Table of Contents
Advertisement
Quick Links
Advertisement
Table of Contents

Subscribe to Our Youtube Channel
Related Manuals for Camoplast Tatou


Summary of Contents for Camoplast Tatou
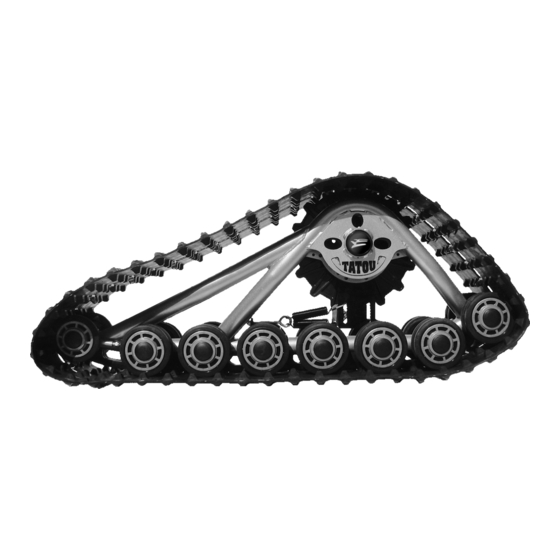
- Page 1 User Manual ® TATOU UTV Track System...
- Page 2 Please read carefully each part of this docu- ment as well as model specific Installation Guidelines prior to assembling, installing and using the track system. are trademarks of Camoplast Inc. All rights reserved. ©2008 Camoplast Inc. ® Printed in Canada.
-
Page 3: Table Of Contents
TABLE OF CONTENTS INTRODUCTION ..........1 USING THE UTV WITH TRACKS . -
Page 4: Introduction
INTRODUCTION INTRODUCTION Thank you for choosing Tatou® UTV, an UTV Track System by Camoplast (hereinafter referred to as the "System"). You have made the right choice. This system will provide you with all the traction, performance and durability that you need for your rec- reational needs or to properly complete your work all year round. -
Page 5: Hints And Tips
HINTS AND TIPS HINTS AND TIPS Before leaving for an excursion, make sure you have the follow- ing within arms reach: two 9/16-inch (or 14-mm) wrenches, one 5/8-inch (or 16-mm) wrench, one axe, one shovel, one tow cable and a lifting device. Generally, the slower you go, the better the traction will be. -
Page 6: Safety
NOTE: Indicates supplementary information. USER NOTICE AND DISCLAIMER The Tatou® UTV System was initially designed to be used in winter conditions and was then adapted to be used in fall and spring conditions. - Page 7 USER NOTICE AND DISCLAIMER protective clothing, boots and gloves. It is understood that driv- ing while impaired or intoxicated presents a danger for the UTV user and others and is against the law. The System consists of many moving parts, including transmis- sion wheels.
- Page 8 Excessive speed remains one of the main causes of severe accidents on UTVs. Camoplast is proud to offer UTV conversion kits within its wide range of products. UTV track systems are not only reliable, but safe. However, there are risks inherent to driving an UTV equipped with the System.
-
Page 9: Installation, Removal And Re-Installation
INSTALLATION, REMOVAL AND RE-INSTALLATION INSTALLATION, REMOVAL AND RE-INSTALLATION WARNING Never place body parts under the vehicle unless it is securely placed on appropriate stands. Severe injuries could occur if the vehicle collapses or moves. Do not use a lifting device as a secure stand. Always follow good shop practices. - Page 10 INSTALLATION, REMOVAL AND RE-INSTALLATION Figure 1 • Remove track systems. • Re-install wheels. At the rear on an independent suspension: • Same procedure as the front. At the rear on a rigid axle suspension: • Disconnect the anti-rotation bar from the skid plate under the vehicle.
- Page 11 INSTALLATION, REMOVAL AND RE-INSTALLATION Re-installation Always clean wheel hubs on the UTV before installing wheels or track systems. Figure 2 Clean wheel hubs. • Re-install track systems at the rear and secure stabiliz- ing rod to anchor bracket for rigid axle. •...
- Page 12 INSTALLATION, REMOVAL AND RE-INSTALLATION Spring tension adjustment Vehicles with rigid axle or trailing arm suspension • Position vehicle on a flat and level surface. • Set the nut (1) compressing the spring of the stabilizing rod by doing one complete turn (see Figure 3). •...
- Page 13 INSTALLATION, REMOVAL AND RE-INSTALLATION Vehicles with independent suspension • Install the extension spring with the eye bolt supplied and adjust tension until you can insert 1/32 inch (1 mm) thickness plastic card between spring coils. (refer to Figure 4). Figure 4...
- Page 14 INSTALLATION, REMOVAL AND RE-INSTALLATION Alignment The parallelism must be adjusted with the UTV on the ground, driving forward on about 10 feet (3 m) and measuring toe out distance. It should be ¼ inch (6 mm) more at the front (B) than at the back (A) (refer to Figure 5).
- Page 15 INSTALLATION, REMOVAL AND RE-INSTALLATION Front rubber track tension Adjust tension of the rubber track by turning the adjusting nut (item 1 in Figure 7) of the track tensioner. Adjust track tension. A force of 22 lb max (10 kg) positioned as shown should pro- duce a deflection of 1 inch (25 mm) (refer to Figure 8).
- Page 16 INSTALLATION, REMOVAL AND RE-INSTALLATION Basic tuning • A higher rubber track tension reduces the risk of “detracking” and reduces drive “ratcheting” (for severe use only). • A lower rubber track tension provides better perform- ance, better rolling and better fuel economy (recrea- tional use).
- Page 17 INSTALLATION OF A RUBBER TRACK INSTALLATION OF A RUBBER TRACK If possible, position the vehicle on a flat and level surface (or on a suitable lift device). Turn off the engine. Proceed as follows: • Install the track over the frame starting with front wheels, then over the sprocket, finishing with the rear.
-
Page 18: Maintenance Schedule
MAINTENANCE SCHEDULE MAINTENANCE SCHEDULE WARNING Do not insert hands or feet into or near the System unless the engine is off, and the vehicle is stopped with the secu- rity brake engaged. For optimum performance and maximum durability, please refer to the following maintenance grid: Frequency Break-in... -
Page 19: Torque Table
TORQUE TABLE TORQUE TABLE N•m lbf•in Dimension / Grade 5 5/16 - 18 18 - 22 163 - 199 5/16 - 24 20 - 25 180 - 220 3/8 - 16 33 - 40 289 - 353 3/8 - 24 37 - 45 328 - 400 7/16 - 14... -
Page 20: Warranty
The UTV Tatou® UTV track system is covered by a manufacturer warranty (warranty). The warranty covers manufacturing defects related with materials and workmanship. The installation and main- tenance of the System is always the responsibility of the owner. - Page 21 (12) months from the date of original System purchase. In all cases, the warranty is limited to a maximum of the original pur- chase price or the fair market value of the System. Camoplast will have final authority in determining the fair market value of a used System.
-
Page 22: Serial Number Location
SERIAL NUMBER LOCATION SERIAL NUMBER LOCATION The following pictures show the location of the serial numbers on the track system frame and rubber track. Figure 11 Figure 12... -
Page 23: Technical Support
TECHNICAL SUPPORT If your dealer or distributor is unable to solve a problem related with the System, you may contact the Camoplast support team from Monday to Friday from 8:00 a.m. to noon and 1:00 to 5:00 p.m. (Eastern Standard time) by dialing 1-866-533-0008 or 819- 533-0008.
Need help?
Do you have a question about the Tatou and is the answer not in the manual?
Questions and answers