Advertisement
Quick Links
Advertisement

Related Manuals for Goldline SAB Series

Summary of Contents for Goldline SAB Series
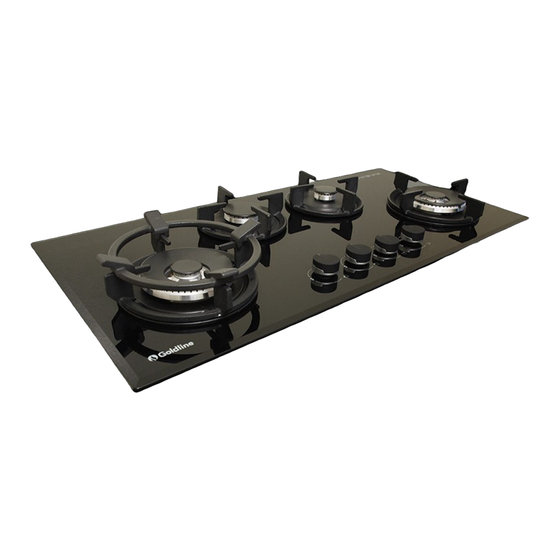
- Page 1 GOLDLINE GAS COOKTOP (SAB SERIES) USER MANUAL...
- Page 2 Built-in Gas Hobs Installation and User manual Content Safety instructions———————-2 Product description———————4 Specifications Table—————–—6 Installation ———–——————–8 Start Using your cooktop———–—13 Maintenance and troubleshooting—-15 Servicing———————————19 Model numbers covered in this manual: SAB301GL, SAB302GL, SAB2GL, SAB3GL, SAB402GL SAB603GL, SAB4GL SAB704GL, SAB5GL NOTE: This User Instruction Manual contains important information, including safety &...
- Page 3 This manual explains the proper installation and use of your appliance, please read it carefully before using even if you are familiar with the product. The manual should be kept in a safe place for future reference. In case of failure, only the Authorized Technical Service may repair this hob.
- Page 4 1.2m in length. If you are required to transport the Goldline product to the Company or its service agent, you must ensure it is safely disconnected by a qualified tradesman and securely packed and insured. The Company does not accept any responsibility for loss or damage of the Goldline product prior to it being received by the Company or its service agent.
- Page 5 Tempered glass Trivet SEMI RAPID Model number. Shown SAB4GL Wok — Wok Burner R — Rapid Burner SR — SemiRapid Burner Aux — Auxiliary Burner CONTROL KNOBS Layout for different models will vary. Please see SPEC table for burner details of each model. Accessory Name Picture ( for reference only, physical unit maybe different) Quantity...
- Page 6 Page 6...
- Page 7 Bench cut out and cooktop dimension by model number. See specs table on page 6 for details of bench cut out and other important information for each model. The following is a guide to your installation layout. According to Australian regulations, the minimum clearance between a gas cooktop element or burner component is: •...
- Page 8 box. Shown at G opposite. Place burner box Apply the adhesive sealing tape to the underside lip of the burner Place burner box into cutout hole and fit clamping brackets to clamp the hotplate to the bench. Replace burners and ensure they are correctly repositioned over the ignitor( S) \ thermocouple Fit burners and...
- Page 9 outlet( GPO) in accordance with relevant electrical standards and/or Electrical connection. Install a 10 amp general purpose cord( supplied) must not touch against any hot surfaces and must be placed codes of practice applicable. The power supply hotplate, the GPO so that its temperature does not exceed 75 at any point along its length.
- Page 10 Gas connection Install in accordance with relevant gas standards and/or codes of practice applicable. Connect the elbow fitting to the appliance gas manifold connection, and check that seals between the elbow and manifold connection are in place and in good condition. For Natural gas : connect the natural gas appliance regulator (pictured opposite) with integral test point using approved gas thread tape or compound to the elbow fitting.
- Page 11 After connecting to gas, check for leaks using soapy solution, never a naked flame. Fit the duplicate data plate ( supplied in separate bag) on a surface adjacent to the hotplate, for example, the inside of the cupboard door so it is clearly visible for any service technician.
- Page 12 The hotplates are fitted with mains powered electronic spark ignitors, so must be connected to mains power supply ( i.e. nomi- nal 220 -240 V ac) to operate. If power is not available, the hotplate will still work but the burners will have to be lit with a match or similar.
- Page 13 For the best efficiency and to ensureutensil handle does not over heat, place the utensil centrally on the burner and adjust the flame height so all the flame remains under the utensin. NOTE: Enclosure may be be circular or sqaure Page 13...
- Page 14 Cleaning and maintenance should be carried out with the appliance cold, especially when cleaning the enam- el parts. Avoid using alkaline or acid substances (lemon juice, vinegar etc..) on the surface. CERAMIC GLASS PANEL The ceramic glass hob of the hotplate must be cleaned regularly ( e.g. weekly) to ensure long life expectancy of the hot plate.
- Page 15 Before Installation : Before cutting into any bench tops, ensure the minimum clearances to walls, adjacent surfaces and overhead surfaces required by the relevant gas appliance installation code ( see above) will comply. Dimensions are specified in millimeters ( mm) Overhead cupboards and range hood = 600 mm.
- Page 16 Wok jet dia 0.5mm (Inner) + dia 1.10mm (Outer) GAS CONVERSION ( LPG TO NG) If the required gas conversion kit is not supplied with your appliance, you can order one from GOLDLINE. Gas conversion shall only be carried out by by an authorized service techni- cian.
- Page 17 TROUBLESHOOTING Servicing of the hotplate must only be done by an authorized service representative (see back of this booklet) and the hotplate must not be modified. Power must be disconnected before any servicing or maintenance is con- ducted. Abnormal conditions include: •...
- Page 18 SERVICING INSTRUCTIONS WARNING! DANGER 240 VOLTS 50Hz DISCONNET POWER BEFORE SERVICING UNIT DO NOT MODIFY THIS APPLIANCE MINOR ADJUSTMENT Access to By Pass Screw - Light the burner and turn to minimum setting (marked small flame). The flame should minimum setting and should not extinguish when passing from maximum setting to low setting.
- Page 19 Consumer until the expiry of two ( 2) years (Warranty Period ) . 1.6 If within the Warranty Period a manufacturing defect is discovered in the Goldline product or it fails to perform to the Company’s specifications as a result of some defect in materials, components or workman- ship ( Defect) then the Company will, at its option, repair the Goldline product or supply a replacement Gold- line product free of charge.
- Page 20 1.11 You will be responsible for all costs of returning a Goldline product to the Company and for rede- livery of the Goldline product by the Company ( whether it is the original or a repaired and/or a re- placement Goldline product) and for any other expenses you incur in claiming under this warranty.
Need help?
Do you have a question about the SAB Series and is the answer not in the manual?
Questions and answers