Table of Contents
Advertisement
Quick Links
Advertisement
Table of Contents

Related Manuals for INSYS GSM 4.2 easy

Summary of Contents for INSYS GSM 4.2 easy
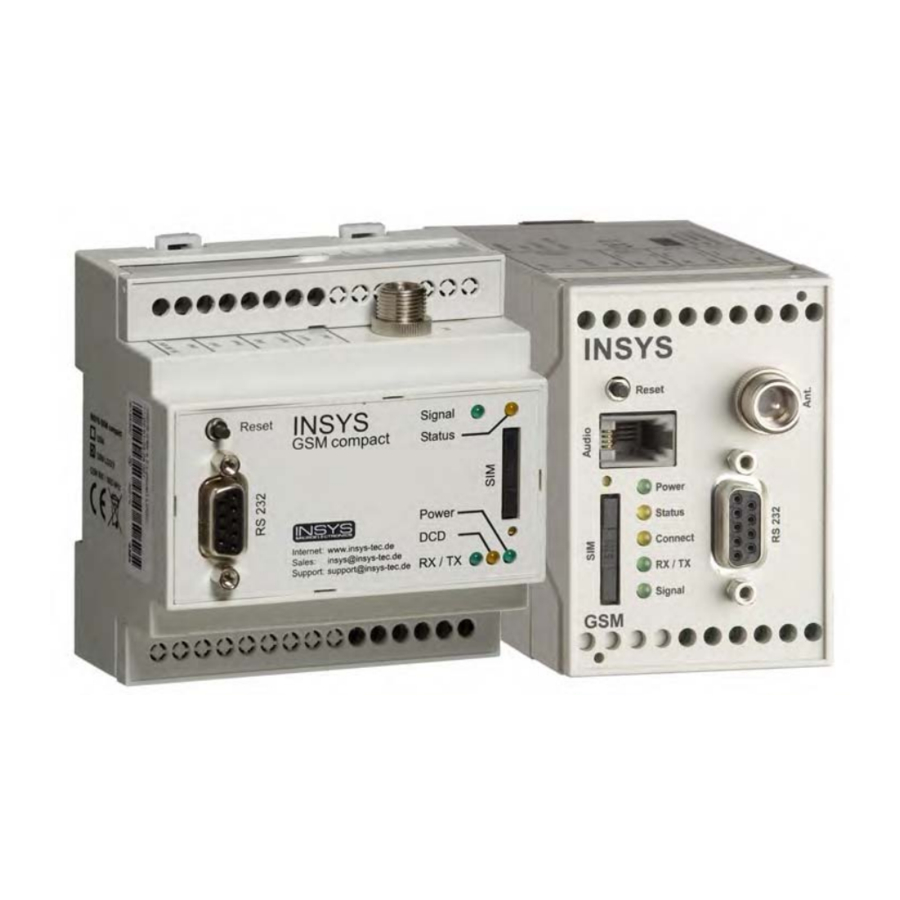
- Page 1 INSYS GSM 4.2 easy Oct-08...
- Page 3 MNP is a registered trademark of Microcom Inc. IBM PC, AT, XT are registered trademarks of International Business Machine Corporation. INSYS ® is a registered trademark of INSYS MICROELECTRONICS GmbH. Windows™ is a registered trademark of Microsoft Corporation. Linux is a registered trademark of Linus Torvalds.
-
Page 4: Table Of Contents
Contents Scope of Delivery ....................6 General ......................7 Application Possibilities of the INSYS GSM 4.2 easy............7 Remote Control via Mobile Phone or Data Connection .......... 8 2.1.1 2.1.2 Remote Programming via Data Connection .............. 8 Possibilities with the Preceding Version INSYS GSM ............8 Restrictions / Notes...................... - Page 5 Date / Time........................32 5.7.4 Serial Interface ......................... 32 Moeller easy™ Settings ....................33 5.8.1 Alias Configuration ......................34 5.8.2 Configure monitoring ....................35 5.8.3 Configure Periodic SMS....................36 Remote Configuration with EASY-SOFT and INSYS Connect ......37 Declaration of Conformity................39 Oct-08...
-
Page 6: Scope Of Delivery
Outside mounted aerial, magnetic base aerial or patch aerial • Connection cable GSM easy 500 for connecting the INSYS GSM 4.2 easy to a Moeller easy 500/700 (Art.-Nr.: 31-02-02-011) Connection cable GSM easy 800 for connecting the INSYS GSM 4.2 easy to a Moeller easy 800/MFD (Art.-Nr.: 31-02-02-012) -
Page 7: General
INSYS GSM 4.2 easy. Both versions are referred to as INSYS GSM 4.2 easy in the further course of this man- ual. If the INSYS GSM 4.2 easy compact differs from the INSYS GSM 4.2 easy, this will be mentioned in particular in the respective sections. -
Page 8: Remote Control Via Mobile Phone Or Data Connection
The possibility to control the alarm inputs of the INSYS GSM with pulses, thus triggering up to 20 fault messages, has been implemented into the device series INSYS GSM and can still be used. This possibility is not tied to a device and can therefore be used for all kinds of control types. -
Page 9: Restrictions / Notes
Valuable outputs of the compact controllers are used, because they are needed for the pulse output. Restrictions / Notes Since the INSYS GSM 4.2 easy is connected to the Moeller easy device via a serial interface, a memory can not be used simultaneously with the INSYS GSM 4.2 easy. -
Page 10: Functional Description
Therefore, so-called aliases were intro- duced for the INSYS GSM 4.2 easy. This offers the possibility to allocate a name that is easy to understand. If the Moeller easy device controls a waste water sys- tem, for example, the digital register M1 can be allocated the alias "waste water... - Page 11 SYS GSM 4.2 easy. Behaviour after reset or power up After a reset or a power up of the INSYS GSM 4.2 easy, values of object instances, which are not within the configured target state, will not trigger a fault message.
-
Page 12: Periodic Sms
This applies to most applications (e.g. fill level monitoring or protective motor switch). Monitoring with INSYS GSM 4.2 easy is mainly intended for static signals and val- ues. If the used signal (e.g. pulse) does not comply with these requirements, this signal must be directed to an ON or OFF delay or a RS flip-flop in the control program. - Page 13 The text of a periodic SMS consists of an object short name, its instance, a “=”, and finally the value itself. If an alias was defined for periodically transmitted object instances, this alias is entered in the SMS text instead of the object short name and the instance.
-
Page 14: Querying And Controlling Via Sms
Querying and Controlling via SMS 3.3.1 SMS Commands Many of the INSYS GSM 4.2 easy functions can be configured via SMS (the func- tion automatic SMS processing must be activated). It is furthermore possible to access the inputs and outputs of the INSYS GSM 4.2 easy indirectly via registers. -
Page 15: Monitoring Of An Object Instance
3.3.2 Monitoring of an Object Instance Command: MONITOR <Objectshortname><Instance>,CN:[ Callback] MONITOR <Alias>,CN:[ Callback] A reply with the value of the object instance or the alias follows. The query of the object instances is performed up to three times, if necessary. If there is still no reply from the easy device, an SMS with the text „NO SUCCESS“... - Page 16 Example 1: Query of the object instance M12 MONITOR M12,CN: In this case, an SMS is sent to the INSYS GSM 4.2 easy, which includes the com- mand for the query of object instance M12. The reply SMS should be sent to the sender phone number which sent this command SMS to the INSYS GSM 4.2 easy.
-
Page 17: Setting An Object Instance
3.3.3 Setting an Object Instance Command: SET <Objectshortname><Instance>=<Value>[,CN:[ Callback]] SET <Alias>=<Value>[,CN:[ Callback]] The object instance is set to the according value. If callback is desired, the reply will contain „SUCCESS“ for a successful setting procedure or „NO SUCCESS“for a failed setting procedure. The specification of „CN:“... -
Page 18: Status Query
ommended to switch objects like digital inputs directly. On the other hand it is uncritical to set a parallel connected bit register to simulate the setting of digital input within the configuration pro- gram (e.g. imitate the triggering of a sensor). 3.3.4 Status Query Command: STATUS?,CN:[ Callback]... -
Page 19: New History-Entries
New History-Entries The description of the history functionality of the INSYS GSM 4.2 easy can be found in the supplied manual of the INSYS GSM 4.2. Due to the extended functionality of the INSYS GSM 4.2 easy, there are several additional entries in the history memory:... -
Page 20: Initial Operation
Installation Overview 4.1.1 Installation for Configuration The serial interface (RS232) of the INSYS GSM 4.2 easy and the configuration PC are connected for initial operation and configuration. The cable used for the RS232 is the default supplied 9-pin cable with 9-pin D-SUB plug / 9-pin D-SUB jack. -
Page 21: Initial Operation
Carry out the following steps: 1. Have the SIM card and PIN number ready, but do not insert the card yet. 2. Connect the INSYS GSM 4.2 easy and the PC with a serial cable (male/female). Connect the GSM antenna. - Page 22 6. Select the following standard setting for the serial interface in the menu Inter- face at the configuration PC: If the INSYS GSM 4.2 easy is in an undefined state (e.g. due to a previous con- figuration), reset it to the factory settings (button Send default settings), if re- quired.
-
Page 23: Troubleshooting
(Default: 19200 bps, 8N1). The INSYS GSM 4.2 easy can be reset to the factory settings by pressing the Reset key for an extended period (> 25 seconds). -
Page 24: Signal Quality
4.3.4 Signal Quality The query of the signal quality at the reception location takes place using the but- ton Detect GSM field strength now at the tab Basic settings or using the AT com- mand AT**SIGNAL?. The response should deliver a value larger than 12; the best value would be 31. -
Page 25: Log-In State In Gsm Network
READY Enter PIN of the SIM card store the PIN for automatic dial-up of SIM PIN the INSYS GSM 4.2 easy and execute a reset. Enter PUK of the SIM card the PIN has been repeatedly entered SIM PUK wrong and is locked now. To unlock, the PUK, which you find in the contract documents of your GSM provider is required. -
Page 26: Configuration With The Software Hscomm Easy
The software HSComm easy is used to configure the INSYS GSM 4.2 easy in Win- dows, without the need for explicit knowledge of the AT commands and their pa- rameters. The settings are only sent to or read from the INSYS GSM 4.2 easy after the according instruction (buttons Send settings or Read settings). -
Page 27: Program Settings
„Automatic detection at program start“ to attempt to establish a connection with the INSYS GSM 4.2 easy immediately after the start procedure. Use the item "Ex- tended logging” to log all INSYS GSM 4.2 easy messages. The log can be viewed at the menu item „Send/receive log“. -
Page 28: Buttons
GSM network if the PIN is stored. 5.5.5 Synchronize The serial interfaces of the INSYS GSM 4.2 easy and the connected device have to be configured equally. With „Synchronize“, all possible baud rates and data for- mat settings at the PC side are tested until both sides match 5.5.6 Abort... -
Page 29: Tabs
Tabs The settings of the basic and extended settings are spread across several pages, which can be selected via the tab titles. The settings are transmitted to the INSYS GSM 4.2 easy only after pressing the button Send values. The functions are described in the following chapters, provided they are relevant for the easy version. -
Page 30: Gsm Connection
The default setting is „0000“. When the INSYS GSM 4.2 easy has a stored PIN, the option PIN active is checked. A PIN stored in the INSYS GSM 4.2 easy is deleted by Delete PIN. This also enables the operation of SIM cards without PIN. - Page 31 99 stands for not ascertainable field strength, e.g. due to network loss or a dam- aged antenna. When the location of the antenna is changed, it usually takes 5 to 10 seconds until the field strength of the INSYS GSM 4.2 easy is displayed correctly.
-
Page 32: System Monitoring
5.7.2 System Monitoring 5.7.2.1 Scheduled Logout/Login Log the INSYS GSM 4.2 easy in and out for a short period every day to allow main- tenance functions of the GSM provider. Enter the logout time and the duration (1 to 98 minutes). -
Page 33: Moeller Easy™ Settings
Moeller easy™ Settings Use the „easy“ tab to enter the compact controller Moeller easy™ settings. You need to indicate which Moeller easy™ compact controllers are installed. Now the buttons “Configure” are available. The following functions can be configured: Alias Monitoring Periodic SMS Depending on the selected compact controller, the speed of the serial interface is set to 4800 bps or 9600 bps. -
Page 34: Alias Configuration
These three buttons will enable you to read, write or delete the INSYS GSM 4.2 easy configuration for the Moeller easy™ functionality in particular. Reading and writing using these buttons will be faster than the total transfer via the button Send values, because the standard functionality need not be transferred once more. -
Page 35: Configure Monitoring
5.8.2 Configure monitoring Clicking the button „Configure“ displays the special configuration of the function. The table is not used to enter data, but to visualize the configuration. The entry takes place below the table. Selecting the monitoring line in the configuration window is done either with the selection box „No.“... -
Page 36: Configure Periodic Sms
5.8.3 Configure Periodic SMS The dedicated configuration of the function appears after pressing the „Config- ure“ button. The displayed settings below are only effective when „Periodic SMS“ is turned on in the main window! In the text field „Alias“ an object instance which has already been allocated an alias can be selected optionally. -
Page 37: Remote Configuration With Easy-Soft And Insys Connect
GSM Modem) is required locally. Any of these devices can be used to establish a connection to the remote INSYS GSM 4.2 easy via a dial up connection. When the connection is established, INSYS Connect will retreat from the serial interface. The communication device connected to this serial interface now has no connection to another program, but maintains the connection. - Page 38 The according waiting period of EASY-SOFT must be set under „Communication“ -> „Interface“ -> „Timeout“ -> „Device“ For the easy 500 and 700 devices, the „Timeout for Communication“ must be in- creased to at least 1000 ms. For the easy 800 and MFD devices, the „Timeout for Communication“ must be in- creased to at least 1000 ms.
-
Page 39: Declaration Of Conformity
Declaration of Conformity ===== Ende der Stüc kliste =====...
Need help?
Do you have a question about the GSM 4.2 easy and is the answer not in the manual?
Questions and answers