Table of Contents
Advertisement
Available languages
Available languages
Quick Links
Advertisement
Table of Contents

Related Manuals for Electrolux EFG60750


Summary of Contents for Electrolux EFG60750
- Page 1 USER MANUAL EFG60750 EFG90750 EFG10750...
- Page 2 We were thinking of you when we made this product...
-
Page 3: Table Of Contents
3 EMPFEHLUNGEN UND HINWEISE CONSEILS ET SUGGESTIONS CHARAKTERISTIKEN CARACTERISTIQUES TECHNIQUES MONTAGE INSTALLATION BEDIENUNG UTILISATION WARTUNG ENTRETIEN ET NETTOYAGE CONSIGLI E SUGGERIMENTI RECOMMENDATIONS AND SUGGESTIONS 32 CARATTERISTICHE CHARACTERISTICS INSTALLAZIONE INSTALLATION MANUTENZIONE MAINTENANCE... - Page 4 Au travers d’une large gamme komfortabler zu machen. Sie fi nden de produits de qualité, la volonté einige Beispiele auf der vorletzten Seite d’Electrolux est de vous rendre la vie in diesem Heft. Bitte nehmen Sie sich plus agréable. einige Minuten, diese Benutzerinforma-...
-
Page 5: Empfehlungen Und Hinweise
5 EMPFEHLUNGEN UND HINWEISE EMPFEHLUNGEN UND HINWEISE MONTAGE Achtung! Frittiergeräte müssen wäh- rend des Gebrauchs stets beaufsich- • Das Gerät darf nur vom Fachpersonal an- tigt werden: Überhitztes Öl kann sich geschlossen werden. entzünden. • Der Hersteller haftet nicht für Schäden, die •... - Page 6 6 electrolux CHARAKTERISTIKEN CHARAKTERISTIKEN Platzbedarf Min. Min. 650mm 650mm...
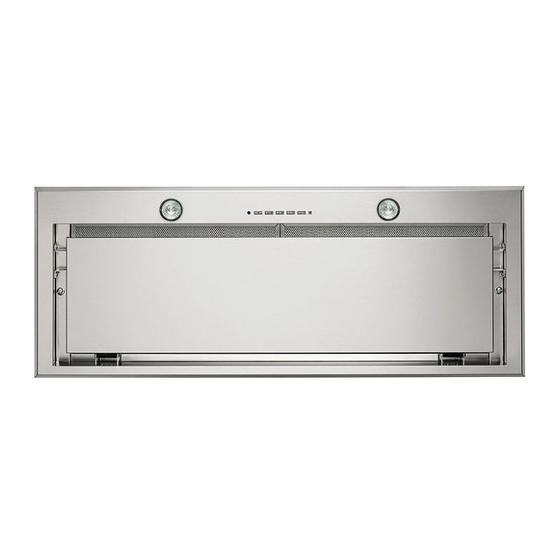
- Page 7 7 CHARAKTERISTIKEN Komponenten Pos. St. Produktkomponenten 1 Haubenkörper mit Schaltern, Be- leuchtung, Gebläse-gruppe, Filter Luftleitgitter Luftaustritt Anschlussfl ansch ø 150-120 mm Flansch mit Ventil ø 150 mm Pos. St. Montagekomponenten Befestigungswinkel Haubenkör- 12a 10 Schrauben 3,5 x 16 Schrauben 2,9 x 12,7 St.
-
Page 8: Montage
8 electrolux MONTAGE MONTAGE Um jede Gefahr zu vermeiden, muss dieses Verfahren vom Kundendienst oder von jemandem durchgeführt werden, der eine gleichartige Berufsbezeichnung besitzt. Installation Luftauslass-Modus • Die Haube ist mit einem System aus- gestattet, welches die Ausrichtung des Luftauslasses ermöglicht. - Page 9 9 MONTAGE Bohrung der Aufl agefl äche und Montage der Haube • Die Haube kann direkt an der Unter- seite der Hängeschränke (mindestens 650 mm von der Kochmulde entfernt) mit seitlichen Schnapphalterungen und den mitgelieferten Schrauben befestigt werden. • An der Unterseite des Hängeschranks eine Aussparung anbringen (Abb.1),...
- Page 10 10 electrolux MONTAGE Anschluss in Abluftversion Bei Abluftbetrieb kann die Haube vom Installateur wa-hlweise mittels Rohr oder Schlauch (ø150 oder 120mm) an die Au- ßenrohrleitung angeschlossen werden. Anschlussrohres ø 150 • Den Flansch mit Ruckstauklappe 10 anbringen. • Das Rohr mit geeigneten Rohrschellen fi...
-
Page 11: Bedienung
11 BEDIENUNG BEDIENUNG Die Haube kann direkt auf die gewünschte Stufe eingeschaltet werden ohne daß man vorher auf die Geblä-setaste 0/1 drückt. TASTE FUNKTION Beleuchtung Ein- und Ausschalten der Beleuchtung. 0/1 Motor Eingeschal- Erste Geschwindigkeitsstufe. Schaltet die Haube aus wenn die Taste für unge- fähr 1’’... -
Page 12: Wartung
12 electrolux WARTUNG WARTUNG Fernbedienung Dieses Gerät kann mit einer Fernbedie- nung gesteuert werden, welche mit al- kalischen Zink-Kohle-Batterien 1,5 V des Standard-typs LR03-AAA versorgt wird (nicht mitgeliefert). • Die Fernbedienung nicht in die Nähe von Hitzequellen legen. • Batterien müssen vorschriftsmäßig ent- sorgt werden. - Page 13 13 WARTUNG Reinigung Der Comfort Panel • Den Comfort Panel durch Ziehen öffnen. • Die Platte vom Haubenkörper aushaken, indem der Hebel des Befestigungsstiftes verschoben wird. • Die Comfort Panel darf keinesfalls im Geschirrspüler gewaschen werden. • Außen mit einem feuchten Lappen und neutralem Flüssigreiniger säubern.
- Page 14 14 electrolux WARTUNG Austauschen der AktivkohleFilter Rücksetzen der Sättigungsanzeige • Licht und Gebläsemotor abschalten. Dieser Filter kann weder gewaschen • Mindestens 3 Sekunden lang die Tas- noch wiederverwendet werden und ist te T3 drükken, bis die Leds zur Bestä- bei Blinken der Led S1 oder zumindest tigung zu blinken beginnen.
-
Page 15: Conseils Et Suggestions
15 Conseils et Suggestions CONSEILS ET SUGGESTIONS INSTALLATION • Toujours régler les fl ammes de manière • Le fabricant décline toute responsabi- à éviter toute sortie latérale de ces der- lité en cas de dommage dû à une ins- nières par rapport au fond des marmi-... -
Page 16: Caracteristiques Techniques
16 electrolux Caracteristiques Techniques CARACTERISTIQUES TECHNIQUES Encombrement Min. Min. 650mm 650mm... - Page 17 17 Caracteristiques Techniques Composants Réf. Q.té Composants de Produit Corps Hotte équipé de: Comman- des, Lumière, Groupe Ventilateur, Filtres Grille orientée Sortie de l’Air Flasque ø 150-120 mm Bride avec soupape ø 150 Réf. Q.té Composants pour l ’installation...
-
Page 18: Installation
18 electrolux Installation INSTALLATION Cette opération doit être faite par le Service après vente, ou bien par une personne qualifi ée afi n de prévenir toute sorte de risque Installation Modalité sortie air • La hotte monte un système qui per- met d’orienter la sortie de l’air. - Page 19 19 Installation Perçage du plan de support et montage de la hotte • Il est possible d’installer la hotte di- rectement sur le plan inférieur des armoires murales (650 mm. min. par rapport aux plaques de cuisson), à l’aide des supports latéraux par encli- quetage et des vis fournies.
- Page 20 20 electrolux Instalação Sortie d’air en version évacuation En cas d’installation en version aspirante, brancher la hotte à la tuyauterie de sortie via un tube ri-gide ou fl exible de ø 150 ou 120 mm, au choix de l’installateur. Branchement avec un tube de ø150 •...
-
Page 21: Utilisation
21 Utilisation UTILISATION Il est possible d’allumer la hotte directement à la vitesse demandée en pressant la touche sans devoir d’abord utiliser la touche 0/1. TOUCHE FUNCTIONS éclairage Allume et éteint l‘éclairage. 0/1 Mo- Allumé Première vitesse. teur Cette touche permet d’éteindre la hotte en y pressant pour environ 1 secondes. -
Page 22: Entretien Et Nettoyage
22 electrolux Entretien et Nettoyage ENTRETIEN ET NETTOYAGE Telecommande Il est possible de commander cet ap- pareil au moyen d’une télécommande, alimentée avec des piles alcalines zinc- charbon 1,5 V du type standard LR03- AAA (ne fournis pas). • Ne pas ranger la télécommande à... - Page 23 23 Entretien et Nettoyage Nettoyage Des Confort Panel • Ouvrir le Confort Panel, en tirant ce der- nier. • Décrocher le panneau du corps de la hotte, en faisant coulisser le levier du goujon de fi xation spécialement prévu.
- Page 24 24 electrolux Entretien et Nettoyage Remplacement du fi ltre à charbon Remise à l’état initial du signal d’alarme Il n’est pas lavable ni régénérable, il faut • Éteindre les Lumières et le Moteur le remplacer lorsque la del S1 clignote d’aspiration.
- Page 25 25 Consigli e Suggerimenti CONSIGLI E SUGGERIMENTI INSTALLAZIONE • Controllare le friggitrici durante l’uso: l’olio • Il produttore declina qualsiasi responsabi- surriscaldato potrebbe infi ammarsi. lità per danni dovuti ad installazione non • Non preparare alimenti fl ambè sotto la corretta o non conforme alle regole dell’ar-...
- Page 26 26 electrolux Caratteristiche CARATTERISTICHE Ingombro Min. Min. 650mm 650mm...
- Page 27 27 Caratteristiche Componenti Rif. Q.tà Componenti di Prodotto Corpo Cappa completo di: Co- mandi, Luce, Gruppo Ventilatore, Filtri Griglia direzionata uscita aria Flangia ø 150 Flangia con Valvola ø 150 Rif. Q.tà Componenti di Installazione Staffe Fissaggio Corpo Cappa...
- Page 28 28 electrolux Installazione INSTALLAZIONE Questa operazione deve essere ese- guita dal servizio assistenza tecnica o comunque da una persona con quali- fi ca similare in modo da prevenire ogni rischio Istallazione Modalità Uscita Aria • La Cappa dispone di un sistema che permette il direzionamento dell’usci-...
- Page 29 29 Installazione Foratura Piano Di Supporto e Montaggio Cappa • La Cappa può essere installata diret- tamente sul piano inferiore dei Pensili (650 mm min. dal Piano di Cottura) con i Supporti laterali a scatto e le Viti in dotazione.
- Page 30 30 electrolux Installazione Connessioni in versione aspirante Per installazione in Versione Aspirante collegare la Cappa alla tubazione di usci- ta per mezzo di un tubo rigido o fl essi- bile di ø150 o 120 mm, la cui scelta è la-sciata all’installatore.
- Page 31 31 La cappa può essere accesa direttamente alla velocità desiderata, premendo il relativo tasto senza passare per il tasto 0/1 motore. TASTO FUNZIONI Accende e spegne l’Impianto di Illuminazione. 0/1 Motore acceso Prima velocità. Spegne la cappa se premuto per circa 1”.
- Page 32 32 electrolux Manutenzione MANUTENZIONE Telecomando Questo apparecchio può essere coman- dato per mezzo di un tele-comando, ali- mentato con pile alcaline zinco-carbone da 1,5 V del tipo standard LR03-AAA (non incluse). • Non riporre il telecomando in prossimità di fonti di calore.
- Page 33 33 Manutenzione Pulizia dei Comfort Panel • Aprire il Comfort Panel tirandolo. • Sganciare il pannello dal corpo cappa facendo scorrere l’apposita leva del perno di fi ssaggio. • Il comfort panel non va assolutamente lavato in lavastoviglie. • Pulirlo esternamente con un panno umido e detersivo liquido neutro.
- Page 34 34 electrolux Manutenzione Sostituzione Filtro Al Carbone Reset del segnale di allarme • Spegnere le Luci e il Motore di aspira- Attivo zione Non è lavabile e non è rigenerabile, va • Premere il tasto T3 per almeno 4 se-...
- Page 35 35 Recommendations and Suggestions RECOMMENDATIONS AND SUGGESTIONS Installation sides. • Deep fat fryers must be continuously • The manufacturer will not be held liable monitored during use: overheated oil for any damages resulting from in-cor- can burst into fl ames.
- Page 36 36 electrolux Characteristics CHARACTERISTICS Dimensions Min. Min. 650mm 650mm...
- Page 37 37 Characteristics Components Ref. Q.ty Product Components Hood Body, complete with: Con- trols, Light, Blower, Filters Directional Air Outlet grille Flange ø 150 mm Flange with Valve ø 150 Ref. Q.ty Installation Components Hood body fi xing brackets 12a 10 Screws 3.5 x 16 Screws 2.9 x 12.7...
- Page 38 38 electrolux Installation INSTALLATION This operation must be carry on by the service agent or similarly qualifi ed per- sons in order to avoid a hazard. Installation – Air Outlet Version • The Hood is fi tted with a system that allows the direction of the air outlet to be adjusted.
- Page 39 39 Installation Drilling The Support Surface And Fitting The Hood • The Hood can be installed directly on the underside of wall-mounted units (650 mm min. from the Cooker Top) using the snap-on side supports and screws provided. • Create an opening in the bottom of the wall mounted unit, as shown (fi...
- Page 40 40 electrolux Installation Ducted Version Air Exhaust Sys- When installing the ducted version, connect the hood to the chimney us- ing either a fl exible or rigid pipe ø 150 or 120mm, the choice of which is left to the installer.
- Page 41 41 The hood can be switched on pushing directly onto the requested speed without fi rstly having to select 0/1 button FUNCTIONS Light Turns lighting on and off. 0/1 Motor First speed. When pressed for about 1 seconds the motor is switched off.
- Page 42 42 electrolux Maintenance MAINTENANCE Remote Control The appliance can be controlled using a remote control powered by a 1.5 V car- bon-zinc alkaline batteries of the standard LR03-AAA type (not included). • Do not place the remote control near to heat sources.
- Page 43 43 Maintenance Cleaning The Comfort Panels • Pull the Comfort Panel to open it. • Disconnect the panel from the hood canopy by sliding the fi xing pin lever. • The comfort panel must never be washed in a dishwasher.
- Page 44 44 electrolux Maintenance Activated Charcoal Filter (Recir- Reset the alarm signal • Switch off the lights and extractor culation Version) motor. The fi lter is not washable and cannot be • Press button T3 for at least 3 sec- regenerated. It must be replaced when onds, until the leds start to fl...
- Page 48 436004847_06 - 110408...
Need help?
Do you have a question about the EFG60750 and is the answer not in the manual?
Questions and answers