Jerguson LumaStar EPL-100 Installation, Operation & Maintenance Instructions Manual
Hide thumbs
Also See for LumaStar EPL-100:

Related Manuals for Jerguson LumaStar EPL-100


Summary of Contents for Jerguson LumaStar EPL-100
- Page 1 Installation, Operation, & Maintenance Instructions IOM J500.32 6/1/2021 Jerguson LumaStar ® (EPL-100, EPL-316, & 24VDC Options)
-
Page 2: Table Of Contents
IOM J500.32 ® Jerguson LumaStar™ 2021.05 Table of Contents 1. INTRODUCTION……………………………………………………………………..3 2. WARRANTY………………………………………………………………………….3 3. ABOUT THIS MANUAL……………………………………………………………..3 4. INSPECTION & DELIVERY………………………………………………………...3 5. PRODUCT DESCRIPTION…………………………………………………………3 6. 115 / 230 VAC Models EPL-100 & EPL-316…………………………………..4-9 6.1 SPECIFICATIONS…………………………………………………………………………………4-5 6.2 COMPONENTS……………………………………………………………………………………..5 6.3 INSTALLATION WIRING…………………………………………………………………………5-6 6.4 MAINTENANCE……………………………………………………………………………………6-7... -
Page 3: Introduction
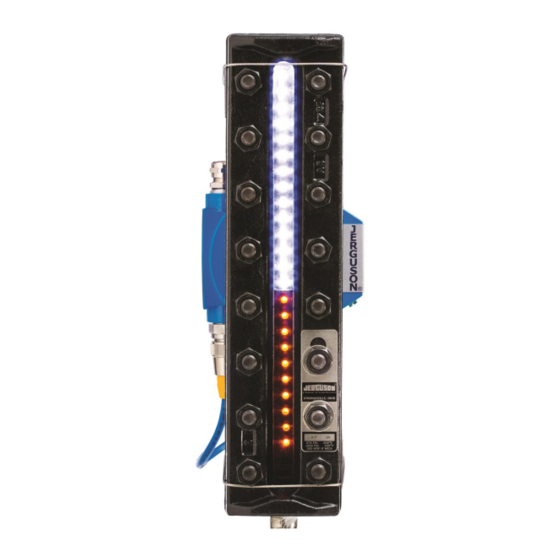
Jerguson Gage and Valve, a leading supplier of level gaging products, offers the world’s largest selection of liquid level glass gages, magnetic level gages, liquid level switches and level transmitters. Since 1905, Jerguson gages and valves have been installed in a wide variety of liquid level applications, from basic chemical storage tanks to the most advanced nuclear aircraft carriers. -
Page 4: 230 Vac Models Epl-100 & Epl-316
IOM J500.32 ® Jerguson LumaStar™ 2021.05 6. 115 / 230 VAC Models EPL-100 & EPL-316 6.1 Specifications Note: Power Supply is remote mount for all sizes on EPL-316 16633 Foltz Parkway ● Strongsville, OH 44149 USA ● Telephone: +1 (440) 572-1500 ● Fax: +1 (440) 238-8828... -
Page 5: Components
All lights are tagged with the service conditions for that particular unit. These specifications are located on the Jerguson tag on the power supply housing and are contained in the “Specifications” section of this manual. Do not use or refer to specifications listed on red label on the power supply housing. -
Page 6: Maintenance
IOM J500.32 ® Jerguson LumaStar™ 2021.05 Step by step instructions: See Drawing CI-26677 for safety information for hazardous locations. CAUTION: Before working with the power supply, verify that the area is free of flammables and the AC power circuit is off 1. - Page 7 IOM J500.32 ® Jerguson LumaStar™ 2021.05 Routine Inspection Keep window on the front of the light clean using a clean damp cloth. Avoid using chemical cleaners that may damage the silicone seals. If cleaner is required, do not spray directly onto the light. Apply a small amount to the rag and carefully wipe the glass only.
-
Page 8: Troubleshooting
IOM J500.32 ® Jerguson LumaStar™ 2021.05 6.5 Troubleshooting Troubleshooting Steps CAUTION: Some of these troubleshooting steps are performed with live voltage applied. The assembly should be moved to a safe area before beginning work. A qualified and properly trained technician must perform these steps. -
Page 9: Labels
IOM J500.32 ® Jerguson LumaStar™ 2021.05 6.6 Labels 16633 Foltz Parkway ● Strongsville, OH 44149 USA ● Telephone: +1 (440) 572-1500 ● Fax: +1 (440) 238-8828 www.clark-reliance.com ● sales@clark-reliance.com... -
Page 10: Barrier Driven 24Vdc Models Epl-100 & Epl-316
IOM J500.32 ® Jerguson LumaStar™ 2021.05 7. Barrier Driven 24VDC Models EPL-100 & EPL-316 7.1 Specifications 16633 Foltz Parkway ● Strongsville, OH 44149 USA ● Telephone: +1 (440) 572-1500 ● Fax: +1 (440) 238-8828 www.clark-reliance.com ● sales@clark-reliance.com... -
Page 11: Components
IOM J500.32 ® Jerguson LumaStar™ 2021.05 7.2 Components There are 4 main components required for the LED illuminator system: the light bar, a 24VDC power supply, zener diode barrier, and cord with optional field-wireable connector. The cord may have more than one piece depending on the customer requirements. - Page 12 IOM J500.32 ® Jerguson LumaStar™ 2021.05 Enclosure Option 1. Open the cover of the connection enclosure. Insert the DC Line wires into the housing and connect to the terminal block noting the polarity of the wire. The terminal block has been labelled with V + and GND to aid installation.
- Page 13 IOM J500.32 ® Jerguson LumaStar™ 2021.05 Field-Wireable Option 1. Disassemble the field-wireable connector. See figure 4. Figure 4 2. Connect DC lines to the field-wireable connector, V+ to pin #2 and connect GND to pin #4. See figure 5. Figure 5 3.
- Page 14 IOM J500.32 ® Jerguson LumaStar™ 2021.05 Selecting Wire & Barrier Selecting a wire with a lower capacitance (F) will yield longer distances. Use the following equations and diode parameters below to determine the distance of wire between the LED illuminator and zener diode barrier. Pick the...
-
Page 15: Troubleshooting
IOM J500.32 ® Jerguson LumaStar™ 2021.05 7.4 Troubleshooting Troubleshooting Steps CAUTION: Some of these troubleshooting steps are performed with live voltage applied. The assembly should be moved to a safe area before beginning work. A qualified and properly trained technician must perform these steps. -
Page 16: Bracket Installation (All Models)
8. Bracket Installation (All Models) 8.1 Universal Bracket *NOTE: Illuminators pictured are for reference only. The mounting instructions are the same across all Jerguson Lumastar models. Model EPL-316 mounts in the same manner except the power supply is always remote mounted. - Page 17 LumaStar™ 2021.05 ® 2. Press Jerguson LumaStar™ assembly against rear of gauge as shown in Figure 9, aligning the bracket cutouts over the gauge bolt heads as shown. Align the brackets with the 2 set of bolts in from each end of the gage, when possible.
- Page 18 Figure 14 ® 6. The Jerguson LumaStar™ is now properly installed. Feel free to tuck any excess cable inside itself or allow it to hang freely. This adjustable assembly is appropriate for any gauge with a cover width not exceeding 4.375 inches (111 mm).
-
Page 19: Alternate Bracket
8.2 Alternate Bracket Figure 15 ® 1. Align Jerguson LumaStar™ assembly with rear (side with bolt heads) of gauge. Loosen bracket thumb nuts and adjust the position of the brackets to line up with their respective bolts on the gauge. Tighten the thumb nuts to secure in place. -
Page 20: Reflex Gage Bracket
IOM J500.32 ® Jerguson LumaStar™ 2021.05 8.3 Reflex Gage Bracket NOTE: installation onto a Reflex Gauge requires removal of nuts on the gauge. Do not install illuminator with gauge in service. 1. Install the brackets onto the illuminator leaving the bracket thumb screws loose. -
Page 21: Spare Parts (All Models)
IOM J500.32 ® Jerguson LumaStar™ 2021.05 9. Spare Parts (All Models) 16633 Foltz Parkway ● Strongsville, OH 44149 USA ● Telephone: +1 (440) 572-1500 ● Fax: +1 (440) 238-8828 www.clark-reliance.com ● sales@clark-reliance.com... - Page 22 16633 Foltz Parkway ● Strongsville, OH 44149 USA ● Telephone: +1 (440) 572-1500 ● Fax: +1 (440) 238-8828 www.clark-reliance.com ● sales@clark-reliance.com...
Need help?
Do you have a question about the LumaStar EPL-100 and is the answer not in the manual?
Questions and answers