Table of Contents
Advertisement
Quick Links
Advertisement
Table of Contents

Related Manuals for Meyer Drive Pro

Summary of Contents for Meyer Drive Pro
- Page 1 ™ Operation and Maintenance Manual...
- Page 2 • Increased Radiator Cooling the storm hits, your Meyer Snow Plow will be ready and you will • Automatic Transmission know how to plow like a pro. DO NOT EQUIP ANY VEHICLE WITH •...
-
Page 3: Table Of Contents
___________________ Moldboard Serial Number SAFETY FIRST Meyer Products recommends that this manual be read cover to cover so that you are completely aware of all important safety recommendations. Record your E-58H Serial Number and Moldboard Serial Number. These serial numbers are printed on the E-58H unit decal and on the back of the Moldboard on the part number decal www.meyerproducts.com... -
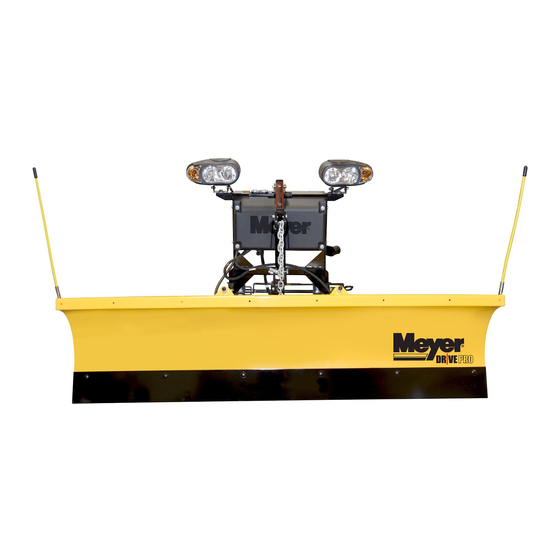
Page 4: Get To Know Your Drive Pro™ Snow Plow
4. Trip Springs PLOW IS REMOVED. Allow moldboard to trip forward and ride over obstructions, this protects the snow plow, vehicle, and operator. 13. Meyer Nite Saber Snow Plow Lights ® Complies with the Federal Motor Vehicle Safety Standards. 5. Pivot Bar High quality steel - positions moldboard straight across, or angle 14. - Page 5 ™ E-58H (14)
- Page 6 ™ DETACHING THE COMPLETE ASSEMBLY to the clevis frame. Remove Safety Clip from jackstand. Push Leave control switch in lower float position and push down on Jackstand Lever down and raise Jackstand to storage posi- the Lift Arm (4) approximately 1/4”. Disconnect the electrical tion.
- Page 7 ™ Removal Pull, then rotate Handle so the notch Lower Plow to float position and manually Remove Safety Clip from jackstand. Push hooks onto the bracket on lift frame. The push lift arm down 1/4”. Disconnect the Jackstand Lever down to lower Jackstand vehicle is now free from mount and may to ground.
- Page 8 ™ Attachment Remove Safety Clip from jackstand. Push Drive into assembly until contact is made Rotate handle until engaged and push Jackstand Lever down and raise Jackstand and push assembly a few inches forward. top of lift frame towards truck until pins to storage position.
- Page 9 ™ ADJUSTING CHAIN FOR PROPER SLACK WHEN PLOWING SNOW 1. Be sure lift piston is fully retracted. 2. Hold chain taut and choose the third link above lift arm, place that link in lift arm locking groove. This procedure will provide the proper amount of slack when snow plowing for the moldboard to follow the contour of the ground.
-
Page 10: Snow Plow Operation, Maintenance & Adjustments
2 minutes. If the overload light is still illuminated after attempts to down arrow in short intervals. Holding down the down arrow will activate reset the switch have failed, contact your nearest authorized Meyer a float light located in the upper right corner of the control switch. This... - Page 11 Reset is accomplished by turning off the ignition switch or by turning the power switch off momentarily and then back on. If the monitor light is still illuminated after attempts to reset the switch have failed, contact your nearest authorized Meyer Distributor for repairs.
- Page 12 1. Keep windshield wipers, heaters and lights working. 2. Use emergency flasher lights for increased visibility and safety. Meyer offers as standard equipment quartz halogen snow plow lights for even brighter illumination. 3. Equip vehicles with chains where necessary.
- Page 13 fluid. The complete hydraulic system should then be flushed out with Meyer Hydra-Flush before adding C. Adjust the runners to maintain cutting edge height new Meyer Hydraulic Fluid.
- Page 14 It is effective corrosion. for a maximum of one year. Always carry an extra quart of Meyer 6. WARNING: LIFT ARM EXTENDS BEYOND BUMPER OF Hydraulic Fluid M-1 or equal fluids. Use of any inferior fluids will VEHICLE.
-
Page 15: Hydraulic Power Unit Diagnosis Charts
ELECTRIC HYDRAULIC POWER UNITS These charts are intended to be used as an aid in diagnosing problems on Meyer Hydraulic Power Units. They are not a substitute for factory train- ing and experience. Be certain to read the General Information and Testing Tips sections before attempting any troubleshooting. Additional detailed information as well as all electrical schematics may be found in Service Manuals 1-822. - Page 16 Electric Hydraulic Power Unit Diagnosis Chart MODEL CONDITION POSSIBLE CAUSE CORRECTION Plow does not lift or lifts 1. Low hydraulic fluid level. 1. Add fluid to proper level Power slowly - motor operates. 2. Discharged battery. 2. Recharge battery. Angling 3.
- Page 17 Electric Hydraulic Power Unit Diagnosis Chart MODEL CONDITION POSSIBLE CAUSE CORRECTION Motor does not operate. 1. Discharged or defective battery. 1. Recharge or replace battery. Power 2. Loose or corroded electrical connections. 2. Clean and tighten electrical connections. Angling 3. Inoperative starter solenoid. 3.
-
Page 18: Efficient Snow Clearance Starts With Planning
Efficient Snow Clearance Starts with Planning PREPARING AREAS, USE OF GUIDE MARKERS KEEP SNOW UNDER CONTROL Every area to be plowed should be inspected before Deep or heavy, wet snow, because of its increased weight, calls snowfall for potential hazards. Holes should be repaired, for more skillful and powerful plowing than light powder snow. -
Page 19: Plow With The Storm
Plow with the Storm It is of utmost importance to remember one basic rule -- plow path, in the angled position, should exceed the tire track Always plow with the storm. Start plowing when snow is 1 by at least two inches on either side. Be sure to have enough to 4 inches deep, depending upon traffic or other limitations. -
Page 20: Two Established Snow Clearance Plans
Established Snow Clearance Plan Recommended equipment: A four wheel drive vehicle; a Drive Pro™ 6’-8” snow plow; snow shovels; and ice control equipment. Recommended procedure: PLOW WITH THE STORM. Begin plowing at the suggested accumulation for your type of establishment. Continue until snow has been cleared. Don’t forget - snowfall often surpasses weather forecasts. -
Page 21: Snow Plowing Tips From The Pros
Snow Plowing Tips from the Pros STRAIGHT LINE SNOW PLOWING This method is most efficient for drives and walkways. Moldboard type blade snow plows mounted on utility vehicles or service trucks are best for such an operation. Set the snow plow moldboard at an angle so that the snow is rolled to the shoulder or curb. - Page 22 DRIVEWAYS 1. Plow toward garage pushing snow to one side. 2. Set blade to straight position, lift it as high as possible and drive through snow to garage. Drop blade and back drag to street. 3. Back into driveway and angle blade again.
- Page 23 Lower/Float or Angled position can cause damage to the Snow Plow components or the vehicle that will not be covered under the Meyer Products Warranty Program. Such damage may include, without limitation, twisting the A- Frame, the Moldboard hitting the Lift Arm, or the Plow Markers...
-
Page 24: Minerals & Chemicals For Snow & Ice Control
Minerals and Chemicals for Snow and Ice Except in very light snow, ice melting materials should never be used in place of snow plowing. However, in combination with trained personnel and equipment, ice melting materials play an important part in controlling ice and snow. Whenever possible, apply ice melting materials before a snowfall. -
Page 25: Meyer Spreaders
70 amps of surge power Mini Jr. (36006) to grind through chunks of salt The Meyer Mini Jr (5.75cu.ft.) is an ideal or sand. The 750- and 350- solution for small and medium sized jobs: pound hoppers are made of... -
Page 26: Meyer Accessories
Keep your Meyer electric hydraulic control change hydraulic fluid yearly. Meyer M-1 system operating at peak performance. Hydraulic Fluid has additives that insure It features special additives to ensure peak efficient operation of all Meyer electric efficient operation. hydraulic power units (15134). Hydra-Flush ®... - Page 27 find Meyer Hydraulic Lock Pin Oil, Hinge and Linch Pins, Eye Bolt, Protect your Meyer Snow Plow components with this sturdy, Solenoid Starter, the Hydraulic durable stainless steel and brass lock pin. Available in two Coupler Assembly, Hose Assembly...
-
Page 28: Genuine Meyer Parts
SNOWPLOW HARDWARE URETHANE EDGES W/HARDWARE 09277 12978 TRIP SPRING (OPTIONAL) 09131 ST-6.5 09124 EYE BOLT & NUTS 08277 DRIVE PRO™ 09916 MARKER KIT NUTS & BOLTS (STEEL) 13507 KING BOLT W/GREASE FIT. 08486 SET OF 6 DRIVE PRO™ 22720 PIVOT PIN... - Page 29 M CPLR SAE 6 VLV BLOCK SIDE 15918 B VALVE 07119 ROCKER SWITCH 08206 COUPLER KIT 15916 B COIL 07347 CONTROL MODULE 15987 C SOLENOID ASSY. SNOW DEFLECTOR KITS (OPTIONAL) 15916 C COIL 12706 6.8 FT. LG. DRIVE PRO™ 15958 C VALVE 15370 MOTOR SOLENOID...
- Page 30 PAINT - TOUCH UP Meyer Products LLC 07026 BLACK AEROSOL (1) U.S. Patent Numbers 08676 BLACK AEROSOL (12) 07027 SNO-FLO AEROSOL (1) YE 7,114,270 6,138,388 5,036,608 6,015,219 6,265,829 5,075,988 08677 SNO-FLO AEROSOL (12) YE 6,005,300 6,276,075 5,088,215 07028 SNO-FLO BRUSH-ON .6 OZ. (1) YE...
Need help?
Do you have a question about the Drive Pro and is the answer not in the manual?
Questions and answers
it is very difficult to pull the pins to remove my drive pro plow from my truck. do these pins need grease,or **** I doing something wrong?
Yes, greasing the pins, springs, and plow mount holes on the truck can make removal easier.
This answer is automatically generated