Table of Contents
Advertisement
Quick Links
Advertisement
Table of Contents

Related Manuals for Cannon DVR-1000


Summary of Contents for Cannon DVR-1000
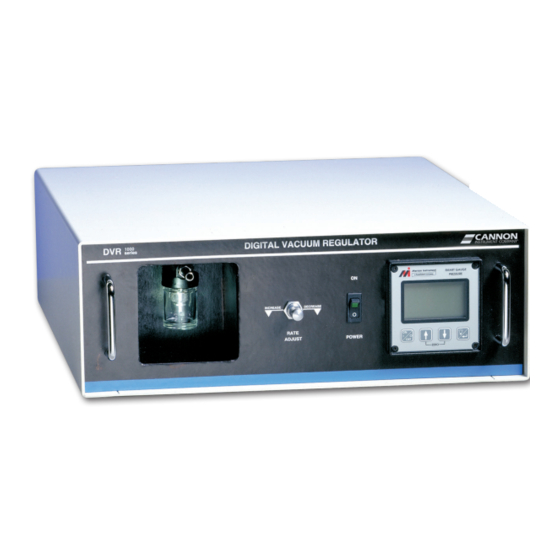
- Page 1 Digital Vacuum Regulator Instruction & Operation Manual P/N 41.2990...
- Page 3 Copyright Copyright ©2021 CANNON Instrument Company®. All rights reserved. Trademarks CANNON® and the CANNON® logo are registered trademarks of Cannon Instrument Company®. Meriam® is a registered trademark of Meriam® Contact Address: CANNON Instrument Company® 2139 High Tech Road State College PA 16803, USA Phone: 1-814-353-8000;...
-
Page 4: Table Of Contents
Safety Precautions ......................iv Notes/Cautions/Warnings ......................v DVR Overview ........................1 DVR Function ..........................1 DVR Application ..........................1 DVR-1000 vs. DVR-1500 ......................2 Configuration Options ....................... 2 Specifications ........................3 Tubing Connections ......................4 DVR-1000 Connections ......................... 4 Connect to your Application ...................... 4 DVR-1500 Connections ......................... - Page 5 Procedure ..........................27 List of Figures Figure 1: DVR with CT-1000 Constant Temperature Bath ..............1 Figure 2: CANNON DVR in Horizontal & Vertical Positions ............... 2 Figure 3: NPT Port Connection ......................4 Figure 4: DVR Front Panel Connections .................... 4 Figure 5: 3VM Vacuum Manifold .......................
- Page 6 List of Tables Table 1: DVR Specifications ......................3 Table 2: Engineering Units ......................13 Table 3: DVR Replacement Parts ..................... 16 Table 4: Gauge Display Errors ......................25 Table 5: User Units .......................... 26 Cannon Instrument Company® | Contents...
-
Page 7: Safety Precautions
CANNON advises turning OFF the vacuum source when changing DVR meter settings. For the DVR-1000, it is necessary to disconnect the connection to the in-house vacuum source or turn the vacuum off. For the DVR-1500 unit, which includes a built-in vacuum pump, the vacuum can be shut off by switching the DVR front panel switch to the METER position. -
Page 8: Notes/Cautions/Warnings
Manufacturer is not liable for any loss or damage directly or indirectly caused by use of the instrument or its consequences. This manual pertains directly to the DVR Digital Vacuum Regulator. For details relating to other accessories or equipment, please refer to the appropriate manufacturer-supplied documentation. Cannon Instrument Company® | Safety Precautions... - Page 9 | DVR Operation Manual...
-
Page 10: Dvr Overview
The CANNON DVR 1000 Series instrument is designed to regulate vacuum at 300 mm Hg below atmospheric pressure. Vacuum may be adjusted to other settings, from 28 mm Hg to 411 mm Hg. The DVR is suitable for use with all CANNON temperature baths, including the CT and TE Series high and low temperature baths. -
Page 11: Dvr-1000 Vs. Dvr-1500
The DVR is available from CANNON in both horizontal and vertical configurations. With its sturdy steel construction, the horizontal DVR unit is able to support any CANNON CT or TE Series temperature bath. The vertical or horizontal configuration offers convenience in locations where workspace is at a premium. -
Page 12: Specifications
Specifications Table 1: DVR Specifications Specifications Details Model DVR-1000 and DVR-1500 Digital Vacuum Regulator Methodology ASTM D2171 Applications Common applications include asphalt cement and asphalt binders, with an operational range of 28 mm Hg to 410 mm Hg below atmospheric pressure Dimensions (W ×... -
Page 13: Tubing Connections
Figure 3: NPT Port Connection Connect to your Application Connect the DVR-1000 to your vacuum manifold or application using the 4' length of ¼“ x 5/8" O.D. rubber vacuum tubing provided by CANNON. Secure the tubing to the Vacuum Manifold Inlet on the front panel of the DVR. -
Page 14: Dvr-1500 Connections
Figure 4. Connect the DVR-1500 to your vacuum manifold or application using the 4' length of ¼” x 5/8" O.D. rubber vacuum tubing provided by CANNON. Secure the tubing to the Vacuum Manifold Inlet on the front panel of the DVR. Push the tubing firmly into place over the barbed nipple fitting. -
Page 15: Connecting Power Cable
The (O) symbol indicates the OFF position for the electrical switches for the unit (AC Mains or accessories). Connecting Power Cable Make sure that the 3-position switch on the front panel is set to the center STANDBY position. Plug the power cord into the DVR rear panel IEC Power Inlet connector. Plug the other end of the cord into an appropriate electrical outlet. -
Page 16: Dvr Operation
Points. Accessories TheThe DVR is designed for use in conjunction with the CANNON 3VM and 4VM vacuum manifolds. The 3VM manifold (part number 9726-V10) has three valves and pairs with the CANNON CT-500 Series Constant Temperature Bath. The 4VM manifold (part number 9726-V05) has four valves and pairs with the CANNON CT-1000 Series and CT-2000 Series Constant Temperature Baths. -
Page 17: Meter Display/Key Control Options
The DVR’s vacuum is regulated by two solenoid valves mounted inside the unit. The valves operate in tandem to maintain consistent vacuum at the desired setting. CANNON creates preset control set points for the solenoid valves to regulate vacuum at 300 mm Hg below atmospheric pressure. If it is necessary to adjust these settings, see section Altering Factory Settings. -
Page 18: Bleeding Vacuum
This action disengages solenoid operation for both models and turns off the DVR-1500 vacuum pump. CANNON advises users bleed off residual DVR system vacuum to 250 mm or lower when the instrument is in the center STANDBY position. This prevents the unit from overshooting the target vacuum (default 300 mm Hg) when the toggle switch is returned to the RUN position. -
Page 19: Adjust Hi/Lo Set Points
Press the SCAN/adj key to display OFFST. Refer to Figure 9. Figure 9: SCAN/adj Key Press the HOLD/mode key to display the number 0. Set the desired value for the meter to display at the presently applied pressure. a. Press the SCAN/adj key to move the numbers up (+). b. -
Page 20: Selecting Set Point Values
Once your control point (desired vacuum setting) is known, you must select and test new set points. Normal factory set points may provide a useful reference. The unit is shipped from CANNON with a value of 292.5 mm Hg for LO and a value of 299.6 mm Hg for HI. These settings allow the DVR to control at 300 mm Hg ±... -
Page 21: Dvr Cleaning & Maintenance
DVR Cleaning & Maintenance Cleaning Before cleaning the DVR, turn off the instrument and unplug the MAINS Caution: power cord. Do NOT clean the instrument while it is in operation. Best practices dictate that it is ideal to periodically clean the outside of the unit with a cloth moistened with water and/or a mild detergent solution. -
Page 22: Altering Factory Settings
Altering Factory Settings The Meriam gauge installed on the DVR unit offers several programmable registers for adjusting the operating parameters of the instrument. For a full description of programming options, consult the Meriam manual included with your DVR instrument. Changing the Engineering Unit of Measure The LCD provides nine options for units of measurement. -
Page 23: Adjustment Procedure: Adjusting The Control Set Points (Set 1 And Set 2)
During any programming operation, if there is no keypad Note: activity for approximately one minute then the current programming operation aborts and the gauge returns to the Measurement mode. Adjustment Procedure: Adjusting the Control Set Points (SET 1 and SET 2) Make certain the gauge is in the measurement mode displaying the current vacuum/pressure reading. -
Page 24: Selecting Set Point Values
Once your control point (the desired vacuum setting) is known, select and test new set points. Normal factory set points may provide a useful reference. The unit ships from CANNON with a value of 292.5 mm Hg for and a value of 299.6 mm Hg for SET2. -
Page 25: Replacement Parts
Vacuum trap, ¾ oz jar, 1/8” NPT 74.2110* Power cord, UA IEC320 *international customers please contact your local CANNON representative for the equivalent part number Direct requests for other required parts to CANNON customer service department at 814-353-8000 or sales@cannoninstrument.com. | DVR Operation Manual... -
Page 26: Warranty
Company to conform to the weight, specifications and standards stated on the package. Returning a Product to CANNON Before returning a CANNON product for repair or service, make every attempt to identify the problem. If, after careful checking, the problem remains unidentified or unsolved, telephone CANNON Instrument Company (or the local service agent) to consult with a product specialist. -
Page 27: Required Information
Please contact CANNON before returning a product that could possibly contain hazardous material. Shipping Notification Products returned without CANNON’s prior authorization will not be accepted. The customer may be billed a testing fee if a product is returned to CANNON and found to be working properly. | DVR Operation Manual... -
Page 28: Appendix A - Calibrating The Setra Gauge
Turn off power to the DVR and unplug the MAINS power cord from the DVR unit. For DVR-1000 units, remove the in-house vacuum connection from the port on the rear panel of the DVR. Allow the system to equilibrate to atmospheric conditions. -
Page 29: Reassembling The Dvr
The Customer Service Department will assign you a Return Authorization number. The digital differential gauge is sensitive to jarring and shock. After issuing an RA number, CANNON ships the appropriate packing materials for your gauge. Use these materials to ship your gauge to CANNON Instrument Company. -
Page 30: Appendix B - Calibrating The Meriam Gauge
Engaging Front Panel Lockout To engage front panel lockout, change the lockout code from the default (lockout disabled) to any value between and 99. Cannon Instrument Company® | Appendix B - Calibrating the Meriam Gauge... -
Page 31: Disabling Lockout
During any programming operation, if there is no keypad Note: activity for approximately one minute then the current programming operation is aborted and the gauge returns to the Measurement mode. Lockout Procedure While the gauge is in the Measurement mode, press the PRGM key. -
Page 32: Changing The Lockout Code
When choosing a reference, ensure that the accuracy of the calibration unit is superior to the accuracy of the Meriam gauge. Meriam offers the Meri-Cal auto calibration unit as a calibration tool. Cannon Instrument Company® | Appendix B - Calibrating the Meriam Gauge... -
Page 33: Zeroing The Gauge
Unplug the MAINS power and turn OFF the power to the DVR unit. For DVR-1000 units, remove the in-house vacuum connection from the port on the rear panel of the DVR. Allow the system to equilibrate to atmospheric connections. -
Page 34: Reassembling The Dvr
Remove the brass elbow from the “low” port and remove the brass filter from the “high” port of the differential gauge to complete the procedure. Contact CANNON Instrument Company (or your local service representative) for calibration information and to receive a Return Authorization (RA) number. The digital differential gauge must be recalibrated by the manufacturer. -
Page 35: Setting User Units
Confirm function of power supply E030 or greater Hardware or EEProm error. Contact a CANNON service representative Figure 13: Meriam Display with Vacuum Setting User Units The Meriam meter provides a register for defining unique User Units for your specific application. The programmable register stores a value corresponding to the full-scale reading for the Engineering Unit of your choice. -
Page 36: Procedure
Press PRGM. The meter returns to the Measurement mode and no engineering unit displays on the LCD, indicating that User Units are the current unit of measurement. Cannon Instrument Company® | Appendix B - Calibrating the Meriam Gauge... - Page 38 CANNON INSTRUMENT COMPANY® 2139 High Tech Road | State College, PA 16803 | USA 800-676-6232 | 814-343-8000 | Fax: 814-353-8007 sales@cannoninstrument.com | www.cannoninstrument.com...
Need help?
Do you have a question about the DVR-1000 and is the answer not in the manual?
Questions and answers