Osstell IDx How-To
How to create a backup
Hide thumbs
Also See for IDx:
- User manual (107 pages) ,
- Manual (105 pages) ,
- How to connect to the internet (2 pages)
Advertisement
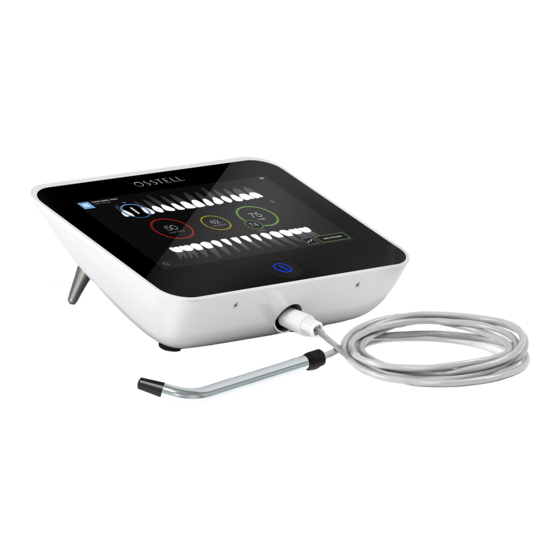
Osstell IDx
Backups of your Osstell IDx data can be saved on Osstell Connect or on a USB stick.
Backup to Osstell Connect
First make sure you have a WiFi
1
connection, then click the settings
symbol in the lower left corner and select
"More".
| How to Create a Backup
Select Net Service and click Ok next
2
to "Manage Backups".
1
Advertisement
Table of Contents

Related Manuals for Osstell IDx


Summary of Contents for Osstell IDx
- Page 1 Osstell IDx | How to Create a Backup Backups of your Osstell IDx data can be saved on Osstell Connect or on a USB stick. Backup to Osstell Connect First make sure you have a WiFi connection, then click the settings symbol in the lower left corner and select ”More”.
- Page 2 Once the backup is complete, you can find it under the ”Import” tab, where you will be able to restore it if needed. It is possible to save three different backup versions. Since the Osstell IDx backs up your data automatically on a regular basis, the oldest backup will be deleted when a new one is created.
- Page 3 Backup to a USB stick Turn over your IDx and insert a USB memory stick. The IDx will automatically open the USB folder. Select the Export tab, then click USB Files ”All” and then ”Export”. Once the backup is complete, you can find it under the ”Import” tab, where you will be...
- Page 4 Restore a Backup First make sure you have a WiFi connection, then click the settings symbol in the lower left corner and select ”More”. If you are restoring a backup from a USB stick, simply insert the USB and the import folder (step 3) will open automatically.
- Page 5 Enter the system backup code (created during the registration process). The IDx will restore the data, restart and ask for your PIN to complete the installation. If you are restoring a backup from a USB, it is now safe to remove it.
Need help?
Do you have a question about the IDx and is the answer not in the manual?
Questions and answers