Advertisement
Quick Links
Advertisement

Related Manuals for Little Seeds LS Monarch Hill 4540013COM


Summary of Contents for Little Seeds LS Monarch Hill 4540013COM
- Page 1 B344540013COM00 inside for Assembly Manual Check us out! li• leseedskids.com...
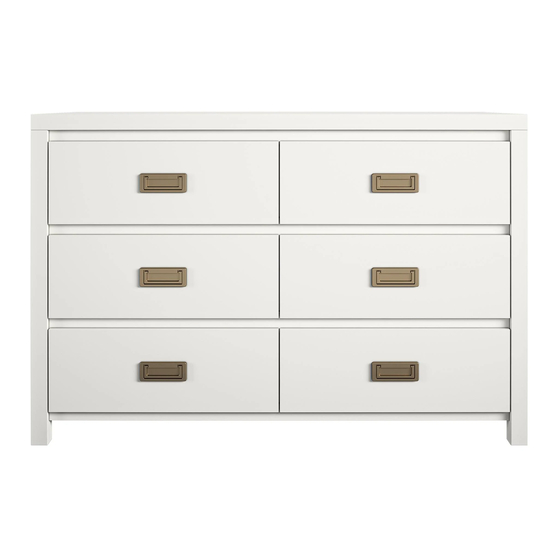
- Page 2 4540013COM LS Monarch Hill 6 Drawer Dresser Keep this Assembly Manual for future reference Two Adults recommended for assembly This product is not intended for commercial use Do NOT return this product! Follow li• le seeds on For missing or broken parts - Visit li•...
- Page 3 Do NOT return this product! Contact our friendly customer service team fi rst for help Assembly Tips Call us! 1-800-489-3351 Monday-Friday 9am - 5pm CST Visit li• leseedskids.com to view the limited warranty valid in the U.S and Canada Helpful Hints PEOPLE NEEDED FOR ASSEMBLY: 1-2 ESTIMATED ASSEMBLY TIME: 1 HOUR - Open your item in the area you plan to keep it for less heavy li"...
- Page 4 Before You Start Read through each step carefully and follow the proper order Separate and count all your parts and hardware Give yourself enough room for the assembly process Have the following tools: Flat Head Screwdriver, #2 Phillips Head Screwdriver and Hammer Cau! on: If using a power drill or power screwdriver for screwing, please beware to slow down and stop when screw is ! ght.
- Page 5 Board Iden! fi ca! on Not actual size T4540013010UD T4540013020UD T4540013030UD TOP PANEL LEFT SIDE PANEL RIGHT SIDE PANEL T4540013040UD T4540013050UD T4540013060UD BOTTOM PANEL BOTTOM APRON TOP APRON T4540013070UD T4540013080UD T4540013090UD CENTER APRON LEFT DRAWER SIDE RIGHT DRAWER SIDE li• leseedskids.com...
- Page 6 Board Iden! fi ca! on Not actual size T4540013100UD T4540013110UD T4540013120UD FRONT DRAWER LEFT FRONT DRAWER RIGHT BACK DRAWER T4540013130UD T4540013140UD T4540013150UD DRAWER BOTTOM DRAWER SUPPORT BACK PANEL T4540013160UD T4540013170UD CENTER LEG PARTITION li• leseedskids.com...
- Page 7 Part List Actual size TUD0001 TUD0002 TUD0004 TUD0009 Cam Bolt Cam Lock DOWEL CBS 4 x 38 15-12 M8 X 25 TUD0011 TUD0008 PH M4 X 12 CBS 3.5 x 16 li• leseedskids.com...
- Page 8 Part List Not actual size x1 SET x6 SETS TUD0006 TUD0021 TUD0064 TUD0017 NAIL ANTI TIPPING KIT BIG SQUARE DRAWER SLIDE HANDLE 350 MM Hardware Bag Reference Number: 24540013COM0UD li• leseedskids.com...
- Page 9 Step 1 Proper orienta! on of CAM LOCK TUD0002 TUD0008 TUD0001 x3 SETS TUD0017 TUD0004 RIGHT LEFT * raw edges are shaded li• leseedskids.com...
- Page 10 Step 2 Proper orienta! on of CAM LOCK TUD0002 TUD0008 TUD0004 x3 SETS TUD0017 RIGHT HAND SURFACE LEFT HAND SURFACE * raw edges are shaded li• leseedskids.com...
- Page 11 Step 3 Proper orienta! on of CAM LOCK TUD0002 TUD0001 TUD0021 FRONT * raw edges are shaded li• leseedskids.com...
- Page 12 Step 4 Proper orienta! on of CAM LOCK TUD0001 TUD0002 TUD0004 TUD0009 * raw edges are shaded li• leseedskids.com...
- Page 13 Step 5 Proper orienta! on of CAM LOCK * raw edges are shaded li• leseedskids.com...
- Page 14 Step 6 Proper orienta! on of CAM LOCK * raw edges are shaded li• leseedskids.com...
- Page 15 Step 7 Proper orienta! on of CAM LOCK * raw edges are shaded li• leseedskids.com...
- Page 16 Step 8 Proper orienta! on of CAM LOCK * raw edges are shaded li• leseedskids.com...
- Page 17 Step 9 Proper orienta! on of CAM LOCK * raw edges are shaded li• leseedskids.com...
- Page 18 Step 10 IMPORTANT! THE BACK PANEL IS A STRUCTURAL PART OF THIS UNIT AND MUST BE INSTALLED PROPERLY. TUD0006 A• ached back panel as shown nailing straight into the raw edges. Ensure that the unit is square. Distance from corner to corner must be equal as shown. li•...
- Page 19 Step 11 TUD0002 * raw edges are shaded li• leseedskids.com...
- Page 20 Step 12 TUD0001 LEFT RIGHT * raw edges are shaded li• leseedskids.com...
- Page 21 Step 13 * raw edges are shaded li• leseedskids.com...
- Page 22 Step 14 * raw edges are shaded li• leseedskids.com...
- Page 23 Step 15 * raw edges are shaded li• leseedskids.com...
- Page 24 Step 16 * raw edges are shaded li• leseedskids.com...
- Page 25 Step 17 TUD0009 * raw edges are shaded li• leseedskids.com...
- Page 26 Step 18 x6 SETS TUD0016 TUD0008 * raw edges are shaded li• leseedskids.com...
- Page 27 Step 19 TUD0011 TUD0064 * raw edges are shaded li• leseedskids.com...
- Page 28 For Masonry, Concrete, or other wall materials: Consult your local hardware store for appropriate anchors to securely a• ach the safety bracket. IMPORTANT: THIS UNIT MUST BE SECURE TO THE WALL TO HELP PREVENT TIPOVER. FOLLOW THESE INSTRUCTIONS TO INSTALL THE ANTI-TIPPING SAFETY BRACKET PROVIDED WITH THIS PRODUCT.
- Page 29 Step 20 LEFT RIGHT * raw edges are shaded li• leseedskids.com...
- Page 30 Maximum Loads This unit has been designed to support the maximum loads shown. Exceeding these load limits could cause sagging, instability, product collapse, and/or serious injury. 75 lbs. 25 lbs. 34 kg 11 kg Each drawers Warning: Risk of serious injury to person - do not place a television on this furniture. This furniture is not approved for use with a television.
- Page 31 Register your product to receive the following: * New trend details -sneak peek on what's new * Surveys -have a voice within our community * Exclusive deals and discount codes * Quick and easy replacement part service To register your product, visit Visit your local retailer's website, rate your purchased product and leave us some feedback! We would like to extend a big "Thank You"...
- Page 33 Español Cubierta Delantera Busque en el interior del manual de montaje Búsquenos! página 2 Conserve este manual de montaje para futuras consultas. Se recomienda dos adultos para el montaje. Este producto no es para uso comercial. No Regrese este producto! Para piezas perdidas o rotas. Visitar: li•...
- Page 34 Español Página 28 Para mampostería, hormigón u otros materiales de pared: Consulte en su ferretería local los anclajes apropiados para sujetar de forma segura el soporte de seguridad. IMPORTANTE: ESTA UNIDAD DEBE ESTAR SEGURA EN LA PARED PARA AYUDAR A PREVENIR AL TIPOVER. SIGA ESTAS INSTRUCCIONES PARA INSTALAR EL SOPORTE DE SEGURIDAD ANTIDISCIPLINADOR PROPORCIONADO CON ESTE PRODUCTO.
- Page 35 Español Página 31 Registre su producto para recibir lo siguiente: * Nuevos detalles sobre las tendencias - Sneek echa un vistazo a lo nuevo * Encuestas - tener una voz dentro de nuestra comunidad * Ofertas exclusivas y códigos de descuento Servicio de piezas de repuesto rápido y fácil Para registrar su producto, visite Ameriwoodhome.com 5 estrellas...
- Page 36 Français Capot Avant Regardez à l’intérieur du manuel d’assemblage Búsquenos! Page 2 Gardez ce manuel d’assemblage pour référence ultérieure. Deux adultes sont recommandés pour l’assemblage. Ce produit n’est pas des" né à un usage commercial. Non Retournez ce produit! Pour les pièces perdues ou cassées. Visiter: li•...
- Page 37 Français page 28 Pour la maçonnerie, le béton ou d’autres matériaux muraux: Consultez votre quincaillier local pour obtenir les ancrages appropriés afi n de fi xer solidement le support de sécurité. IMPORTANT: CET APPAREIL DOIT ÊTRE SÉCURISÉ AU MUR POUR AIDER À PRÉVENIR TIPOVER. SUIVEZ CES INSTRUCTIONS POUR INSTALLER LE SUPPORT DE SÉCURITÉ...
- Page 38 Français Page 31 Enregistrez votre produit pour recevoir les éléments suivants: * De nouveaux détails sur les tendances - Sneek vérifi er la nouvelle * Sondages - ont une voix dans notre communauté * Off res exclusives et des codes de réduc# on Service de pièces de rechange rapide et facile Pour enregistrer votre produit, visitez Ameriwoodhome.com 5 étoiles...
Need help?
Do you have a question about the LS Monarch Hill 4540013COM and is the answer not in the manual?
Questions and answers