Table of Contents
Advertisement
Quick Links
Advertisement
Table of Contents

Related Manuals for AQUAHEAT AS70


Summary of Contents for AQUAHEAT AS70
- Page 1 INVERTER POOL HEAT PUMP USER MANUAL...
-
Page 3: Table Of Contents
Table of contents Foreword B. Safety Precautions Warning Attention Safety C. About Your Heat Pump Transportation Accessories Features Operating condition and range Introduction of different modes Technical parameter Dimension D. Installation Guidance Installation reminder Wiring Electric wiring diagram References for protecting devices and cable specification Operation Guidance Key function Operation instruction... -
Page 4: Foreword
A. Foreword Thank you for choosing our inverter pool heat pump, which is designed for more silent and energy saving user experience. It is an ideal way for green pool heating. We hope you'll enjoy using our heat pumps. Thank you! -
Page 5: Safety Precautions
B. Safety Precautions We have provided important safety messages in this manual and on your heat pump. Please always read and obey all safety messages. Environment friendly R32 Refrigerant is used for this heat pump 1. Warning The WARNING sign denotes a hazard. It calls attention to a procedure, practice, or the like, which, if not correctly performed or adhered to, could result in personal injury or injury to a third party. -
Page 6: Attention
2. Attention a. Please read the following instructions before installation, use and maintenance. b. Installation must be done by professional staff only in accordance with this manual. c. A leakage test must be performed after installation. d. Except for the methods recommended by the manufacturer, do not use any methods to accelerate the defrosting process or clean the frosted parts. -
Page 7: About Your Heat Pump
C. About Your Heat Pump 1. Transportation a. Always keep upright b. Do not lift the water union (Otherwise the titanium heat exchanger inside the heat pump may be damaged) 2. Accessories Connection of the condensate drainage kit:... -
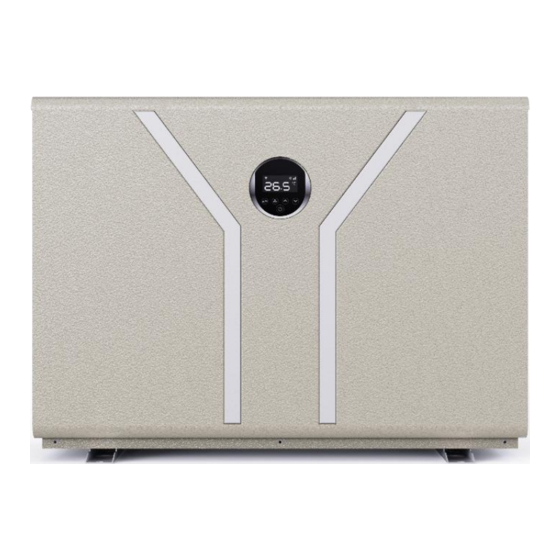
Page 8: Features
3. Features DC Twin-rotary inverter compressor of Mitsubishi DC Brushless fan motor EEV Technology Reverse cycle defrosting High-efficiency twisted titanium heat exchanger Sensitive and accurate temp control and water temp display High pressure and low pressure protection Full protection on electrical system 4. -
Page 9: Technical Parameter
6. Technical parameter Model AS70 AS90 AS110 AS130 AS170 AS210 AS280 AS280S PERFORMANCE CONDITION: Air 27°C/ Water 27°C/ Humid. 80% Heating capacity (kW) 11.0 13.0 17.5 20.8 27.8 27.8 COP Range 14~7.4 14~7.4 14~6.9 14.5~7.1 15.6~6.9 14.6~7.0 15.8~7.2 15.6~7.1 PERFORMANCE CONDITION: Air 15°C/ Water 26°C/ Humid. 70% Heating capacity (kW) 12.3... -
Page 10: Dimension
7. Dimension Size(mm) Name Model ASC 70 ASC 90 ASC 110 ASC 130 ASC 170 1060 ASC 210 1060 ASC 280 1060 ASC 280s 1060 ※ Above data is subject to modification without notice. Note: The picture above is the specification diagram of the pool heat pump, for technician’s installation and layout reference only. -
Page 11: Installation Guidance
D. Installation Guidance 1. Installation reminder Only a professional staff is allowed to install the heat pump. The users are not qualified to install by themselves, otherwise the heat pump might be damaged and risky for users’ safety. a. Location and clearances The inverter pool heat pump should be installed in a good ventilation place. - Page 12 Water pipe connection The inlet and outlet water unions can’t stand the weight of soft pipes. The heat pump must be connected by hard pipes! DO NOT install water pipes in a way that they pass behind the heat pump's evaporator. In case this cannot be avoided, cover the pipes with thermal insulation foam.
-
Page 13: Wiring
1) The frame must be fixed by bolts (M10) to concrete foundation or brackets. The concrete foundation must be solid and fastened; the bracket must be strong enough and antirust treated; 2) Please don’t stack substances that will block air flow near inlet or outlet area, and there is no barrier within 50cm behind the main machine, or the efficiency of the heat pump will be reduced or even stopped;... -
Page 14: References For Protecting Devices And Cable Specification
4. References for protecting devices and cable specification MODEL AS70 AS90 AS110 AS130 AS170 AS210 AS280 AS280S Rated Current (A) 10.5 14.5 Rated Residual Breaker Action Current (mA) Fuse (A) 10.5 14.5 Power Cord (mm 3x1.5 3 x 2.5 3 x 2.5 3 x 2.5... - Page 15 c. Temperature Setting Press “ ” and “ ” to display and set temperature. d. Mode Selection 1) Heating/Cooling/Auto mode Press “ ” to switch among heating” ”, cooling” ” and automatic” ” mode. Heating mode “ ”: Water setting range(18-40℃) Cooling mode “...
-
Page 16: Testing
3. Change status through “ ” and “ ”, the corresponding value also changes. 4. Press “ ” to quit “Running Status Checking” mode 5. Running status checking table: Symbol Content Unit Inlet water temp °C Outlet water temp °C Ambient temp °C Exhaust gas temp... -
Page 17: Trial
3. Trial The user must “Start the Pump before the Machine, and Turn off the Machine before the Pump”, or the machine will be damaged. Before start the heat pump, please check for any leakage of water; and set suitable temperature in the thermostat, and then switch on power supply. -
Page 18: Trouble Shooting For Common Faults
H. Trouble Shooting for Common Faults 1. Repairing Guidance ----------------------------------------------------------------------------------------------------------------------------------------- WARNING: If repair or scrap is required, pls contact authorized service center nearby. Requirements for Service Personnel Any person who is involved with working on or breaking into a refrigerant circuit should hold a current valid certificate from an industry-accredited assessment authority, which authorizes their competence to handle refrigerants safely in accordance with an industry recognized assessment specification. - Page 19 Protection & Failure code Display Protection code description No water protection Power supply excesses operation range Excessive temp difference between inlet and outlet water(Insufficient water flow protection) Ambient temperature too high or too low protection Anti-freezing reminder Display Failure code description High pressure protection Low pressure protection 3 phase sequence protection (three phase only)
-
Page 20: Water Pump Control Connection
I. Water Pump Control Connection Water pump: 230V voltage, ≤500W capacity Breaker/fuse Powercord (Customer prepare) Earthing Power Supply 230V~/50Hz Customer remote control switch connector Breaker/fuse Water Pump (Customer prepare) Power Supply 230V~/50Hz Earthing... - Page 21 Water pump: 230V voltage, >500W capacity Breaker/fuse Powercord (Customer prepare) Earthing Power Supply 230V~/50Hz Customer remote control switch connector Breaker/fuse Water Pump (Customer prepare) Contactor Power Supply 230V~/50Hz Earthing...
- Page 22 Water pump: 400V voltage Breaker/fuse Power cord Power Supply (Customer prepare) 230V~/50Hz Earthing Customer remote control switch connector Water Pump Breaker/fuse (Customer prepare) Contactor Power Supply 400V~/50Hz Earthing...
- Page 23 Water pump control and timer connection 1: Water pump timer 2: Water pump wiring of Heat Pump Note: The installer should connect 1 parallel with 2 (as above picture). To start the water pump, condition 1 or 2 is connected. To stop the water pump, both 1 and 2 should be disconnected.
-
Page 24: Wi-Fi Operation
J. Wi-Fi Operation... - Page 30 AQ00ASC-R32-P5...
Need help?
Do you have a question about the AS70 and is the answer not in the manual?
Questions and answers