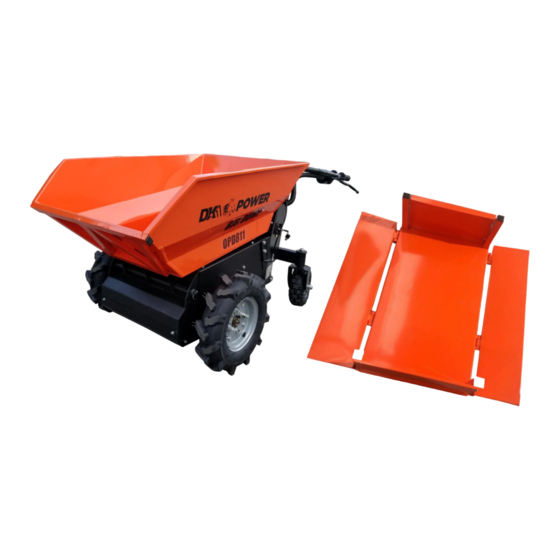
DK2 Power OPD811 Installation Manual
Big dump elec drive hydraulic dump; 1100lb big dump cart
Hide thumbs
Also See for OPD811:
- Assembly manual (39 pages) ,
- Safety and operation instructions (14 pages) ,
- Assembly manual (35 pages)
Advertisement
Quick Links
DETAIL K2 INC.
DK2 POWER USA
4301 S Valley View Blvd STE 10-11
Las Vegas, NV 89103
1-702-331-5353
PARTS AND SERVICE 702-331-5353 OR
OPD811 BIG DUMP ELEC DRIVE
Included with Carry-All
DETAIL K2, INC.
1080 Clay Avenue Unit 2
Burlington, Ontario, Canada L7L0A1
1100LB BIG DUMP CART
HYDRAULIC DUMP
BIG DUMP ASSEMBLY GUIDE
MODEL: OPD811
1100 LB ELEC DUMP CART
WWW.DK2POWER.COM
DK2 USA EAST
6245 Industrial Parkway
Whitehouse, OH 43571
CONTACT US
ELEC DRIVE
HYDRAULIC DUMP
ALL TERRAIN TIRES
REV 1 – 10/16/2019
Advertisement

Related Manuals for DK2 Power OPD811


Summary of Contents for DK2 Power OPD811
- Page 1 Burlington, Ontario, Canada L7L0A1 Whitehouse, OH 43571 1-702-331-5353 PARTS AND SERVICE 702-331-5353 OR WWW.DK2POWER.COM CONTACT US 1100LB BIG DUMP CART ELEC DRIVE HYDRAULIC DUMP ALL TERRAIN TIRES OPD811 BIG DUMP ELEC DRIVE HYDRAULIC DUMP Included with Carry-All REV 1 – 10/16/2019...
- Page 2 STEP 1: Install both wheels NOTE: UPON INSPECTION OF PARTS IF YOU FIND ANY DAMAGE OR MISSING PARTS PLEASE CALL DK2 POWER AT 702-331-5353 OR CONTACT US VIA OUR WEBSITE WWW.DK2POWER.COM WE WILL REPLACE ANY MISSING PARTS TO YOU FREE...
- Page 3 STEP 2: 1. Tip Bucket forward 2. Pin the lift rod PIN THE LIFT ROD...
- Page 4 STEP 3: 1. Assemble axle and nut...
- Page 5 STEP 4: 1. Install the right handle assembly with 4 bolts 2. Install the left handle assembly with 4 bolts 4 BOLTS EACH SIDE...
- Page 6 STEP 5: 1. TURN ON MACHINE 2. FORWARD AND REVERSE CONTROLS 3. BUCKET LIFT 4. BRAKE...
- Page 7 STEP 6: 1. YOUR UNIT IS ALSO SUPPLIED WITH A CARRY ALL 2. TIP WET BUCKET FORWARD AND REMOVE BOLTS 3. SLIDE BUCKET OFF 4. REPLACE WITH CARRY ALL REMOVE BOLTS...
- Page 8 STEP 7: 1. ASSEMBLE THE CARRYALL 2. INSERT DUMP GATE END BETWEEN THE 2 POSTS 3. BOLT THE END POSTS INTO PLACE 4. BOLT THE REAR PANEL INTO PLACE 5. ASSEMBLE SIDES WITH HINGES, FOLD CLOSED AND LATCH 6. USE YOUR CARRYALL TO HAUL BOARDS, FEEDBAGS, CONCRETE BAGS, GRAVEL, DIRT AND MORE.
- Page 9 Ref.No. Description Ref.No.2 Description3 Bucket M16 lock nut Handle cover Rearaxle mud guard Switch Motor hanger Right handrail 16*6.5-8 wheel Brake assemble Rear axle assembly Brake fitting tube Rear axle mud guard Brake fitting flat tube Rear axle controller Electric box Ø19*Ø11*58 spacer Push bar switch Rear axle fitting plate...
- Page 12 OPERATION – BEFORE USING YOUR DUMP CART CLEAR AREA OF ALL PEOPLE AND PROPERTY THAT COULD BE DAMAGED. THINK SAFETY. ALLOW STOPPING DISTANTANCE. TAKE CAR ON SLOPES AND HILLS. ONLY ONE OPERATOR SHOULD WORK THIS UNIT. NEVER HAVE ANOTHER PERSON RIDE IN THE BUCKET OR THE CARRYALL. USE THE PARKING BRAKE ON HILLS.
- Page 13 If within one (1) year from the original date of purchase this product fails due to defect in material or workmanship. DK2 POWER outdoor power equipment is 1-year parts only warranty no labor. Upon expiry of one (1) year, Detail K2 will have no further liability related to the product. Detail K2 does not authorize any party, including its authorized distributors or dealers, to offer any other warranty on behalf of Detail K2 Inc.
Need help?
Do you have a question about the OPD811 and is the answer not in the manual?
Questions and answers