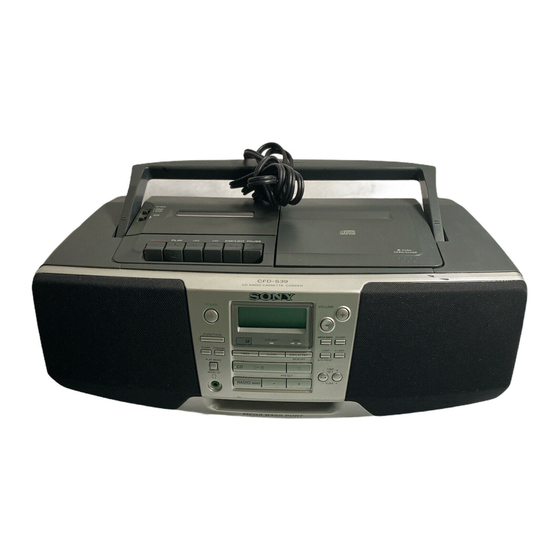
Sony CFD-S39 Operating Instructions Manual
Boomboxes: cd radio cassette-corder
Hide thumbs
Also See for CFD-S39:
- Specifications (2 pages) ,
- Limited warranty (1 page) ,
- Service manual (48 pages)

Related Manuals for Sony CFD-S39


Summary of Contents for Sony CFD-S39
- Page 1 3-865-707-14 (1) CD Radio Cassette-Corder Operating Instructions CFD-S39 ©1999 by Sony Corporation...
- Page 2 The model number is located at the bottom and the serial number is located in the battery compartment. Record the serial number in the space provided below. Refer to these numbers whenever you call upon your Sony dealer regarding this product. Model No. CFD-S39 Serial No.
-
Page 3: Table Of Contents
Table of contents Basic Operations Playing a CD Listening to the radio Playing a tape 10 Recording on a tape The CD Player 12 Using the display 13 Locating a specific track 14 Playing tracks repeatedly (Repeat Play) 15 Playing tracks in random order (Shuffle Play) 16 Creating your own program (Program Play) -
Page 4: Basic Operations
Basic Operations Playing a CD PUSH OPEN/CLOSE PUSH OPEN/CLOSE Basic Operations Connect the supplied AC power cord (see page 25). Press 6 PUSH OPEN/CLOSE down to open the CD compartment and place the CD on the CD compartment. Close the lid of the CD compartment. - Page 5 Next time you want to listen to a CD, just press ^. The player turns on automatically and starts playing the CD. Use these buttons for additional operations adjust the volume stop playback pause playback go to the next track go back to the previous track = remove the CD turn on/off the player...
-
Page 6: Listening To The Radio
Listening to the radio PRESET RADIO BAND TIME TUNE Basic Operations Connect the supplied AC power cord (see page 25). Press RADIO BAND until the band you want appears in the display (direct power-on). Hold down TIME SET•TUNE + or – (TUNE + or – on the remote) until the frequency digits begin to change in the display. - Page 7 Tips • If the FM broadcast is noisy, press PLAY MODE •MONO/ST until “Mono” appears in the display and the radio will play in monaural. • Next time you want to listen to the radio, just press RADIO BAND. The player turns on automatically and starts playing the previous station.
-
Page 8: Playing A Tape
Playing a tape STOP/EJECT PLAY Basic Operations Connect the supplied AC power cord (see page 25). Press p6 to open the tape compartment and insert a recorded tape. Use TYPE I (normal) tape only. Close the compartment. Press (. The player turns on (direct power-on) and starts playing. - Page 9 Next time you want to listen to a tape, just press (. The player turns on automatically and starts playing the tape. Use these buttons for additional operations adjust the volume stop playback play the reverse side fast-forward or rewind the tape pause playback eject the cassette turn on/off the player...
-
Page 10: Recording On A Tape
Recording on a tape STOP/EJECT PRESET RADIO BAND Basic Operations Connect the supplied AC power cord (see page 25). Press p6 to open the tape compartment and insert a blank tape. Use TYPE I (normal) tape only. Select the program source you want to record. - Page 11 Make sure that · (forward) of the tape direction indicators is lit. If ª (reverse) is lit, push DIR in the direction of the arrow to switch the tape directrion. Press r to start recording REC ( FWD ) (( is depressed automatically). Note Recording can be made only on the forward side...
-
Page 12: The Cd Player
The CD Player Using the display You can check information about the CD using the display. The CD Player Checking the total track number and playing time Press DISPLAY ENT•MEMORY in stop mode. If the CD has more than 12 tracks, “OVER 12” appears in the display. -
Page 13: Locating A Specific Track
Locating a specific track You can locate any track using the number buttons on the remote. You can also quickly find a specific point in a track while playing a CD. Note You cannot locate a specific track if “SHUF” or “PGM” is lit in the display. -
Page 14: Playing Tracks Repeatedly
Playing tracks repeatedly (Repeat Play) You can play tracks repeatedly in normal, shuffle or program play modes (see page 16). On the player • Press PLAY MODE• MONO/ST to select “REP 1”, “REP ALL”, “SHUF REP”, or “PGM REP”. • Press ^ instead of •... -
Page 15: Playing Tracks In Random Order
Playing tracks in random order (Shuffle Play) You can play tracks in random order. On the player Press PLAY MODE•MONO/ST to select “SHUF”. STANDBY SLEEP CD/RADIO MODE 0/10 BAND TUNE FUNCTION TUNE LOOP FLASH SOUND Press p. “Cd” appears in the display. Press MODE until “SHUF”... -
Page 16: Creating Your Own Program
Creating your own program (Program Play) You can arrange the playing order of up to 20 tracks on a CD. On the remote 1 Press p. 2 Press PLAY MODE•MONO/ST until “PGM” appears in the display. 3 Press = or + then press DISPLAY ENT•... - Page 17 Tips • You can play the same program again, since the program is saved until you open the CD compartment. • You can record your own program. After you’ve created the program, insert a blank tape and press r to start recording.
-
Page 18: Enjoying Sound Effects
Enjoying sound effects (LOOP/FLASH) You can repeat part of a CD (LOOP) and can “flash” the CD sound (FLASH) during playback. On the remote Press LOOP•AUTO PRESET instead of LOOP. The CD Player STANDBY SLEEP CD/RADIO MODE 0/10 BAND TUNE FUNCTION TUNE LOOP... -
Page 19: The Radio
The Radio Presetting radio stations You can store radio stations into the player’s memory. You can preset up to 20 radio stations, 10 for each band in any order. On the remote 1 Press BAND until the band you want appears in the display. -
Page 20: Playing Preset Radio Stations
Playing preset radio stations Once you've preset the stations, use the number buttons on the remote or PRESET +/– on the player to tune in to your favorite stations. On the player Press PRESET + or – to tune in the stored station. -
Page 21: The Timer
The Timer Setting the clock “- -:- -” indication appears in the display until you set the clock. The time display system: 12-hour system AM 12:00=midnight PM 12:00=noon Before you set the clock, connect the AC power cord (page 25). Press CLOCK for 2 seconds until the hour digit flashes. -
Page 22: Waking Up To Music
Waking up to music You can wake up to music or a radio program at a preset time. Make sure you have set the clock (“Setting the clock” on page 21). The Timer Before you begin, make sure the t (clock) indication is not lit in the display. - Page 23 Tips • To exit the standby mode, press STANDBY to make t disappear from the display. • The preset settings remain until you reset them. Press TIME SET•TUNE + or – to set the volume, then DISPLAY ENT•MEMORY. Press STANDBY. The t indication lights up and the power goes off.
-
Page 24: Falling Asleep To Music
Falling asleep to music You can set the player to turn off automatically after 10, 20, 30, 60, 90, and 120 minutes, allowing you to fall asleep while listening to music. • You can fall asleep and wake up to different music. -
Page 25: Setting Up
Setting Up Choosing the power sources You can use the AC power or batteries as a power source. 1 4 Battery compartment 1 Inserting the back-up batteries Insert four size AA (R6) batteries (not supplied) into the battery compartment. These batteries work to save the memory data. - Page 26 Choosing the power sources (continued) Note When you operate the player on batteries, you cannot turn on the player using the remote. • Replace the batteries when the OPR/BATT indicator dims or when the player stops operating. Replace all the batteries with new ones.
-
Page 27: Selecting The Audio Emphasis
Selecting the audio emphasis (SOUND/MEGA BASS) You can adjust the audio emphasis of the sound you are listening to. STANDBY SLEEP CD/RADIO MODE 0/10 BAND TUNE FUNCTION TUNE LOOP FLASH SOUND Selecting the sound characteristic Press SOUND repeatedly to select the audio emphasis you want. -
Page 28: Additional Information
• If the player has not been used for a long time, set it in the playback mode to warm it up for a few minutes before inserting a cassette. If you have any questions or problems concerning your player, please consult your nearest Sony dealer. - Page 29 Notes on CDs • Before playing, clean the CD with a cleaning cloth. Wipe the CD from the center out. • Do not use solvents such as benzine, thinner, commercially available cleaners or anti-static spray intended for vinyl LPs. • Do not expose the CD to direct sunlight or heat sources such as hot air ducts, nor leave it in a car parked in direct sunlight as there can be a...
-
Page 30: Troubleshooting
Troubleshooting Symptom The power is not on. There is no audio. Noise is heard. “no dISC“ lights in the display even when a CD is in place. The CD does not play. The sound drops out. The audio is weak or has poor quality. - Page 31 After trying the above remedies, if you still have problems, unplug the AC power cord and remove all the batteries. After all the indications in the display disappear, plug the power cord and insert the batteries again. If the problem persists, please consult your nearest Sony dealer. Remedy •...
-
Page 32: Maintenance
Maintenance Cleaning the lens If the lens becomes dirty, it may cause a skipping of sound during CD operation. Clean with a commercially available blower. Cleaning the tape heads and tape path Wipe the heads, the pinch roller and the capstan with a cleaning swab slightly moistened with cleaning fluid or alcohol after every 10 hours of operation for... -
Page 33: Specifications
AM: Built-in ferrite bar aerial Cassette-corder section Recording system 4-track 2 channel stereo Fast winding time Approx. 90 sec. with Sony cassette C-60 Frequency response TYPE I (normal): 70 - 13,000 Hz General Speaker Full range: 10 cm (4 in.) dia.,... -
Page 34: Index
Index Audio emphasis 27 Batteries for player 26 memory back-up 25 for remote 26 CD player 12 Choosing power sources 25 Cleaning cabinet 32 tape heads and tape path 32 Connecting AC power cord Creating your own program D, E Demagnetizing the tape heads 32 Display 12... - Page 35 Additional Information...
- Page 36 Sony Corporation Printed in China...
Need help?
Do you have a question about the CFD-S39 and is the answer not in the manual?
Questions and answers