Advertisement
Tools required:
Ø6.0mm
1
Attach the two horizontal rails to the front rail.
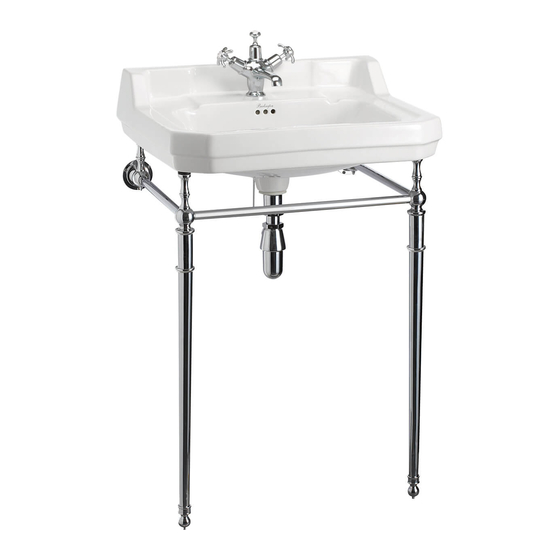
51cm Cloakroom Basin Stand
56cm / 58cm Basin Stand
61cm Basin Stand
56cm Round Basin Stand
Parts supplied:
(floor nipples)
6x
(rubber washers)
ST4.2 x 3.8mm
(floor nipple washers)
6x
2
1 - 3
T21A CHR
62cm Round Basin Stand
T22A CHR
Curved Basin Stand
T23A CHR
80cm Basin Wash Stand
T24A CHR
2x
2x
4x
1x
1x
6x
3
Screw the legs into the rail.
Please note at this step,
if you are using the regal
designer basin stand
Extension kit (T62). Then
refer to page 3 first, and
then go onto step 4.
T25A CHR
T49A CHR
T50 CHR
2x
2x
H
Advertisement
Table of Contents

Subscribe to Our Youtube Channel
Related Manuals for Burlington T21A CHR

Summary of Contents for Burlington T21A CHR
- Page 1 51cm Cloakroom Basin Stand T21A CHR 62cm Round Basin Stand T25A CHR 56cm / 58cm Basin Stand T22A CHR Curved Basin Stand T49A CHR 61cm Basin Stand T23A CHR 80cm Basin Wash Stand T50 CHR 56cm Round Basin Stand T24A CHR...
- Page 2 Using a 6mm drill bit drill the six holes on the Check that the horizontal bracket bar is vertical Determine the final installation position and mark the 4 wall and two floor fixing hole positions in pencil. marked positions (note: In the event that the wall / using a spirit level.
- Page 3 Regal designer Basin Stand Extension Kit Parts supplied: Please refer to the basin stand instruction for the more detail basin stand installation. 805mm / 745mm / 845mm 785mm Without the Extention Kit With the Extention Kit 3 - 3...
Need help?
Do you have a question about the T21A CHR and is the answer not in the manual?
Questions and answers