Genie Z-51/30J Service And Repair Manual
Hide thumbs
Also See for Z-51/30J:
- Operators manual with maintenance information (39 pages) ,
- Maintenance manual (182 pages) ,
- Operator's manual (16 pages)
Table of Contents
Advertisement
Quick Links
1.
Service and Repair Manual
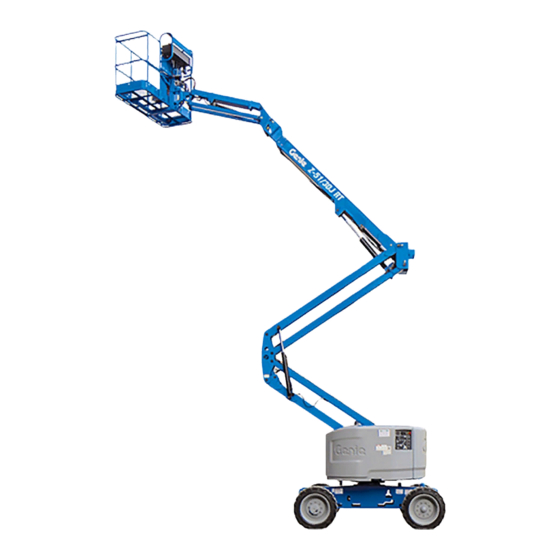
Z-51/30J
Serial Number Range
From Z513014B-1201
to Z513016M-1999
From Z5130M-2000
This manual includes:
Repair procedures
Fault Codes
Electrical and Hydraulic
Schematics
For detailed maintenance
procedures, Refer to the
appropriate Maintenance
Manual for your machine.
Part No. 1268553GT
Rev A3
October 2020
Advertisement
Table of Contents

Related Manuals for Genie Z-51/30J


Summary of Contents for Genie Z-51/30J
- Page 1 Service and Repair Manual Serial Number Range Z-51/30J This manual includes: From Z513014B-1201 to Z513016M-1999 Repair procedures Fault Codes From Z5130M-2000 Electrical and Hydraulic Schematics For detailed maintenance procedures, Refer to the appropriate Maintenance Manual for your machine. Part No. 1268553GT...
-
Page 2: Introduction
Genie has endeavored to deliver the highest operating instructions in the appropriate Operator's degree of accuracy possible. However, continuous Manual on your machine before attempting any improvement of our products is a Genie policy. procedure. Therefore, product specifications are subject to change without notice. -
Page 3: Revision History
October 2020 Service and Repair Manual Introduction Revision History Revision Date Section Procedure / Page / Description 9/2015 Initial Release 9/2016 Introduction Serial Number Legend 11/2017 Specifications Machine Specifications 10/2020 All Sections Add Deutz TD 2.2 L3 engine REFERENCE EXAMPLES: Electronic Version Section –... -
Page 4: Serial Number Legend
Service and Repair Manual October 2020 Introduction Serial Number Legend To August 31, 2016 1 Model 4 Sequence number 2 Model Year 5 Serial number (stemped on chassis) 3 Facility code 6 Serial label (located under cover) From September 1, 2016 1 Model 4 Serial number (stemped on chassis) 2 Facility code... -
Page 5: Safety Rules
October 2020 Service and Repair Manual Safety Rules Danger Failure to obey the instructions and safety rules in this manual and the appropriate Operator's Manual on your machine will result in death or serious injury. Many of the hazards identified in the operator's manual are also safety hazards when maintenance and repair procedures are performed. - Page 6 Service and Repair Manual October 2020 SAFETY RULES Personal Safety Workplace Safety Any person working on or around a machine must Be sure to keep sparks, flames and be aware of all known safety hazards. Personal lighted tobacco away from flammable and safety and the continued safe operation of the combustible materials like battery gases machine should be your top priority.
-
Page 7: Table Of Contents
October 2020 Table of Contents Introduction Introduction ....................ii Important Information .................. ii Find a Manual for this Model ............... ii Revision History...................iii Serial Number Legend................iv Safety Rules ....................v Section 1 General Safety Rules .................. v Section 2 Specifications .................... - Page 8 October 2020 TABLE OF CONTENTS Section 3 Repair Procedures, continued Platform Components ................21 Platform Leveling Slave Cylinder ............21 Platform Rotator ................22 Platform Overload System ..............23 Jib Boom Components ................26 Jib Boom ..................26 Boom Lift Cylinder ................27 Primary Boom Components ..............29 Cable Track ..................29 How to Repair the Cable Track ............31 Primary Boom..................32...
- Page 9 October 2020 TABLE OF CONTENTS Section 3 Repair Procedures, continued Manifolds ....................51 Function Manifold Components............51 Valve Adjustments-Function Manifold ..........55 How to Adjust the System Relief Valve ...........55 How to Adjust the Secondary Boom Down Relief Valve ....55 Jib Boom / Platform Rotate Manifold Components ......56 Turntable Rotation Manifold Components ........57 Directional Valve Manifold Components .........58 How to Set Up the Directional Valve Linkage ........59...
- Page 10 October 2020 TABLE OF CONTENTS Section 5 Schematics....................87 Introduction ....................87 Electrical Symbol Legends ................88 Hydraulic Symbol Legends ................89 Electrical Component and Wire Color Legends.........90 Electrical Schematics - Options .............93 Ground Control Box Terminal Strip Wiring Diagram - Options ....94 Platform Control Box Wiring Diagram - Options ........95 Wiring Diagram - Battery, Hydraulic Oil and Engine Oil Heater Options ..
-
Page 11: Specifications
October 2020 Service and Repair Manual Specifications Performance Specifications Machine Specifications Drive speed, maximum Tires and wheels Stowed position 5 mph Tire size 355/55 D625 8 km/h Tire ply rating 40 ft/5.5 sec 12.2 m/5.5 sec Tire weight, new foam-filled 390 lbs (minimum) (Rough terrain) 177 kg... -
Page 12: Hydraulic Specifications
Hydraulic fluids may be incompatible Hydraulic Oil Specification due to the differences in base Genie specifications require hydraulic oils which are additive chemistry. When designed to give maximum protection to hydraulic incompatible fluids are mixed, systems, have the ability to perform over a wide... - Page 13 October 2020 Service and Repair Manual Specifications Chevron Rando HD Premium Petro-Canada Environ MV 46 Oil MV Fluid Properties Fluid Properties ISO Grade ISO Grade Viscosity index Viscosity index Kinematic Viscosity Kinematic Viscosity cSt @ 200°F / 100°C cSt @ 200°F / 100°C cSt @ 104°F / 40°C 33.5 cSt @ 104°F / 40°C...
-
Page 14: Hydraulic Component Specifications
Service and Repair Manual October 2020 Specifications Hydraulic Component Function Manifold Specifications System relief valve pressure 3200 psi 220.6 bar Secondary boom down relief 2100 psi Drive pump valve pressure 145 bar Type: bi-directional, variable Platform level relief valve 2500 psi displacement piston pressure 172 bar... -
Page 15: Manifold Component Specifications
October 2020 Service and Repair Manual Specifications Manifold Component Specifications Plug Torque 36 in-lbs / 4 Nm SAE No. 4 10 ft-lbs / 13 Nm SAE No. 4 SAE No. 6 14 ft-lbs / 19 Nm SAE No. 8 38 ft-lbs / 51 Nm 41 ft-lbs / 55 Nm SAE No. -
Page 16: Deutz D2011 L30I Engine Specifications
Service and Repair Manual October 2020 Specifications Deutz D2011 L03i Engine Oil temperature switch Displacement 142 cu in Temperature switch point 300°F 2.33 liters 149°C Number of cylinders Oil pressure switch Bore and Stroke 3.7 x 4.4 inches Oil pressure switch point 22 psi 94 x 112 mm 1.5 bar... -
Page 17: Deutz Td 2.2 L3 Engine Specifications
October 2020 Service and Repair Manual Specifications Deutz TD 2.2 L3 Engine Fuel requirement Displacement 134 cu. in For fuel requirements, refer to the engine 2,2 liters Operator's Manual for your engine. Number of cylinders Engine coolant capacity 2.5 gallons 9,5 liters Bore and Stroke 3.6 x 4.3 inches... -
Page 18: Machine Torque Specifications
Service and Repair Manual October 2020 Specifications Machine Torque Specifications Platform Rotator 3/4 -10 center bolt, GR 8 380 ft-lbs 515 Nm 3/8 -16 bolts, GR 8 44 ft-lbs 60 Nm Turntable rotate assembly Rotate bearing mounting bolts, 180 ft-lbs lubricated 244 Nm Drive motor/brake mounting bolts,... -
Page 19: Hydraulic Hose And Fitting Torque Specifications
Your machine is equipped with Parker Seal-Lok™ ORFS or 37° JIC fittings and hose ends. 14 ft-lbs / 19 Nm Genie specifications require that fittings and hose 23 ft-lbs / 31.2 Nm ends be torqued to specification when they are 36 ft-lbs / 54.2 Nm... -
Page 20: Torque Procedure
Note: The O-rings used in the Parker Seal Lok™ fittings and hose ends are custom-size O-rings. They are not standard SAE size O-rings. They are available in the O-ring field service kit (Genie part number 49612). 2 Lubricate the O-ring before installation. - Page 21 October 2020 Service and Repair Manual Specifications 3 Working clockwise on the body hex fitting, make a second mark with a permanent ink marker to indicate the proper tightening position. Refer to Illustration 2. Note: Use the JIC 37° Fittings table in this section to determine the correct number of flats, for the proper tightening position.
-
Page 22: Repair Procedures
Service and Repair Manual October 2020 Repair Procedures This page intentionally left blank Z®-51/31J Part No. 1268553GT... -
Page 23: Introduction
Be sure that all necessary tools and parts are available and ready for use. Use only Genie approved replacement parts. Read each procedure completely and adhere to the instructions. Attempting shortcuts may produce hazardous conditions. - Page 24 Service and Repair Manual October 2020 Repair Procedures About This Section Most of the procedures in this section should only be performed by a trained service professional in a suitably equipped workshop. Select the appropriate repair procedure after troubleshooting the problem. Perform disassembly procedures to the point where repairs can be completed.
-
Page 25: Platform Controls
October 2020 Service and Repair Manual Platform Controls Platform Controls ALC-500 Circuit Board The platform control box contains one printed circuit board. The ALC-500 circuit board inside Note: When the ALC-500 circuit board is replaced, the platform control box controls all proportional the joystick controllers will need to be calibrated. -
Page 26: Joysticks
Service and Repair Manual October 2020 Platform Controls 7 Return the joystick to the neutral position, pause for a moment, then move the joystick Joysticks full stroke in the opposite direction. Hold for 5 seconds and return the joystick to the neutral position. -
Page 27: How To Adjust The Joystick Max-Out Setting
October 2020 Service and Repair Manual Platform Controls How to Adjust the Joystick 8 Start the engine from the platform controls and press down the foot switch. Max-out Setting 9 Start a timer and activate the machine function The max-out setting of a joystick controls the that needs to be adjusted. -
Page 28: How To Adjust The Joystick Ramp Rate Setting
Service and Repair Manual October 2020 Platform Controls How to Adjust the Joystick 8 Start the engine from the platform controls and press down the foot switch. Ramp Rate Setting 9 Start a timer and simultaneously move the The ramp rate setting of a joystick controls the joystick in either direction full stroke. -
Page 29: How To Adjust The Joystick Treshold Setting
October 2020 Service and Repair Manual Platform Controls How to Adjust the Joystick Note: Do not operate any machine function during the 10 second waiting time.SENSOR SETTINGS Threshold Setting is shown on the display. The threshold setting of a joystick is the minimum Ramp rate (factory settings) output at which a function proportional valve can Primary boom up/down... - Page 30 Service and Repair Manual October 2020 Platform Controls 9 Select a boom function joystick to set the threshold. 10 Slowly move the joystick off center in either direction just until the function begins to move. 11 Slowly move the joystick back towards the neutral position.
-
Page 31: Repair Procedures, Continued Platform Components
October 2020 Service and Repair Manual Platform Controls 2-1 Platform Leveling Slave 4 Tag, disconnect and plug the hydraulic hoses from the slave cylinder at the unions and Cylinder connect them together using a connector. Connect the hoses from the cylinder together using a connector. -
Page 32: Platform Rotator
Service and Repair Manual October 2020 Platform Controls How to Bleed the Slave Cylinder Platform Rotator How to Bleed the Platform 1 Simultaneously activate the boom up function and the platform level up function until the Rotator boom is fully raised. Note: This procedure will require two people. -
Page 33: Platform Overload System
October 2020 Service and Repair Manual Platform Components Bodily injury hazard. Spraying WARNING Platform Overload System hydraulic oil can penetrate and burn skin. Loosen hydraulic connections very slowly to allow How to Calibrate the Platform the oil pressure to dissipate gradually. - Page 34 Service and Repair Manual October 2020 Platform Components 5 Move the platform up and down by hand, so Note: There may be a 2 second delay before it bounces approximately 2.5 to 5 cm / 1 to 2 the platform overload indicator lights and alarm inches.
- Page 35 October 2020 Service and Repair Manual Platform Components 9 Test all machine functions from the platform controls. Result: All platform control functions should not operate. 10 Turn the key switch to ground control. 11 Test all machine functions from the ground controls.
-
Page 36: Jib Boom Components
Service and Repair Manual October 2020 Jib Boom Components 7 Remove the pin retaining fasteners from both platform rotator pivot pins. Do not remove the Jib Boom pins. 8 Use a soft metal drift to remove the leveling How to Remove the Jib Boom arm pivot pin and let the leveling arms hang down. -
Page 37: Boom Lift Cylinder
October 2020 Service and Repair Manual Jib Boom Components 16 Use a soft metal drift to remove the pin and let the cylinder hang down. Jib Boom Lift Cylinder Crushing hazard. The jib boom WARNING could fall when the barrel- How to Remove the Jib Boom end pivot pin is removed if not properly supported by the... - Page 38 Service and Repair Manual October 2020 Jib Boom Components 4 Use a soft metal drift to tap the jib boom lift cylinder rod-end pivot pin half way out. Then lower one of the leveling arms to the ground. Tap the pin the other direction and lower the opposite leveling arm.
-
Page 39: Primary Boom Components
October 2020 Service and Repair Manual Primary Boom Components 6 Tag, disconnect and plug the hydraulic hoses from the "V1" and "V2" ports on the Cable Track counterbalance valve manifold located on the platform rotator. Cap the fittings on the manifold. - Page 40 Service and Repair Manual October 2020 Primary Boom Components 9 Tag, disconnect and plug the platform rotator 13 Attach a lifting strap from an overhead 5 ton / hydraulic hoses at the union located above the 5,000 kg capacity crane to the platform end of primary boom lift cylinder.
-
Page 41: How To Repair The Cable Track
24 Remove the cable track mounting fasteners Note: A 7 link repair section of cable track is that attach the lower cable track to the primary available through the Genie Service Parts boom. Department. 25 Remove the cable track from the machine and place it on a structure capable of supporting it. -
Page 42: Primary Boom
Service and Repair Manual October 2020 Primary Boom Components 6 Remove the pin retaining fastener from the master cylinder barrel-end pivot pin. Use a soft Primary Boom metal drift to remove the pin. Then lower the cylinder and let it hang down. How to Remove the Primary Component damage hazard. -
Page 43: How To Disassemble The Primary Boom
October 2020 Service and Repair Manual Primary Boom Components How to Disassemble the Primary 14 Attach a 5 ton / 5,000 kg overhead crane to the center point of the primary boom. Boom 15 Attach a similar lifting device to the primary Complete disassembly of the boom is only boom lift cylinder. -
Page 44: Primary Boom Lift Cylinder
Service and Repair Manual October 2020 Primary Boom Components 6 Remove the external snap rings from the extension cylinder rod-end pivot pins at the Primary Boom Lift Cylinder platform end of the extension tube. Use a soft metal drift to remove the pins. The primary boom lift cylinder raises and lowers 7 Support and slide the extension cylinder out of the primary boom. -
Page 45: Primary Boom Extension Cylinder
October 2020 Service and Repair Manual Primary Boom Components 6 Tag, disconnect and plug the primary boom lift cylinder hydraulic hoses. Cap the fittings on the Primary Boom Extension cylinder. Cylinder Bodily injury hazard. Spraying WARNING hydraulic oil can penetrate and The primary boom extension cylinder extends and burn skin. -
Page 46: Platform Leveling Master Cylinder
Service and Repair Manual October 2020 Primary Boom Components 4 Tag, disconnect and plug the primary boom extension cylinder hydraulic hoses. Cap the Platform Leveling Master fittings on the cylinder. Cylinder Bodily injury hazard. Spraying WARNING hydraulic oil can penetrate and The master cylinder acts as a pump for the slave burn skin. - Page 47 October 2020 Service and Repair Manual Primary Boom Components 4 Remove the pin retaining fasteners from the master cylinder barrel-end pivot pin. 5 Place a rod through the barrel-end pivot pin and twist to remove the pin. 6 Remove the pin retaining fastener from the rod- end pivot pin.
-
Page 48: Secondary Boom Components
Service and Repair Manual October 2020 Secondary Boom Components Secondary Boom Components 6 secondary boom lift cylinder (2) 7 lower secondary boom (number 4 arm) 1 upper secondary boom (number 1 arm) 8 turntable pivot 2 upper tension link (number 2 arm) 9 boom rest 3 lower tension link (number 3 arm) 10 upper pivot... -
Page 49: Secondary Boom
October 2020 Service and Repair Manual Secondary Boom Components 6 Tag, disconnect and plug the hydraulic hoses at the primary boom lift cylinder. Cap the fittings Secondary Boom on the cylinder. Bodily injury hazard. Spraying WARNING How to Disassemble the hydraulic oil can penetrate and burn skin. - Page 50 Service and Repair Manual October 2020 Secondary Boom Components 10 Remove the pin retaining fasteners from both 17 Attach a lifting strap from a second overhead sides of the secondary boom lift cylinder rod- crane to the number 1 arm at the mid-point end pivot pin and barrel-end pivot pin.
- Page 51 October 2020 Service and Repair Manual Secondary Boom Components 24 Remove the hose and cable covers from the 34 Use a soft metal drift to drive each pin out. top of the number 2 arm. Then remove the mid-pivot from the secondary boom assembly.
- Page 52 Service and Repair Manual October 2020 Secondary Boom Components 40 Remove the number 2 arm from the machine. 46 Tag, disconnect and plug the fuel hoses from the fuel tank. Clean up any fuel that may have Crushing hazard. The number 2 spilled.
-
Page 53: Secondary Boom Lift Cylinder
October 2020 Service and Repair Manual Secondary Boom Components 54 Remove the number 3 arm from the machine. Secondary Boom Lift Cylinder Crushing hazard. The number 3 WARNING arm could become unbalanced and fall when removed from There are two secondary boom lift cylinders the machine if not properly incorporated in the structure of the secondary supported by the overhead... - Page 54 Service and Repair Manual October 2020 Secondary Boom Components 3 Tag, disconnect and plug the hydraulic hoses on the secondary boom lift cylinder. Bodily injury hazard. Spraying WARNING hydraulic oil can penetrate and burn skin. Loosen hydraulic connections very slowly to allow the oil pressure to dissipate gradually.
-
Page 55: Engines
October 2020 Service and Repair Manual Engines 6-2 Flex Plate RPM Adjustment The flex plate acts as a coupler between the engine and the pump. It is bolted to the engine Refer to Maintenance Procedure in the appropriate flywheel and has a splined center to drive the Maintenance Manual for your machine, Check and pump. -
Page 56: How To Install The Flex Plate
Deutz Models 4 Apply a high viscosity coupling grease (Genie part number 128025) to the splines of the pump shaft and flex plate. Grease Specification Shell Alvania®... -
Page 57: Engine Fault Codes - Deutz Td 2.2 L3 Models
October 2020 Service and Repair Manual Engines Engine Fault Codes - Diesel Particle Filter Deutz TD 2.2 L3 Models Regeneration - Deutz TD 2.2 L3 Engine How to Retrieve Engine Fault Codes The combustion of diesel fuel results in soot, which is separated in the diesel particle filter The ECM constantly monitors the engine by the (DPF). -
Page 58: Hydraulic Pumps
Service and Repair Manual October 2020 Hydraulic Pumps 2 Tag, disconnect and plug the lift/steer pump hydraulic hoses. Cap the fittings on the pump. Lift/Steer Pump Bodily injury hazard. Spraying WARNING hydraulic oil can penetrate and How to Remove the Lift/Steer burn skin. -
Page 59: Drive Pump
Any internal service to the pump condition. should only be performed at an authorized Eaton Hydraulics center. Call Genie Service Department to locate your local authorized service center. How to Remove the Drive Pump Component damage hazard. - Page 60 Service and Repair Manual October 2020 Hydraulic Pumps How to Prime the Pump 5 Carefully pull the drive pump out until the pump coupler separates from the flex plate. 1 Connect a 0 to 600 psi / 0 to 41 bar pressure 6 Remove the drive pump from the machine.
-
Page 61: Manifolds
October 2020 Service and Repair Manual Manifolds Function Manifold Components The function manifold is located next to the hydraulic tank underneath the ground controls side cover Index Description Schematic Function Torque Item Solenoid valve, 3 position 4 way Platform level up/down 25 ft-lbs / 34 Nm Solenoid valve, 3 position 4 way Platform rotate left/right and... - Page 62 Service and Repair Manual October 2020 Manifolds Z®-51/31J Part No. 1268553GT...
- Page 63 October 2020 Service and Repair Manual Manifolds Function Manifold Components, continued Index Description Schematic Function Torque Item Check valve, 5 psi / 0.3 bar Differential sensing circuit, 12-14 ft-lbs / 16-19 turntable rotate Check valve, 5 psi / 0.3 bar Differential sensing circuit, 12-14 ft-lbs / 16-19 primary boom retract...
- Page 64 Service and Repair Manual October 2020 Manifolds Z®-51/31J Part No. 1268553GT...
-
Page 65: Valve Adjustments-Function Manifold
October 2020 Service and Repair Manual Manifolds How to Adjust the Secondary Boom Down Relief Valve Valve Adjustments - Function Manifold Note: Perform this procedure with the boom in the stowed position. How to Adjust the System Note: Refer to Function Manifold Component list to Relief Valve locate the secondary boom down relief valve. -
Page 66: Jib Boom / Platform Rotate Manifold Components
Service and Repair Manual October 2020 Manifolds Jib Boom / Platform Rotate Manifold Components The jib boom / platform rotate manifold is mounted to the platform support. Index Description Schematic Function Torque Item Solenoid valve, 2 position 3 way Platform rotate/jib boom select 8-10 ft-lbs / 11-14 Nm Z®-51/31J Part No. -
Page 67: Turntable Rotation Manifold Components
October 2020 Service and Repair Manual Manifolds Turntable Rotation Manifold Components The turntable rotation manifold is mounted to the turntable rotation motor located in the boom storage compartment. Index Description Schematic Function Item Counterbalance valve Turntable rotate right Counterbalance valve Turntable rotate left Part No. -
Page 68: Directional Valve Manifold Components
Service and Repair Manual October 2020 Manifolds Directional Valve Manifold Components The directional valve manifold is mounted inside the drive chassis at the non-steer end. Index Description Schematic Item Function Torque Breather 20-25 ft-lbs / 27-33 Nm Spool valve Directional control Z®-51/31J Part No. -
Page 69: How To Set Up The Directional Valve Linkage
6 stability of the machine resulting through 11 OR consult Genie Product Support. in the machine tipping over. 3 Check the tire pressure in all four tires and add air if needed to meet specification. -
Page 70: Traction Manifold Components
Service and Repair Manual October 2020 Manifolds Traction Manifold Components The traction manifold is mounted inside the drive chassis at the non-steer end. Index Description Schematic Function Torque Item Flow divider/combiner valve Controls flow to flow divider/ 25-30 ft-lbs / 34-41 combiner valves 2 and 4 Flow divider/combiner valve Controls flow to non-steer end drive... - Page 71 October 2020 Service and Repair Manual Manifolds Part No. 1268553GT Z®-51/31J...
-
Page 72: Valve Adjustment, Traction Manifold
Service and Repair Manual October 2020 Manifolds Valve Adjustments,Traction Manifold How to Adjust the Charge Pressure Relief Valve 1 Connect a 0 to 600 psi / 0 to 50 bar pressure gauge to the test port on the drive pump. 2 Hold the charge pressure relief valve and remove the cap (item AH). -
Page 73: Valve Coils
30%. coil. Result: If the resistance is not within Resistor. 10Ω specification, plus or minus 30%, replace the Genie part number 27287 coil. Note: The battery should read 9V DC or more Valve Coil Resistance Specification when measured across the terminals. - Page 74 Service and Repair Manual October 2020 Manifolds 6 At the battery or coil terminals, reverse the connections. Note and record the current reading. Result: Both current readings are greater than 0 mA and are different by a minimum of 20%. The coil is good.
-
Page 75: Turntable Rotation Components
October 2020 Service and Repair Manual Turntable Rotation Components 2 Secure the turntable from rotating with the turntable rotation lock. Turntable Rotation Assembly Tip-over hazard. The machine DANGER could tip over when the turntable How to Remove the Turntable rotation assembly is removed if Rotation Assembly the turntable rotation lock is not in the locked position. - Page 76 Service and Repair Manual October 2020 Turntable Rotation Components 3 Remove the safety pin from the engine pivot 8 Remove the turntable rotation assembly plate latch. mounting fasteners. Note: The engine pivot plate latch is located 9 Carefully remove the turntable rotation under the engine turntable pivot plate at the assembly from the machine.
-
Page 77: Axle Components
October 2020 Service and Repair Manual Axle Components 10-1 3 Attach a lifting strap from an overhead crane to the barrel end of the oscillating cylinder. Oscillating Axle Cylinders 4 Remove the pin retaining fasteners from the barrel-end pivot pin. Use a soft metal drift to The oscillating axle cylinders extend and retract remove the pin. -
Page 78: Fault Codes
Service and Repair Manual October 2020 Fault Codes Before Troubleshooting: Read, understand and obey the safety rules and operating instructions in the appropriate operator's manual on your machine. Be sure that all necessary tools and test equipment are available and ready for use. Observe and Obey: Read each appropriate fault code thoroughly. -
Page 79: Control System Fault Codes
October 2020 Service and Repair Manual Control System Fault Codes Control System 3 Determine the error source: The red LED indicates the error source and will flash two separate codes. The first code will indicate the How to Retrieve Control first digit of the two digit code, flashing once per second. -
Page 80: Control System Fault Codes
Service and Repair Manual October 2020 Control System Fault Codes Error Source Error Type Condition Solution Name Name Primary Up / Value at 5V Function is inoperative.Alarm Cycle power off, then on Down Joystick. sounds indicating a fault after problem has been corrected. - Page 81 October 2020 Service and Repair Manual Control System Fault Codes Error Source Error Type Condition Solution Name Name Secondary Fault Valve is operating outside of limits. Cycle power off, then on Up / Down. Alarm sounds indicating a fault. after problem has been Directional corrected.
- Page 82 Service and Repair Manual October 2020 Control System Fault Codes Error Source Error Type Condition Solution Name Name Primary Extend/ Fault Platform Ext/Ret frozen at neutral Power up controller with Retract Switch problem corrected Drive Joystick Value at 5V Limited speed and direction. Cycle power off, then on Frozen at zero and neutral.
- Page 83 October 2020 Service and Repair Manual Control System Fault Codes Error Source Error Type Condition Solution Name Name High Drive Fault Motor speed in the low state. Cycle power off, then on Motor Speed Alarm sounds indicating a fault after problem has been Valve corrected.
-
Page 84: Fault Codes Display
Service and Repair Manual October 2020 Fault Codes Display How to Retrieve Active Engine With an active fault and the engine running: (preferred method) Fault Codes - Deutz TD 2.2 L3 1 At the ground controls, activate the auxiliary Models pump toggle switch to shut the engine off. - Page 85 October 2020 Service and Repair Manual Fault Codes Display Soft Key Functions and Icons - Deutz TD 2.2 L3 Models 1 Exit / Back one screen 2 Scroll up • Increase Time / Date • Decrease brightness 3 Scroll down • Decrease Time / Date • Increase brightness 4 Main menu •...
- Page 86 Service and Repair Manual October 2020 Fault Codes Display Main Menu Structure - Deutz TD 2.2 L3 Models Z®-51/31J Part No. 1268553GT...
-
Page 87: Deutz Td 2.2 L3 Engine Fault Codes
October 2020 Service and Repair Manual Deutz TD 2.2 L3 Engine Fault Codes 1072 Engine exhaust gas recirculation. Pressure above normal operational range. 1073 Engine exhaust gas recirculation. Pressure below normal operational range. 1074 Engine exhaust gas recirculation. Negative measured differential pressure. - Page 88 Service and Repair Manual October 2020 Deutz TD 2.2 L3 Engine Fault Codes DTC = Diagnostic Trouble Code 1126 1176 Engine turbocharger compressor FMI = Failure Mode Identifier intake pressure below normal operational range. SPN = Suspect Parameter Number 1127 1209 Engine exhaust pressure turbine upstream tuck check failed.
- Page 89 October 2020 Service and Repair Manual Deutz TD 2.2 L3 Engine Fault Codes DTC = Diagnostic Trouble Code 1195 7103 Rail fuel pressure value is below FMI = Failure Mode Identifier minimum rail pressure threshold. SPN = Suspect Parameter Number 1197 7103 M a x i m u m r a i l f u e l p r e s s u r e...
- Page 90 Service and Repair Manual October 2020 Deutz TD 2.2 L3 Engine Fault Codes DTC = Diagnostic Trouble Code 1291 3509 Sensor supply voltage 1 from ECU FMI = Failure Mode Identifier current above normal or grounded circuit. SPN = Suspect Parameter Number 1292 3509 Sensor supply voltage 1 from ECU...
- Page 91 October 2020 Service and Repair Manual Deutz TD 2.2 L3 Engine Fault Codes DTC = Diagnostic Trouble Code 1377 Engine throttle valve 1, position 1 FMI = Failure Mode Identifier voltage below normal or shorted to low. Short circuit to ground 1. SPN = Suspect Parameter Number 1378 Engine throttle valve 1, position 1...
- Page 92 Service and Repair Manual October 2020 Deutz TD 2.2 L3 Engine Fault Codes DTC = Diagnostic Trouble Code 3349 Timeout error of CAN receive frame FMI = Failure Mode Identifier active TSC1AR. SPN = Suspect Parameter Number 3349 Timeout error of CAN receive frame passive TSC1AR.
- Page 93 October 2020 Service and Repair Manual Deutz TD 2.2 L3 Engine Fault Codes DTC = Diagnostic Trouble Code 5763 Engine exhaust gas recirculation 1, FMI = Failure Mode Identifier actuator 1 voltage above normal or shorted to high. SPN = Suspect Parameter Number 5763 Engine exhaust gas recirculation 1, actuator 1 voltage below normal or...
- Page 94 Service and Repair Manual October 2020 Deutz TD 2.2 L3 Engine Fault Codes DTC = Diagnostic Trouble Code 2797 Engine fuel 1 injector, Group 1. FMI = Failure Mode Identifier Number of possible injections limited by the injection valve SPN = Suspect Parameter Number 2797 Engine fuel 1 injector, Group 1 voltage below normal or shorted...
- Page 95 October 2020 Service and Repair Manual Deutz TD 2.2 L3 Engine Fault Codes DTC = Diagnostic Trouble Code 5362 Engine cylinder 5 fuel injection FMI = Failure Mode Identifier quantity above normal or grounded circuit. Short circuit between high- SPN = Suspect Parameter Number side and low-side of the power stage.
- Page 96 Service and Repair Manual October 2020 Deutz TD 2.2 L3 Engine Fault Codes DTC = Diagnostic Trouble Code 5357 Engine fuel injection error for FMI = Failure Mode Identifier multiple cylinders. Diagnostic fault check to report the error due to SPN = Suspect Parameter Number injection quantity correction.
-
Page 97: Schematics
October 2020 Service and Repair Manual Schematics About This Section There are two groups of schematics in this section. Electrical Schematics Electrocution/burn hazard. WARNING Contact with electrically charged Observe and Obey: circuits could result in death or serious injury. Remove all rings, Troubleshooting and repair procedures shall be watches and other jewelry. -
Page 98: Electrical Symbol Legends
Service and Repair Manual October 2020 Electrical Symbols Legends Z®-51/31J Part No. 1268553GT... -
Page 99: Hydraulic Symbol Legends
October 2020 Service and Repair Manual Hydraulic Symbols Legends Part No. 1268553GT Z®-51/31J... -
Page 100: Electrical Component And Wire Color Legends
Service and Repair Manual October 2020 Electrical Component and Wire Color Legends Item Description Item Description Battery Horn or Alarm Engine Start - 12V DC Tilt/load sense alarm Connector Descent (ground) Power to platform, 12v cable connector Load sense (ground) Joystick Footswitch input connector Options connector... - Page 101 October 2020 Service and Repair Manual Electrical Component and Wire Color Legends Item Description Item Description Motor Toggle Switch Auxiliary pump Auxiliary pump switch Engine starter Start engine switch Fuel pump Fuel select switch (ford efi only) Button Hi/low rpm switch Red emergency stop button Glow plug switch Emergency stop button...
- Page 102 Service and Repair Manual October 2020 Electrical Component and Wire Color Legends Item Description Wire Color Legend Module Item Description Ignition start module Blue EDC - drive pump Black Alc 500 joystick controller card Brown Control module Green Load sense module Orange Time delay relay - 2 seconds, 10A Purple...
-
Page 103: Electrical Schematics - Options
Service and Repair Manual October 2020 Ground Control Box Terminal Strip Wiring Diagram, Options... -
Page 104: Ground Control Box Terminal Strip Wiring Diagram, Options
Service and Repair Manual October 2020 Ground Control Box Terminal Strip Wiring Diagram, Options Z®-51/31J Part No. 1268553GT... -
Page 105: Platform Control Box Wiring Diagram, Options
Service and Repair Manual October 2020 Platform Control Box Wiring Diagram, Options Z®-51/31J Part No. 1268553GT... - Page 106 Service and Repair Manual October 2020 Platform Control Box Wiring Diagram, Options...
-
Page 107: Wiring Diagram - Battery, Hydraulic Oil And Engine Oil Heater Options
Service and Repair Manual October 2020 Wiring Diagram - Battery, Hydraulic Oil and Engine Oil Heater Options... - Page 108 Service and Repair Manual October 2020 Wiring Diagram - Battery, Hydraulic Oil and Engine Oil Heater Options Z®-51/31J Part No. 1268553GT...
-
Page 109: Electrical Schematics Options
Service and Repair Manual October 2020 Electrical Schematic, Options Z®-51/31J Part No. 1268553GT... - Page 110 Service and Repair Manual October 2020 Electrical Schematic, Options...
-
Page 111: Electrical Schematics - As Models
Service and Repair Manual October 2020 Electrical Schematic (AS) -
Page 112: Electrical Schematics (As)
Service and Repair Manual October 2020 Electrical Schematic (AS) Z®-51/31J Part No. 1268553GT... - Page 113 Service and Repair Manual October 2020 Electrical Schematic (AS) Z®-51/31J Part No. 1268553GT...
- Page 114 Service and Repair Manual October 2020 Electrical Schematic (AS)
-
Page 115: Ground Control Box Terminal Strip Wiring Diagram (As)
Service and Repair Manual October 2020 Ground Control Box Terminal Strip Wiring Diagram (AS) - Page 116 Service and Repair Manual October 2020 Ground Control Box Terminal Strip Wiring Diagram (AS) Z®-51/31J Part No. 1268553GT...
-
Page 117: Ground Control Box Switch Panel Wiring Diagram (As)
Service and Repair Manual October 2020 Ground Control Box Switch Panel Wiring Diagram (AS) Z®-51/31J Part No. 1268553GT... - Page 118 Service and Repair Manual October 2020 Ground Control Box Switch Panel Wiring Diagram (AS)
-
Page 119: Platform Control Box Wiring Diagram (As)
Service and Repair Manual October 2020 Platform Control Box Wiring Diagram (AS) - Page 120 Service and Repair Manual October 2020 Platform Control Box Wiring Diagram (AS) Z®-51/31J Part No. 1268553GT...
-
Page 121: Platform Control Box Switch Panel Wiring Diagram (As)
Service and Repair Manual October 2020 Platform Control Box Switch Panel Wiring Diagram (AS) Z®-51/31J Part No. 1268553GT... - Page 122 Service and Repair Manual October 2020 Platform Control Box Switch Panel Wiring Diagram (AS)
-
Page 123: Electrical Schematics - Ce Models
Service and Repair Manual October 2020 Electrical Schematic (CE) -
Page 124: Electrical Schematics (Ce)
Service and Repair Manual October 2020 Electrical Schematic (CE) Z®-51/31J Part No. 1268553GT... - Page 125 Service and Repair Manual October 2020 Electrical Schematic (CE) Z®-51/31J Part No. 1268553GT...
- Page 126 Service and Repair Manual October 2020 Electrical Schematic (CE)
-
Page 127: Ground Control Box Terminal Strip Wiring Diagram (Ce)
Service and Repair Manual October 2020 Ground Control Box Terminal Strip Wiring Diagram (CE) - Page 128 Service and Repair Manual October 2020 Ground Control Box Terminal Strip Wiring Diagram (CE) Z®-51/31J Part No. 1268553GT...
-
Page 129: Ground Control Box Switch Panel Wiring Diagram (Ce)
Service and Repair Manual October 2020 Ground Control Box Switch Panel Wiring Diagram (CE) Z®-51/31J Part No. 1268553GT... - Page 130 Service and Repair Manual October 2020 Ground Control Box Switch Panel Wiring Diagram (CE)
-
Page 131: Platform Control Box Wiring Diagram (Ce)
Service and Repair Manual October 2020 Platform Control Box Wiring Diagram (CE) - Page 132 Service and Repair Manual October 2020 Platform Control Box Wiring Diagram (CE) Z®-51/31J Part No. 1268553GT...
-
Page 133: Platform Control Box Switch Panel Wiring Diagram (Ce)
Service and Repair Manual October 2020 Platform Control Box Switch Panel Wiring Diagram (CE) Z®-51/31J Part No. 1268553GT... - Page 134 Service and Repair Manual October 2020 Platform Control Box Switch Panel Wiring Diagram (CE)
-
Page 135: Electrical Schematics - Deutz Td 2.2 L3, Ce Models
Service and Repair Manual October 2020 Electrical Schematic, Deutz TD 2.2 L3 Models (CE) - Page 136 Service and Repair Manual October 2020 Electrical Schematic, Deutz TD 2.2 L3 Models (CE) Z®-51/31J Part No. 1268553GT...
- Page 137 Service and Repair Manual October 2020 Electrical Schematic, Deutz TD 2.2 L3 Models (CE) Z®-51/31J Part No. 1268553GT...
- Page 138 Service and Repair Manual October 2020 Electrical Schematic, Deutz TD 2.2 L3 Models (CE) Z®-51/31J Part No. 1268553GT...
- Page 139 Service and Repair Manual October 2020 Electrical Schematic, Deutz TD 2.2 L3 Models (CE) Z®-51/31J Part No. 1268553GT...
- Page 140 Service and Repair Manual October 2020 Electrical Schematic, Deutz TD 2.2 L3 Models (CE) Z®-51/31J Part No. 1268553GT...
- Page 141 Service and Repair Manual October 2020 Electrical Schematic, Deutz TD 2.2 L3 Models (CE) Z®-51/31J Part No. 1268553GT...
-
Page 142: Hydraulic Schematics
Service and Repair Manual October 2020 Hydraulic Schematic... -
Page 143: Hydraulic Schematic - 4Wd Models
Service and Repair Manual October 2020 Hydraulic Schematic Z®-51/31J Part No. 1268553GT... - Page 144 California Proposition 65 WARNING Operating, servicing and maintaining this equipment, passenger vehicle or off-highway motor vehicle can expose you to chemicals including engine exhaust, carbon monoxide, phthalates, and lead, which are known to the State of California to cause cancer and birth defects or other reproductive harm.
Need help?
Do you have a question about the Z-51/30J and is the answer not in the manual?
Questions and answers