Chapters
Table of Contents

Related Manuals for Feig Electronic OBID i-scan ID ISC.ANT1300/680


Summary of Contents for Feig Electronic OBID i-scan ID ISC.ANT1300/680
- Page 1 ® APPLICATION NOTE OBID i-scan ID ISC.ANT1300/680 Antennen Aufbau mit 3-5 Antennen Multiple-Gate setup with 3-5 Antennas (deutsch / english) final public (B) 2008-03-19 N71200-0-de-ID-B.doc...
- Page 2 ® OBID i-scan Application Note ID ISC.ANT1300/680-A FEIG ELECTRONIC GmbH Seite 2 von 31 N71200-0-de-ID-B.doc...
- Page 3 ® OBID i-scan Application Note ID ISC.ANT1300/680-A deutsche Version ab Seite 3 english version from page 3 FEIG ELECTRONIC GmbH Seite 3 von 31 N71200-0-de-ID-B.doc...
- Page 4 Hinweise jederzeit dankbar. Die in diesem Dokument gemachten Installationsempfehlungen gehen von günstigsten Rahmenbedingun- gen aus. FEIG ELECTRONIC GmbH übernimmt weder Gewähr für die einwandfreie Funktion in system- fremden Umgebungen, noch für die Funktion eines Gesamtsystems, welches die in diesem Dokument be- schriebenen Geräte enthält.
-
Page 5: Table Of Contents
2.3.2. Aufbau der Antennen Gates ..................10 2.3.3. Einstellung des Multiplexer ..................11 2.3.4. Konfiguration des Readers mit Multiplexer ..............13 2.3.5. Abgleichen der Antennen ....................15 2.3.6. Konfiguration des Readers für Signalgeber..............16 2.4. Aktivieren des Buffered Read Mode................17 FEIG ELECTRONIC GmbH Seite 5 von 31 N71200-0-de-ID-B.doc... - Page 6 Die Antennen müssen einen Mindestabstand von 20 cm von allen größeren Metallteilen haben! Ab einem Abstand kleiner 50 cm von der Antenne zu Metall- teilen muss mit Einbußen in der Lesereichweite gerechnet werden. FEIG ELECTRONIC GmbH Seite 6 von 31 N71200-0-de-ID-B.doc...
-
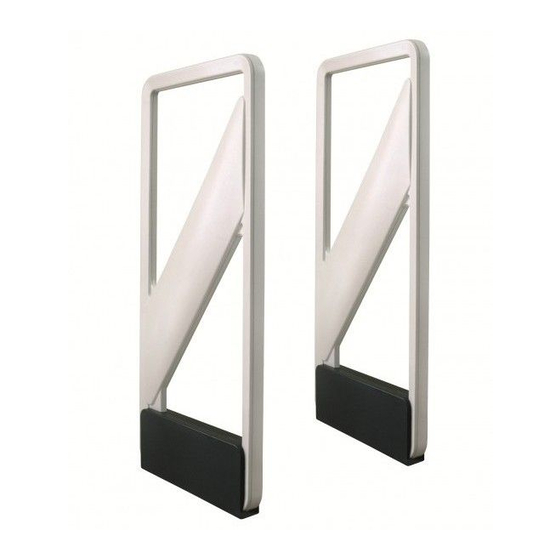
Page 7: Typischer Antennenaufbau (Gate Aus 3 Bis 5 Antennen)
3 Durchgänge (4 Antennen) 3,6m (+7,2m-Kabel) Typ A mit Reader ANT2 ANT3 ANT1 und Multiplexer 3,6m-Kabel 4 Durchgänge (5 Antennen) 3,6m (+7,2m- 3,6m (+7,2m- Typ A mit Reader ANT1 ANT3 ANT4 ANT2 und Multiplexer 3,6m-Kabel FEIG ELECTRONIC GmbH Seite 7 von 31 N71200-0-de-ID-B.doc... -
Page 8: Antennenabstand Und Erfassungsgeschwindigkeit
1 m/s noch gelesen werden (SNR) ist unter anderem Abhängig von der Anzahl der Antennen und der Empfindlichkeit der Transponder. Bei drei Antennen können in der Regel bis zu 10 Stück ISO 15693 kompatible Transponder gleichzeitig gelesen werden, (siehe Montageanleitung, Kapitel Projekthinweise). FEIG ELECTRONIC GmbH Seite 8 von 31 N71200-0-de-ID-B.doc... -
Page 9: Aufbau Und Einstellungen Der Antennen Mit Multiplexer
® auf einem Personal Computer mit Microsoft Windows Betriebssystem benötigt. Die Service- ® software ist auf der OBID i-scan CD oder auf dem Download Bereich der Firma FEIG ELECTRONIC GmbH zu finden. FEIG ELECTRONIC GmbH Seite 9 von 31 N71200-0-de-ID-B.doc... -
Page 10: Aufbau Der Antennen Gates
Die koaxialen Kabel haben feste Längen. Sie dürfen nicht gekürzt und müssen daher zu kleinen Schleifen zusammengebunden werden (siehe Bild 2). Dabei sind alle Kabel möglichst weit vom Antennenleiter weg zu binden. Auf keinen Fall dürfen die Kabel das Aluminiumrohr berühren. Bild 2: Zusammenbinden der Kabel FEIG ELECTRONIC GmbH Seite 10 von 31 N71200-0-de-ID-B.doc... -
Page 11: Einstellung Des Multiplexer
Darstellung eingestellt werden. Mehr zur Einstellung des Multiplexers ID ISC.ANT.MUX ist in der entsprechenden Montageanleitung (M30201-xde-ID-B) dokumentiert. Bild 3: Position DIP-Switch und Jumper 2.3.3.1. Konfiguration des DIP-Schalters Der DIP-Schalter sollte laut folgender Tabelle konfiguriert werden: Tabelle 2: DIP-Schalter Konfiguration DIP-Schalter S1 FEIG ELECTRONIC GmbH Seite 11 von 31 N71200-0-de-ID-B.doc... - Page 12 Die Jumper JP1 bis JP8 müssen nach folgender Tabelle gesteckt werden. Tabelle 3: Konfiguration JP1-8 Jumper Position Zusätzlich sind die Jumper JP11 bis JP18 zu schließen, falls eine Antenne angeschlossen ist, um die DC Spannung an das Tunning Board zu führen. FEIG ELECTRONIC GmbH Seite 12 von 31 N71200-0-de-ID-B.doc...
-
Page 13: Konfiguration Des Readers Mit Multiplexer
„SUB-CARRIER“ – ASK • „DATA-RATE“ – High Hinweis: Die nationalen Funkvorschriften können andere • „NO-TS“ – 1 Timeslots Einstellungen erfordern. (siehe 4.7 Konfiguration des Le- • „AFI“ – Disabled sers gemäß der nationalen Funkvorschriften) FEIG ELECTRONIC GmbH Seite 13 von 31 N71200-0-de-ID-B.doc... - Page 14 „Number of Input 3 bis 5 Channels“ – 1 Input (Single Mode) • „MUX-Valid Time“ – 100 x 5 ms • Number of Output Channels“ => 3 .. 5 mit „Write“ speichern FEIG ELECTRONIC GmbH Seite 14 von 31 N71200-0-de-ID-B.doc...
-
Page 15: Abgleichen Der Antennen
Nach dem erfolgreichen Abgleichen werden alle Antennen grün angezeigt. Falls dies nicht auf Anhieb gelingt, Abgleichvorgang mit „Start Tuning“ erneut starten Nach dem erfolgreichen Abgleichen ist die Software DATuningTool wieder zu schließen. FEIG ELECTRONIC GmbH Seite 15 von 31 N71200-0-de-ID-B.doc... -
Page 16: Konfiguration Des Readers Für Signalgeber
Relais 1 eintragen (z.B.10 entspricht 1 Sekunde) „Output Active Time“ 10 x 100ms mit „Write“ speichern CFG9: Input/Output ΙΙ Relais 1 zu Antenne 1 bis 3 (4,5) zuordnen. 1 bis 5 mit „Write“ speichern FEIG ELECTRONIC GmbH Seite 16 von 31 N71200-0-de-ID-B.doc... -
Page 17: Aktivieren Des Buffered Read Mode
55 x 100 ms (innerhalb der Valid Time werden die Transponder Daten nur einmal im Buffer gespeichert) mit „Write“ speichern CFG1: Interface and Mode „Buffered Read Mode“ auswählen. mit „Write“ speichern FEIG ELECTRONIC GmbH Seite 17 von 31 N71200-0-de-ID-B.doc... - Page 18 FEIG ELECTRONIC call explicit attention that devices which are subject of this document are not designed with components and testing methods for a level of reliability suitable for use in or in connection with surgical implants or as critical components in any life support systems whose failure to perform can reasonably be expected to cause significant injury to a human.
- Page 19 4.3.3. Setting the Multiplexer ....................25 4.3.3.1. DIP Switch Configuration ................25 4.3.3.2. Jumper Configuration ..................26 4.3.4. Reader Configuration....................27 4.3.5. Tuning the Gate Antenna.....................29 4.3.6. Reader Setting for Indicators ..................30 4.4. Activating Buffered Read Mode ..................31 FEIG ELECTRONIC GmbH Page 19 of 31 N71200-0-de-ID-B.doc...
- Page 20 20 cm from all larger metal parts! At a distance of less than 50 cm between the antenna and metal parts the Reader range will be significantly reduced. FEIG ELECTRONIC GmbH Page 20 of 31...
-
Page 21: Typical Antenna Configuration
3 Aisles (4 antennas) 3,6m (+7,2m-cable) Typ A with Reader ANT2 ANT3 ANT1 and Multiplexer 3,6m-cable 4 Aisles (5 antennas) 3,6m (+7,2m-cable) 3,6m (+7,2m-cable) Typ A with Reader ANT1 ANT3 ANT4 ANT2 and Multiplexer 3,6m-cable FEIG ELECTRONIC GmbH Page 21 of 31 N71200-0-de-ID-B.doc... -
Page 22: Gate Width
For a three antenna set up it should be possible to read (SNR) up to 10 pieces of ISO15693 transponder at the same time (see condition at antenna manual, Chapter project notes). FEIG ELECTRONIC GmbH Page 22 of 31 N71200-0-de-ID-B.doc... -
Page 23: Configuration And Setup Using Antennas Type A With Multiplexer
Microsoft Windows . The service software is included on ® the OBID i-scan CD obtained from FEIG ELECTRONIC GmbH. Or can be downloaded from the Download Area. FEIG ELECTRONIC GmbH Page 23 of 31 N71200-0-de-ID-B.doc... -
Page 24: Configuration Of The Gate Antennas
(see Fig. 2). Tie all cables as far away from the antenna conductor as possible. The cables must never be allowed to contact the aluminum tube. Fig. 2: Connecting the cables FEIG ELECTRONIC GmbH Page 24 of 31 N71200-0-de-ID-B.doc... -
Page 25: Setting The Multiplexer
ID ISC.ANT.MUX Multiplexer can be found in the corresponding installation manual (M30201-xde-ID-B). Fig. 3: DIP-Switch and Jumper positions 4.3.3.1. DIP Switch Configuration The DIP switch should be configured as indicated in the following table: Table 1: DIP switch configuration DIP-switch S1 FEIG ELECTRONIC GmbH Page 25 of 31 N71200-0-de-ID-B.doc... -
Page 26: Jumper Configuration
Jumpers JP1 to JP8 must be set according to the following table. Table 2: Configuration JP1-8 Jumper Position In addition, close jumpers JP11 to JP18 if an antenna is connected, to provide the DC voltage to the tuning board. FEIG ELECTRONIC GmbH Page 26 of 31 N71200-0-de-ID-B.doc... -
Page 27: Reader Configuration
• „SUB-CARRIER“ – ASK • „DATA-RATE“ – High • „NO-TS“ – 1 Timeslot • „AFI“ – Disabled Note: National RF regulations may require different settings. (see M50700-4e-ID-B.doc) Set by clicking on “Write” FEIG ELECTRONIC GmbH Page 27 of 31 N71200-0-de-ID-B.doc... - Page 28 „Number of Input 3 to 5 Channels“ – 1 Input (Single Mode) • „MUX-Valid Time“ – 100 x 5 ms • „Number of Output Channels“ => 3 to 5 Set by clicking on “Write” FEIG ELECTRONIC GmbH Page 28 of 31 N71200-0-de-ID-B.doc...
-
Page 29: Tuning The Gate Antenna
A red marked antenna shows a not successful tuning. If this does not succeed on the first try, start the process again by clicking on „Start Tuning“ After successful tuning, close the DATuningTool. FEIG ELECTRONIC GmbH Page 29 of 31 N71200-0-de-ID-B.doc... -
Page 30: Reader Setting For Indicators
(10 corresponds to 1 second „REL 1“ 10 x 100ms Set by clicking on “Write” CFG9: Input/Output ΙΙ Assign Relay 1 to antenna 1 to 3 (4,5) 1 to 5 Set by clicking on “Write” FEIG ELECTRONIC GmbH Page 30 of 31 N71200-0-de-ID-B.doc... -
Page 31: Activating Buffered Read Mode
(within the Valid Time the transponder data will be stored in the buffer only once) Set by clicking on “Write” CFG1: Interface and Mode Select „Buffered Read Mode“. Set by clicking on “Write” FEIG ELECTRONIC GmbH Page 31 of 31 N71200-0-de-ID-B.doc...
Need help?
Do you have a question about the OBID i-scan ID ISC.ANT1300/680 and is the answer not in the manual?
Questions and answers