Table of Contents
Advertisement
Quick Links
Advertisement
Table of Contents

Related Manuals for wallee Yomani


Summary of Contents for wallee Yomani
- Page 1 USER MANUAL Yomani Custombweb GbmH...
-
Page 2: Table Of Contents
Table of contents Scope of Delivery Installation Instruction Keyboard Details Configuration Transactions and Postings Postings Cancellation of Postings Manual Entry of the Postings Daily Closing Currency Choice Support... -
Page 3: Scope Of Delivery
Scope of Delivery Power cable and power supply unit Serial (RS-232) cable with clip LAN - cable is not supplied... -
Page 4: Installation Instruction
Installation Instruction 1. Connect the Ethernet cable or the serial (RS-232) cable or both. 2. To connect the YOMANI to the USB master devices - an ECR, a PC or a merchant control unit - plug the USB device connector of the USB cable into the USB device port of the YOMANI. - Page 5 Installation Instruction - Optional Connect Merchant Unit 1. Connect the merchant unit to the base unit per USB cable. 2. Setup the device’s USB port service a. Keep the Menu button pressed while the base unit starts. The “Boot Menu” is dis- played. b. Select the item: HW-Info > USB port config > ‘Merchant Unit’ (1/5/2/OK/OK) c. Push repeatedly the Stop button until a black screen is displayed. The device is re- booting.
-
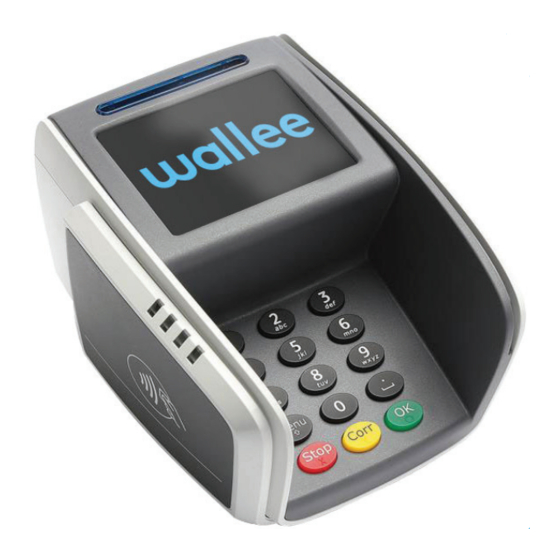
Page 6: Keyboard Details
Keyboard Details Choice-Buttons On the Touchscreen 1…9 Numerical Keys Stop Terminal on and off Confirms the switch off included selection or the Interruption of process entries... -
Page 7: Configuration
Configuration During configuration and initialization, the payment terminal settings are checked and updated. PROCEDURE - INSTALLATION OF THE TERMINAL KEY / SYMBOL CONFIGURING THE TERMINAL 1. Switch on the terminal by pressing Stop the “Stop” button 2. Press the «Menu» button Menu 3. Select Setup > Configuration 4. Enter the merchant password* 2005 5. Confirm the merchant password 6. Document printing INITIALISE THE TERMINAL INITIALISIEREN 1. Press the «Menu» button Menu 2. Select Setup > Initialisation 3. Enter the merchant password* 2005 4. Confirm merchant password 5. Select All 6. Document printing If problems should occur with your terminal, please reconfigure and reinitialize your terminal again briefly. * Your new Yomani terminal is configured with the 2005 merchant password by default. -
Page 8: Transactions And Postings
Transactions and Postings Contactless cards will be issued on demand. The payment terminal is held at a distance of less than 4 cm above the display. Chip cards are inserted with the chip forward pointing into the chip card reader. The card must remain in the reader until the payment process is completed. -
Page 9: Postings
Postings Damit Sie schneller zur Hauptfunktion des Bezahlens kommen, verfügt das Terminal über die Kurzwahltaste 5 . Das Symbol entspricht einer Aktion, die durch Ihren Kunden durchgeführt werden muss. ABLAUF – TRANSAKTIONEN / BUCHUNGEN TASTE / SYMBOL 1. Die Taste 5 drücken 2. Den Betrag eingeben 1 ... 9 3. Den Betrag bestätigen 4. Die Karte mit Chip in den Chipkartenleser stecken, durch den Magnetstreifenleser ziehen oder näher als 4 cm an das Display des Terminals halten WENN DAS TRINKGELD AKTIVIERT IST (OPTIONAL VERFÜGBAR): 1. Den Betrag vor dem Trinkgeld bestätigen 2. Das Trinkgeld eingeben 1 ... 9 3. Den Trinkgeldbetrag bestätigen WENN DIE PIN ABGEFRAGT WIRD: 1. Eingeben des PIN-Codes 1 ... 9 2. Den PIN-Code bestätigen 3. Den Betrag mit OK bestätigen 4. Ausdruck des Händlerbelegs und des Karteninhaberbelegs 5. Den Karteninhaberbeleg dem Kunden geben WENN DIE UNTERSCHRIFT GEFRAGT IST: 1. Den Beleg unterschreiben 2. Die Unterschrift auf dem Beleg kontrollieren*... -
Page 10: Cancellation Of Postings
Cancellation of Postings The cancellation function allows you to cancel the last one on the terminal cancel the transaction carried out. PROCEDURE - TRANSACTIONS / POSTINGS KEY / SYMBOL 1. Press the "Menu" button Menu 2. Choose the Transactions section 3. Confirm the Transactions section 4. Select and confirm the section Reversal 5. Enter the merchant password 2005 6. Confirm the merchant password 7. Confirm the cancelled amount 8. Printout of the merchant receipt and of the cardholder receipt 9. Give the cardholder receipt to the customer... -
Page 11: Manual Entry Of The Postings
Manual Entry of the Postings The following bookings can be entered manually via the “Menu” key on your terminal. Posting Posting at own risk Posting with Cashback Credit note Phone Authorized Balance enquiry Cash withdrawal Posting Phone Order Activate card Reservation Posting Mail Order Cancellation... - Page 12 Manual Entry of the Postings PROCEDURE - MANUAL ENTRY/POSTING KEY / SYMBOL 1. Press the «Menu» button to get to the main menu Menu 2. Select and confirm Transactions > Manual Entry 3. Selecte and confirm Purchase or Reversal 4. Enter the amount 1 ... 9 5. Confirm the amount 6. Enter the card number 1 ... 9 7. Confirm the card number 8. Enter the card code 2, which is located on the 1 ... 9 back of the card 9. Confirm the card code 2 10. Enter the expiry date of the card 1 ... 9 11. Confirm the expiry date of the card 12. Confirm the amount 13. Confirm the last message 14. Printout of the merchant receipt and the cardholder receipt 15. Give the cardholder receipt to the customer...
-
Page 13: Daily Closing
Daily Closing At day-end closing, all bookings made on the terminal during the day are sent to the acquirer (e.g. Aduno). A transaction journal is printed as soon as the day-end closing has been carried out. Aduno recommends that the transactions be submitted daily. PROCEDURE - DAILY CLOSING KEY / SYMBOL 1. Press the «Menu» button to get to the main menu Menu 2. Select Final Balance 3. Enter the merchant password 2005 4. Confirm the section Final Balance 5. Document printing... -
Page 14: Currency Choice
Currency Choice Currency Choice is a service that enables the customer to its purchases directly in its own national currency pay. PROCEDURE - TRANSACTIONS /CC KEY / SYMBOL 1. Press key 5 2. Enter the amount 1 ... 9 3. Confirm the amount 4. Enter the card with the chip into the chip reader slot, slide the magnetic strip of the card through the magnetic reader oder hold the card as close as 4cm to the device. If the device recognises a foreign card, the Currency Choice is offered. 5. The terminal will ask the host for their Rate request Currency Choice Please wait 6. Select the desired currency 7. Confirm the amount 8. Printout merchant receipt and cardholder receipt 9. Give the cardholder receipt to the customer... -
Page 15: Support
WE ARE HERE FOR YOU Terminal Support Line +41 (0) 44 505 13 60 info@wallee.com www.wallee.com/support wallee Terminals wallee AG General Guissanstrasse 47 CH - 8004 Winterthur...
Need help?
Do you have a question about the Yomani and is the answer not in the manual?
Questions and answers