
Subscribe to Our Youtube Channel
Related Manuals for Ostermann REDOCOL e-Desk pro


Summary of Contents for Ostermann REDOCOL e-Desk pro
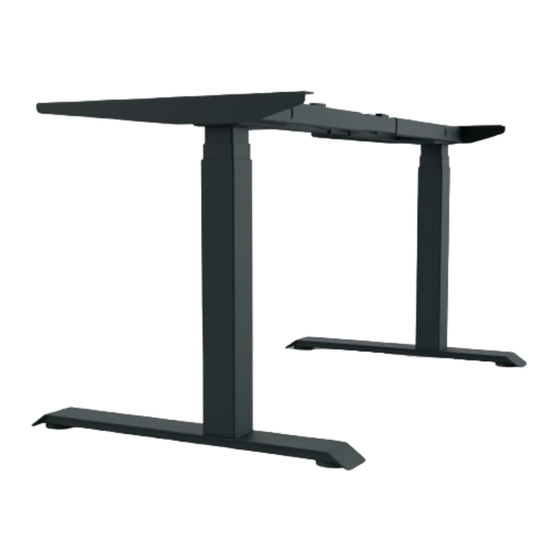
- Page 1 AUFBAU- & BEDIENUNGS- ANLEITUNG ASSEMBLY & OPERATION MANUAL REDOCOL e-Desk pro Elektrisch höhenverstellbares Tischgestell / Electrical Height Adjustable Desk Frame...
- Page 2 Ostermann Aluminium-Schiebetür-Systeme 5 Jahre 5-year GARANTIE warranty Inhaltsverzeichnis TECHNISCHE DATEN TECHNICAL SPECIFICATIONS 1 Warnungen / Informationen 1. Elektrische Komponenten: 1. Electric Components: Eingangsspannung: 100-240V, 50/60 Hz Input Voltage: 100-240V, 50/60 Hz 2 Benutzung/ Haftung Nutzgrad: 10% max 2 min ein 18 min aus...
- Page 3 parts INHALT / CONTENT 6 ......................................................Nr. Bauteil/component Menge/pcs Nr. Bauteil/component Menge/pcs ............................M6x16 Schrauben / Screws M8x16 Schrauben / Screws ......................Ausgleichsfüße / Leveling pads Rahmenanschluss 2 / Top frame-2 Kufe / Table Feet Rahmenanschluss 3 / Top frame-3 ……...........................
- Page 4 Danach befestigen Sie die beiden Kufen an den Hubsäulen mit den Schrauben M6 x 10. Install the leveling pads on the table feet, attach the table feet and fasten them with 8pcs M6x16 bolts. Install the center bracket with 2 pcs M6x10 bolts. www.ostermann.eu...
- Page 5 Step 3 Install the two side brackets with Screws 4 pcs M6x12 and make sure they are completely ti MONTAGE / ASSEMBLY INSTRUCTIONS Step 3 Install the two side brackets with Screws 4 pcs M6x12 and make sure they are completely tighten. Befestigen Sie die Tischauflagen mit 4 der M6x12 Schrauben und ziehen Sie diese fest.
- Page 6 Important: When using only 2 lifting columns the connecting cables must be plugged into the sockets marked "1" ans "2" on the control box. The socket marked "3" is only to be used when connecting a third lifting column. www.ostermann.eu...
-
Page 7: Problembehandlung / Troubleshooting
PROBLEMBEHANDLUNG / TROUBLESHOOTING Fehler Code / Mögliche Ursache Fehlerbehebung Possible Cause How to correct Error Code Zu häufi g bewegt Tisch für 18 Minuten ruhen Excessive use Do not use for 18 minutes. lassen. Ziehen Sie den Disconnect the power cable, Stromstecker, warten Sie wait a few minutes, and einige Minuten. - Page 8 Press and hold the "DOWN" button throughout the process. After 5 seconds, the desk will lower slightly until it reaches its lowest height, then rises slightly and the display changes back to the numeric height setting.After the desk stops, the reset process is successfully completed. www.ostermann.eu...
- Page 9 Advanced programming ERWEITERTE PROGRAMMIERUNG 1Un - Maßeinheit festlegen Stellen Sie hier die Anzeige auf Zentimeter oder Inch. Drücken Sie die Taste für 3 Sekunden, wenn in der Anzeige erscheint die Taste "M" loslassen und dann nochmals kurz drücken. Es erscheint im Display.
-
Page 10: Advanced Programming
Mit der Taste bestätigen. In der Anzeige blinkt Die Taste drücken und für 2 Sekunden warten. In der Anzeige er- scheint die aktuelle Tischhöhe. 12d - Nur für den Herstellergebrauch Nur für die Diagnose des Herstellers. Bitte nicht auswählen. www.ostermann.eu... - Page 11 5Fd - Go down anti-collision sensitivity setting 8Hc - Setting Constant-touch & One-touch The desk has an Anti-Collision Sensitivity that will stop the desk’s move- Press and hold 3 seconds, handset display , release press ment if it hits something on the way down. You can change this Sensitivity again to enter, Display “1Un”.
- Page 12 Redocol e-Desk Aufbau- & Bedienungsanleitung Assembly & Operation Manual Stand: 08/2020 | Technische Änderungen vorbehalten / Technical changes reserved...
Need help?
Do you have a question about the REDOCOL e-Desk pro and is the answer not in the manual?
Questions and answers