Table of Contents

Related Manuals for Basler exA640-60m


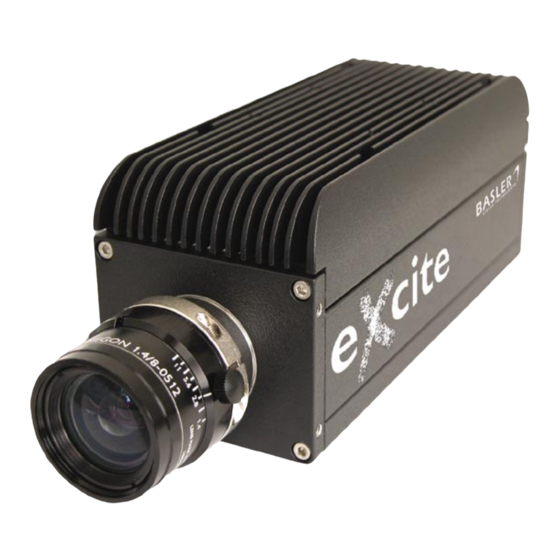
Summary of Contents for Basler exA640-60m
- Page 1 DRAFT Basler eXcite OPERATING MANUAL Document Number: DA000745 Version: 07 Language: 000 (English) Release Date: 15 May 2007 Product Discontinued This Product Has Reached Its End of Life and Will Only Be Available Until the End of 2009...
- Page 2 Basler customers using or selling these products for use in such applications do so at their own risk and agree to fully indemnify Basler for any damages resulting from such improper use or sale. Warranty Note Do not open the housing of the camera.
- Page 3 Contacting Basler Support Worldwide Europe: Basler AG Ander Strusbek 60 - 62 22926 Ahrensburg Germany Tel.: +49-4102-463-500 Fax.: +49-4102-463-599 vc.support.europe@baslerweb.com Americas: Basler, Inc. 855 Springdale Drive, Suite 160 Exton, PA 19341 U.S.A. Tel.: +1-877-934-8472 Fax.: +1-877-934-7608 vc.support.usa@baslerweb.com Asia: Basler Asia Pte Ltd...
-
Page 5: Table Of Contents
2.3.4 Installing the Code Samples ........2-19 Draft Basler eXcite... - Page 6 ....2-39 3 Learning to Use the eXcite 3.1 The Basler eXcite library provides the APIs used to: ..... 3-2 3.2 Building, Loading, &...
- Page 7 5.4.2 On exA640-60m/c Models ........
- Page 8 7.1 Technical Support Resources ........7-1 7.2 Before Contacting Basler Technical Support ......7-2...
- Page 9 ..............v Draft Basler eXcite...
- Page 10 Contents Draft Basler eXcite...
-
Page 11: Specifications, Requirements, & Precautions
Requirements, & Precautions 1.1 eXcite Models The Basler eXcite is available in ten different models. The model depends on the camera’s sensor type, the camera’s maximum frame rate at full resolution and whether the sensor is monochrome or color. Table 1-1 shows the available eXcite models. -
Page 12: General Specifications
Specifications, Requirements, and Precautions 1.2 General Specifications 1.2.1 Camera Section Specification exA640-60m/c exA640-120m/c exA640-180m/c Sensor Type Micron MT9V403 - 1/2 inch, progressive scan CMOS Pixels Mono models: 656 (H) x 491 (V) Color models: 656 (H) x 490 (V) Pixel Size 9.9 µm (H) x 9.9 µm (V) - Page 13 ** For operation at max. frame capture rate at full resolution combined with high processor load. *** For full conformity use a noise suppression choke between the eXcite and the power supply, e.g., model R1405XKS from NKL GmbH. Draft Basler eXcite...
-
Page 14: Processor Section
4 x Input: opto-isolated, +5.2 to +30 VDC, 1.8 mA @ +30 VDC 4 x Output: opto-isolated, +10 to +30 VDC max. forward voltage, 500 mA max. output current See Section for more details. Table 1-5: Interface Specifications Draft Basler eXcite... -
Page 15: Spectral Response
Specifications, Requirements, and Precautions 1.3 Spectral Response 1.3.1 CMOS Camera Models The spectral response for monochrome CMOS eXcite models is shown in Figure 1-1. Figure 1-1: Monochrome Spectral Response The spectral response curve excludes lens characteristics and light source characteristics. Draft Basler eXcite... - Page 16 IR cut-off filter is recommended. The filter should transmit in a range of 400 nm to 700...720 nm, and it should cut off from 700...720 nm to 1100 nm. A suitable IR cut filter is included in the standard C-mount adapter on color models of the eXcite. Draft Basler eXcite...
-
Page 17: Ccd Camera Models
Specifications, Requirements, and Precautions 1.3.2 CCD Camera Models The spectral response for monochrome eXcite model exA1390-19m is shown in Figure 1-3. 1000 Wave Length (nm) Figure 1-3: Monochrome Spectral Response for exA1390-19m Draft Basler eXcite... - Page 18 Specifications, Requirements, and Precautions The spectral response for monochrome eXcite model exA1600-14m is shown in Figure 1-4. Figure 1-4: Monochrome Spectral Response for exA1600-14m The spectral response curve excludes lens characteristics and light source characteristics. Draft Basler eXcite...
- Page 19 The spectral response for color eXcite model exA1390-19c is shown in Figure 1-5. Blue Green Wave Length (nm) Figure 1-5: Color Spectral Response for exA1390-19c The spectral response for color eXcite model exA1600-14c is shown in Figure 1-6. Figure 1-6: Color Spectral Response for exA1600-14c Draft Basler eXcite...
- Page 20 400 nm to 700...720 nm, and it should cut off from 700...720 nm to 1100 nm. A suitable IR cut filter is included in the standard C-mount adapter on color models of the eXcite. Draft 1-10 Basler eXcite...
-
Page 21: Mechanical Specifications
7 (CMOS sensor) and Figure 1-8 (CCD sensor). Rotational accuracy is also shown in each figure. Figure 1-7: CMOS Sensor Positioning Accuracy Tilt Rotation X-Y Direction 27.5+0.5 Reference planes Sensor tolerances are typical Drawings are not to scale Figure 1-8:CCD Sensor Positioning Accuracy Draft Basler eXcite 1-11... -
Page 22: Housing With Contact Plate
Sensor tolerances are typical Drawings are not to scale Figure 1-9: CMOS Sensor Positioning Accuracy Tilt Rotation X-Y Direction 27.5+0.5 Reference planes Sensor tolerances are typical Drawings are not to scale Figure 1-10:CCD Sensor Positioning Accuracy Draft 1-12 Basler eXcite... -
Page 23: Camera Dimensions And Mounting Points
The eXcite’s dimensions in millimeters are as shown in Figure 1-11. 1.4.2.1 Housing with Cooling Fins The housing is equipped with three M3 mounting holes in each side and four M3 mounting holes on the bottom as shown in the drawings. Draft Basler eXcite 1-13... -
Page 24: Housing With Contact Plate
1.4.2.2 Housing with Contact Plate The housing is equipped with three M3 mounting holes in each side, four M3 mounting holes on the bottom, and four mounting holes in the contact plate as shown in the drawings. Draft 1-14 Basler eXcite... -
Page 25: Maximum Lens Thread Length On Color Cameras
7.5 mm. If a lens with a longer thread length is used, the IR cut filter will be damaged or destroyed and the eXcite will no longer operate. Figure 1-13: Maximum Lens Thread Length on Color Models Draft Basler eXcite 1-15... -
Page 26: Mechanical Stress Test Results
20 g / 11 ms / 10 shocks negative Bump (each axis) IEC 60068-2-29 20 g / 11 ms / 100 shocks positive 20 g / 11 ms / 100 shocks negative Table 1-6: Mechanical Tests Draft 1-16 Basler eXcite... -
Page 27: User Requirements
Linux. grams. Familiar with industrial digital imaging de- vices. Minimal experience with writing image pro- cessing programs. Table 1-7: User Requirements and Performance Draft Basler eXcite 1-17... -
Page 28: Environmental Requirements
You must provide sufficient heat dissipation to maintain the temperature of the eXcite housing at 45° C or less. Since each installation is unique, Basler does not specify a strictly required technique for proper heat dissipation. Instead, we provide the following general guidelines: •... -
Page 29: Precautions
See Section 1.4.3 for more in- formation. Security Caution! The operating system on the eXcite has limited security against malicious at- tack. If your eXcite is part of a network, you should take appropriate security measures. Draft Basler eXcite 1-19... - Page 30 Specifications, Requirements, and Precautions Electromagnetic Compatibility Generally, the eXcite is electromagnetically highly compatible with its electromagnetic environment. Please contact Basler technical support if you observe any EMI effects in an environment particularly sensitive to EMI. To ensure that your warranty remains in force: Do not open the eXcite housing Do not open the housing.
-
Page 31: Excite Hardware And Software Installation
• If you want to connect the eXcite to the PC via a LAN that uses dynamic IP addressing (i.e., has a DHCP server), go to Section 2.1.1.2. • If you want to make a direct (peer-to-peer) connection between the eXcite and your develop- ment PC, go to Section 2.1.1.3. Draft Basler eXcite... -
Page 32: Connecting To A Lan With Static Ip Addressing
6. From the command line, ping the eXcite’s IP address. If the ping was successful, go on to Section 2.2. If the ping was not successful, double-check your connections and make sure that there are no device conflicts on your network. Draft Basler eXcite... -
Page 33: Connecting To A Lan With Dynamic Ip Addressing
DHCP server. 7. From the command line, ping the eXcite’s IP address. If the ping was successful, go on to Section 2.2. If the ping was not successful, double-check that there are no device conflicts on your network. Draft Basler eXcite... -
Page 34: Connecting Peer-To-Peer
If the ping was successful, go on to Section 2.2. If the ping was not successful, double-check that the configuration of your network adapter and make sure that you are using the correct type of Ethernet cable. Draft Basler eXcite... -
Page 35: Changing The Excite's Default Network Connection Behavior
4. Log into the Linux operating system on the eXcite processor (login = root, pwd = root). The serial connection is complete. You now have access to the Linux OS and to the file system on the eXcite’s processor. Draft Basler eXcite... - Page 36 Execute the following commands to navigate to this directory and to make a backup copy of the unmodified rcS file: ↵ a) cd /etc/init.d ↵ b) cp rcS rcS_bu 2. Execute the following command to open the rcS file with the nano editor: ↵ a) nano -w rcS Draft Basler eXcite...
- Page 37 You can leave the camera running or you can shut the camera down. If you want to leave the camera running excute the following command to boot the eXcite again and to make the changes become effective: ↵ a) reboot Draft Basler eXcite...
- Page 38 MAC address for the eXcite. For example, assume the contents of the /proc/excite/unit_id file is “00001e.” In this case, the MAC address for the eXcite would be “00:30:53:00:00:1e” and the host name would be “eXcite-00001e.” Draft Basler eXcite...
- Page 39 Control+X keys quit nano; you will be asked wheather you want to save the modified file (Y) or ↵ not (N). Enter Y and execute if you want to save the modified file, enter N and ↵ execute if you do not want to save the modified file. Draft Basler eXcite...
-
Page 40: Finding An Excite's Network Ip Address
There are two ways to find the IP address of an eXcite connected to your PC via an Ethernet network. The first way is to use Basler’s “find_excite” utility and the second way is to use an RS- 232 serial connection to the eXcite. - Page 41 2. Use the terminal emulator to log into the eXcite’s OS (login = root, pwd = root). 3. Execute the following command: ↵ a) ip addr show The IP address will be returned in the emulator window. (The Ethernet IP address is the address shown in the last line returned.) Draft Basler eXcite 2-11...
-
Page 42: Configuring Network Speed And Duplex Mode
Ethernet network. 2. If you have not already done so, connect the eXcite and the PC as described earlier in Section 2.1.1 and make sure to know the eXcite’s IP address (see Section 2.1.1.5). Draft 2-12 Basler eXcite... - Page 43 Press the Control+X keys to leave the nano editor. e) When you are asked to save the modified file, execute: ↵ ↵ (This will log you out of the eXcite’s OS and quit telnet.) logout Draft Basler eXcite 2-13...
-
Page 44: Shutting The Camera Down
1. From the command line, execute the following command: ↵ a) halt 2. Unplug the eXcite’s power supply. 3. If you no longer need to use the Y cable remove the Y cable connecting the eXcite and the power supply. Draft 2-14 Basler eXcite... -
Page 45: Running A Simple Functionality Test
PC. (If you capture another image, the existing image.pgm file in the eXcite will simply be overwritten.) Installation and basic testing of the eXcite is now complete. Go on to Section 2.3. Draft Basler eXcite 2-15... -
Page 46: Installing The Ide, Tool Chain, And Sample Code On A Pc With A Linux Os
These actions will create an /opt/eclipse subdirectory and will install the Eclipse IDE there. 3. Locate the “org.eclipse.cdt-2.XXX-linux.x86.zip” file in the software/linux/ directory on the CD. This zip is the installer for the Eclipse CDT plug-in. Draft 2-16 Basler eXcite... - Page 47 ↵ If you did not create a shortcut, you can always start Eclipse by and typing in: eclipse from the command line. This will start the eclipse script installed in steps and 6.) Draft Basler eXcite 2-17...
-
Page 48: Installing The Tool Chain
Hardware and Software Installation 2.3.3 Installing the Tool Chain This section describes installing the Basler tool chain on your development PC. The tool chain package includes: • the compiler and linker programs necessary for Eclipse to “cross-compile” your programs. • the Basler library files. -
Page 49: Installing The Code Samples
Hardware and Software Installation 2.3.4 Installing the Code Samples This section describes installing the Basler code samples on your development PC. The files for the code samples are located in the software/samples/ directory on the eXcite CD. (If you don’t have the CD, you can order one from your sales representative.) To install the sample code: 1. -
Page 50: Installing The Ide, Tool Chain, And Sample Code On A Windows Pc
Your development PC must have a Windows XP operating system and at least 512 MB of RAM. You will need approximately 2.5 GigaBytes of free space on your hard drive to install coLinux. Draft 2-20 Basler eXcite... -
Page 51: Installing Colinux, Eclipse, The Tool Chain, And The Code Samples
Make sure that “coLinux” and “colinux Virtual Ethernet Driver” are checked as shown below. b) Make sure that “coLinux Bridged Ethernet” and “Root Filesystem image download” are not checked as shown below. c) Click Next. Draft Basler eXcite 2-21... - Page 52 Use WinZip to extract the contents of this file into the directory where you installed coLinux. (If you followed our suggestion in step 6, it would be the C:\coLinux directory.) The files in this zip are large and will take several minutes to extract. Draft 2-22 Basler eXcite...
- Page 53 13. Right click on the desktop shortcut and select Properties from the drop down menu. a) Add the following to the Target line: -c debian.xml -t nt When you finish modifying the Target line, it should look similar to the target line shown below. b) Click Apply and click OK. Draft Basler eXcite 2-23...
- Page 54 15. Do the following to create a network bridge, bridging the physical and the virtual adapter: a) Select the physical and the virtual adapter and right click. A drop down menu will open. b) Select Bridge Connections in the drop down menu. The following error message may appear. Draft 2-24 Basler eXcite...
- Page 55 Restart your computer. This will ensure that all of the network connections are properly reset. d) Open the Network Connections window. In the Network Connections window, find the name of the network bridge as shown below: Draft Basler eXcite 2-25...
- Page 56 IP addressing if you want to continue communication with a LAN that is set for dynamic IP addressing. To set the network bridge to dynamic IP addressing follow the procedures in Section 2.4.4 and then continue with step 16. Draft 2-26 Basler eXcite...
- Page 57 You can find the language designation of the language you want to use by looking at the first characters of the file names of the keyboard driver’s translation tables. You can list the file names of the keyboard driver’s translation tables by executing the following commands: ↵ ls /usr/share/keymaps/i386/qwertz Draft Basler eXcite 2-27...
- Page 58 The files that you extracted in step of this procedure included everything you need to use the Eclipse IDE, the tool chain used with the IDE, and the Basler code samples. When you install the GUI interface, you will find a shortcut to access Eclipse.
-
Page 59: Disabling Windows Data Execution Prevention
6. Restart your computer. This is required for the changes to the Boot.ini file to become effective. The DEP feature is disabled. After you have changed the Boot.ini file we suggest hiding hidden files and folders again if they were hidden initially. Draft Basler eXcite 2-29... -
Page 60: Installing The Vnc Viewer
We suggest that you check the selection to create a viewer icon on your desktop. b) Click Next. 8. A Ready to Install window will appear. a) Check to make sure that the selections are correct and then click Install. Draft 2-30 Basler eXcite... - Page 61 Use the Down Arrow key to move the cursor to the end of the file. Edit the two lines shown below by entering your screen resolution and color depth. The resolution and color depth shown below are given as examples only. $geometry = “1024x768”; $depth = “16”; e) Press the Control+X keys. Draft Basler eXcite 2-31...
- Page 62 Double click the VNC Viewer icon on your desktop. A Connection Details window will open. b) On the Server line, enter the server’s Display ID. The Display ID consists of the IP address that is currently assigned to coLinux and, separated by a colon, the appended Draft 2-32 Basler eXcite...
- Page 63 (This action saves your entries so that they will be automatically reentered each time you start the viewer.) Click this Save button Click the OK button. 17. On the Connection Details window, click the OK button. Draft Basler eXcite 2-33...
- Page 64 If you click on the file drawer icon near the top of your screen, it will open a file browser application. If you open the application and look through the available files, you will notice that sample code files and applications that are part of the tool chain were installed along with the base file system. Draft 2-34 Basler eXcite...
- Page 65 6. The VNC Viewer will open, it will connect to the coLinux OS, and it will act as a GUI front end for coLinux. To expand the VNC Viewer so that it uses the full screen, press the F8 key. In the menu that opens, click Full Screen. Draft Basler eXcite 2-35...
-
Page 66: Configuring For Dynamic Ip Addressing
Note: In this procedure, you will be using the nano editor to edit the coLinux configuration file. A brief introduction to the editor appears on page and you can find many introductions to the nano editor on the web. Draft 2-36 Basler eXcite... - Page 67 Note: Whenever the coLinux console window closes, you will usually see a message that one of your network connections has been lost. This is normal. It happens because the virtual network adapter for coLinux disconnects when the coLinux console closes. coLinux is now set to dynamic IP addressing. Draft Basler eXcite 2-37...
-
Page 68: Setting The Network Bridge To Dynamic Ip Addressing
4. Make sure the adapters of the bridge are checked in the edit field of the Adapter section as shown above. 5. Select Internet protocol (TCP/IP) in the lower edit field as shown above. 6. Click the Properties button. An Internet Protocol (TCP/IP) Properties window will open. Draft 2-38 Basler eXcite... -
Page 69: Adjusting The Display Id Of The Vnc Server
Section 2.4.2): ↵ loadkeys xx c) Execute the following command in the coLinux console: ↵ ifconfig The current settings of coLinux will be displayed in text similar to the one shown below: Draft Basler eXcite 2-39... - Page 70 An Authentication window will appear as shown below. a) Type in the password: excite b) Click the OK button. The VNC Viewer will open, it will connect to the coLinux OS, and it will act as a GUI front end for coLinux. Draft 2-40 Basler eXcite...
-
Page 71: Learning To Use The Excite
The eXcite is shipped with the Basler SFF Viewer GX software which is designed for use in a Windows 2000 or Windows XP operating system. The Basler SFF Viewer GX software allows you to easily enable and disable the eXcite’s features, set the eXcite’s parameters, and capture and... -
Page 72: The Basler Excite Library Provides The Apis Used To
(Note that on a Windows development PC, these files are part of the coLinux file system.) When compiling an application that uses the Basler eXcite library, use the -I and -L compiler/ linker switches to specify the directory where the library and the header files can be found. Here... -
Page 73: Building, Loading, & Running A Program
Now that the Eclipse IDE and the tool chain are installed, you can build executables and run them on the MIPS processor in the eXcite. Basler source code samples were also added to your PC as part of the installation procedure. These code samples include a number of files that will configure Eclipse to find the correct libraries and includes and to find the cross-compiler, linker, etc. - Page 74 The Navigator pane at the left side of the workspace should show a list of the sample programs as “projects” included in the workspace. All of the Basler sample programs should be included in the workspace and should be listed in the Navigator pane. Frequently, however, many of the sample programs will not be included.
- Page 75 The SimpleGrab sample program project will be imported into the workspace. An automatic build will run when the sample is imported. Once the build is complete, you should see the SimpleGrab sample program project in the Navigator pane as shown below. Draft Basler eXcite...
- Page 76 7. Click the Project menu at the top of the Eclipse window and select Clean from the drop down list. When the Clean window appears: a) Make sure that “Clean selected projects” is checked as shown below. b) Click OK. c) The clean and build process will start. Draft Basler eXcite...
- Page 77 9. To view the properties of the SimpleGrab executable that was created: a) Right click on the SimpleGrab entry in the Release folder. b) Select properties from the drop down menu. c) A Properties window will open as shown below. Draft Basler eXcite...
-
Page 78: Loading The Simplegrab Executable Onto Your Excite
(This transfers the file from the PC to the eXcite.) ↵ (This sets the access rights on the uploaded file.) chmod 777 SimpleGrab 3. Execute the following command to exit the FTP session and log off of the eXcite: ↵ a) bye Draft Basler eXcite... -
Page 79: Running The Simplegrab Executable On Your Excite
“image.pgm'' – you can use an FTP session to transfer the output files from the eXcite to your development PC. For Basler sample programs that create output files, the output files are created in the working directory active when the sample program was started. -
Page 80: Building Debug Or Release Versions & Building For Different Targets
Notice that you can use the Tool Settings list to see the settings for the Linker and the Assembler. e) Finally, note that in order to apply your selected configuration so that it will be used on the next build, you must click Apply and then OK. Draft 3-10 Basler eXcite... - Page 81 When the Import window opens, select “Existing project into workspace” as shown below and then click Next. c) Click Browse and then navigate to the samples/StreamingClient directory as shown below. Double-click StreamingClient and then click OK. Draft Basler eXcite 3-11...
- Page 82 The StreamingClient sample program project will be imported into the workspace. An automatic build will run when the sample is imported. Once the build is complete, you should see the SimpleGrab sample program project in the Navigator pane as shown below. Draft 3-12 Basler eXcite...
- Page 83 The compiler, linker, and assembler settings that you looked at in this section are avail- able because they are part of the Eclipse project files included with the Basler code samples. When you write your own programs, you will need to adjust the compiler set- tings accordingly.
-
Page 84: Debugging The Simplegrab Application Running On Your Excite
Make sure that “Clean selected projects” is checked. b) Click OK. c) The clean and build process will start. When the build process is finished, a SimpleGrab executable containing debug information will be located in the [pathname]/samples/SimpleGrab/Debug folder. Where [pathname] is the Draft 3-14 Basler eXcite... - Page 85 For example, you would execute the following commands to rebuild the SimpleGrab sample program: ↵ 1. cd /[pathname]/samples/SimpleGrab/Debug (where [pathname] is the absolute path name to the directory on your development PC where the eXcite sample programs are located) ↵ 2. make all Draft Basler eXcite 3-15...
- Page 86 ↵ e) put SimpleGrab_stripped ↵ (This sets the access rights on the file.) chmod 777 SimpleGrab_stripped 3. Execute the following command to exit the FTP session and log off of the eXcite: ↵ a) bye Draft 3-16 Basler eXcite...
- Page 87 ↵ 1. telnet [eXcite IP address] ↵ 2. root (This is the login for the eXcite's OS.) ↵ 3. root (This is the password for the eXcite's OS.) ↵ 4. killall -9 gdbserver Draft Basler eXcite 3-17...
- Page 88 IP address and you should change the IP address in the gdb configuration file to match the address cur- rently assigned to your eXcite. Draft 3-18 Basler eXcite...
-
Page 89: Using The Gdb Debugger From The Command Line
(The three next commands are used to step over the first three statements of the main function.) ↵ 9. cont (This command lets the program run until it terminates itself.) ↵ 10. quit (This command ends the gdbdebugger program.) Draft Basler eXcite 3-19... -
Page 90: Using The Gdb Debugger With Eclipse
3. From the drop down menu that appears select Debug Debug and a Debug configuration window will open as shown below. Select the “C/C++ Local Application” entry, and press the New button to create a new debug configuration. Draft 3-20 Basler eXcite... - Page 91 PC. Make sure that you enter the actual IP address for your eXcite and the actual port number that you are using for the gdbserver. Draft Basler eXcite 3-21...
- Page 92 IP address and you should change the IP address in the debug configuration file to match the address cur- rently assigned to your eXcite. Draft 3-22 Basler eXcite...
-
Page 93: Introduction To The Sample Programs
Note: The “StreamingClient” sample program can only be run in a Linux environment. The sample program can not be run under coLinux. Note that the first three types of samples do not use, and are not intended to illustrate, the Basler eXcite library. - Page 94 We suggest that you refer to the source code as you are reading the sample description. Once you have finished reading the description and looking through the source code, we suggest that you compile, load, and run the sample. Draft 3-24 Basler eXcite...
-
Page 95: The Excite Sample Programs
PC must be compiled and run under Colinux. Source Code (hello.cpp) #include <iostream> #include <cstdlib> int main( int argc, const char *argv[] ) using std::cout; using std::endl; cout << "Hello, this is really eXciting!" << endl; return EXIT_SUCCESS; Draft Basler eXcite 3-25... -
Page 96: Simplegrab
3. Grab an image. The image grabbing executed in this sample uses one-shot operation (see Section 5.3.1).The image grabbing is performed in the sample by the following function calls and member object accesses: pCamera->PrepareGrab(); pCamera->QueueBuffer( ... ); Draft 3-26 Basler eXcite... - Page 97 The user object can be anything. For example, it might be a pointer to a (user-instantiated) string containing some identification that you want to attach to the buffer (or image). This usage possibility is shown in the sample code. Another useful usage possibility is that the API Draft Basler eXcite 3-27...
- Page 98 DefaultFileName( "image.pgm" ); // ------------------------------------------------------------ // local types // ------------------------------------------------------------ class CBuffer public: CBuffer( uint32_t width, uint32_t height ); ~CBuffer(); private: CBuffer( const CBuffer& ); CBuffer& operator=( const CBuffer& ); public: uint32_t Width() const; Draft 3-28 Basler eXcite...
- Page 99 Camera *pCamera = dynamic_cast<Camera*>( dm.CreateDevice( *lstDevices.begin() ) ); if (NULL == pCamera) throw RUNTIME_EXCEPTION( "Device isn't a camera" ); cout << "Using device " << pCamera->GetDeviceInfo().GetFriendlyDeviceName() << endl; // open camera pCamera->Open(); // STEP 2 (Parameterize camera) pCamera->VideoMode.SetValue( CEnumeration_VideoModeEnums::VideoMode_VideoMode0 ); pCamera->ColorCoding.SetValue( CEnumeration_ColorCodingEnums::ColorCoding_Mono8 ); Draft Basler eXcite 3-29...
- Page 100 // close the device dm.DestroyDevice( pCamera ); // save buffer if (saveBuffer( FileName, aBuffer )) cout << "Saved image as " << FileName << endl; else cerr << "SimpleGrab failed to save image in " << FileName << endl; Draft 3-30 Basler eXcite...
- Page 101 Learning to Use the eXcite catch( exception &e ) cerr << "SimpleGrab failed because " << e.what(); return EXIT_FAILURE; return EXIT_SUCCESS; Draft Basler eXcite 3-31...
-
Page 102: Multigrab
(re-enqueue) the buffer into the Camera object so that the Camera object can use the buffer to receive another image. Draft 3-32 Basler eXcite... - Page 103 In general, when working with multiple (user) buffers, we recommend that application code always use the buffer address and pUser pointer value to access the captured image(s) and should not make assumptions about which user buffer will be returned by which call to WaitForBuffer(). Draft Basler eXcite 3-33...
- Page 104 // ------------------------------------------------------------ class CBuffer public: CBuffer( uint32_t width, uint32_t height ); ~CBuffer(); CBuffer( const CBuffer& ); private: CBuffer& operator=( const CBuffer& ); public: uint32_t Width() const; uint32_t Height() const; uint32_t BufferSize() const; void* Buffer() const; uint8_t* Buffer(); Draft 3-34 Basler eXcite...
- Page 105 ); // prepare for image acquisition pCamera->PrepareGrab(); // allocate memory const unsigned width_px( pCamera->Width() ); const unsigned height_px( pCamera->Height() ); // create ten buffers in a standard container vector<CBuffer> vBuffer( 10, CBuffer( width_px, height_px ) ); Draft Basler eXcite 3-35...
- Page 106 << hex << "0x" << (unsigned int) result << endl; break; } while (result == IInDataStream::bsOk && ++NumGrabs < MaxGrabs); // device is not required anymore pCamera->ContinuousShot = false; pCamera->FinishGrab(); // close the device dm.DestroyDevice( pCamera ); Draft 3-36 Basler eXcite...
- Page 107 Learning to Use the eXcite catch( exception &e ) cerr << "MultiGrab failed because " << e.what(); return EXIT_FAILURE; return EXIT_SUCCESS; Draft Basler eXcite 3-37...
-
Page 108: Simplescalar
3.5.4 SimpleScalar Description This is a very simple sample program that shows how to use the Basler eXcite library to work with a “scalar” camera parameter, i.e., a parameter that can be set to some value within a defined range of integers. - Page 109 << " with an Increment of " << increment << endl << " use representation " << representation << endl; catch (exception &e) cerr << "Exception occurred:" << endl << e.what() << endl; exit( EXIT_FAILURE ); return EXIT_SUCCESS; Draft Basler eXcite 3-39...
-
Page 110: Simpletrigger
3.5.5 SimpleTrigger Description This sample shows how to use the Basler eXcite library to make the eXcite grab an image in “external trigger/one-shot” mode. In this mode, a one-shot function call prepares the camera to react to an external trigger signal and the camera will start grabbing (exposing) an image when the external trigger signal changes state. - Page 111 // let the device manager create the first device Camera *pCamera = dynamic_cast<Camera*>( dm.CreateDevice( *lstDevices.begin() ) ); if (NULL == pCamera) throw RUNTIME_EXCEPTION( "Device isn't a camera" ); cout << "Using device " << pCamera->GetDeviceInfo().GetFriendlyDeviceName() << endl; Draft Basler eXcite 3-41...
- Page 112 IInDataStream::bsError: cerr << "Got Buffer with error status" << endl; default: cerr << "WaitForBuffer returned unexpected value" << hex << "0x" << (unsigned int) result << endl; break; // device is not required anymore pCamera->FinishGrab(); Draft 3-42 Basler eXcite...
- Page 113 << "Saved image as " << FileName << endl; else cerr << "SimpleTrigger failed to save image in " << FileName << endl; catch (exception &e) cerr << "Exception occurred:" << endl << e.what() << endl; exit( EXIT_FAILURE ); return EXIT_SUCCESS; Draft Basler eXcite 3-43...
-
Page 114: Simpledio
Port 3 is left unassigned. After the output ports are assigned, the current value for each port is read by accessing the pCamera->PioOut2Monitor member object (for output port 2) and the pCamera->PioOut3Monitor member object (for output port 3). Draft 3-44 Basler eXcite... - Page 115 RUNTIME_EXCEPTION( "Device isn't a camera" ); cout << "Using device " << pCamera->GetDeviceInfo().GetFriendlyDeviceName() << endl; // open and parameterize camera pCamera->Open(); // read the all output lines cout << "Current output state is 0x" << hex << pCamera->PioOutput() << endl; Draft Basler eXcite 3-45...
- Page 116 << "Current output of line 2 is " << pCamera->PioOut2Monitor.ToString() << endl; // read input lines cout << "Current input state is 0x" << hex << pCamera->PioInput() << endl; catch( exception &e ) cerr << "SimpleDio failed because " << e.what(); return EXIT_FAILURE; return EXIT_SUCCESS; Draft 3-46 Basler eXcite...
-
Page 117: Simplewatchdog
6. Close the device file using the standard close function. Note: The sample uses the RUNTIME_EXCEPTION() macro from the Basler eXcite library. This is the only feature from the eXcite library that is used in this sample. The macro is merely a handy way to create a exception class. - Page 118 5" << endl << endl; exit( EXIT_FAILURE ); // open the watchdog (1) watchdogFd = open( WatchdogDeviceName.c_str(), O_RDWR ); if (watchdogFd < 0) throw RUNTIME_EXCEPTION( "open watchdog failed: %s", strerror( errno ) ); Draft 3-48 Basler eXcite...
- Page 119 << "new timeout value is " << s << " [sec] " << endl; int numIterations = 100; // do something (...) sleep( timeout_s/2 ); if (numIterations % 50 == 0) clog << endl; clog << "." ; Draft Basler eXcite 3-49...
- Page 120 // and close (6) if (close( watchdogFd ) < 0) throw RUNTIME_EXCEPTION( "watchdog close failed : %s", strerror( errno ) ); catch( exception &e ) cerr << "SimpleWatchDog failed because " << e.what(); return EXIT_FAILURE; return EXIT_SUCCESS; Draft 3-50 Basler eXcite...
-
Page 121: Rsreceive And Rssend
*argv[] ); static void configPort( int fd ); static int openPort( const char port[] ); static void echo( int fd ); // --------------------------------------------------------------------------- // int main( int argc, char *argv[] ) // --------------------------------------------------------------------------- Draft Basler eXcite 3-51... - Page 122 // ---------------------------------------------------------------------------- //void configPort( int fd ) // ---------------------------------------------------------------------------- * \brief configure the serial port * \param fd the file descriptor * Turns character handling off. * Reading is to block until a character is availble. Draft 3-52 Basler eXcite...
- Page 123 << "configPort - tcsetattr failed : " << strerror( e ) << endl; // ---------------------------------------------------------------------------- // void echo( int fd ) // ---------------------------------------------------------------------------- * \brief echo the input * \param fd file descriptor for read and write operation Draft Basler eXcite 3-53...
- Page 124 ); static int writeMsg( int fd, const char msg[], size_t msglen ); // --------------------------------------------------------------------------- // int main( int argc, char *argv[] ) // --------------------------------------------------------------------------- * \brief main entry point of RsSend Draft 3-54 Basler eXcite...
- Page 125 // close the serial port close( pd ); cout << "Closed port" << endl; return EXIT_SUCCESS; // --------------------------------------------------------------------------- // int openPort( const char PortNum[] ) // --------------------------------------------------------------------------- * \brief Open serial port * \param Port number of the port Draft Basler eXcite 3-55...
- Page 126 TCIFLUSH ); // set new options, NOW if (tcsetattr( fd, TCSANOW, &options ) != 0) int e = errno; cerr << "configPort - tcsetattr failed : " << strerror( e ); exit( EXIT_FAILURE ); return 0; Draft 3-56 Basler eXcite...
- Page 127 // error occurred int e = errno; cerr << "readMsg failed : " << strerror( e ) << endl; exit( EXIT_FAILURE ); else if (0 == cnt) // no more data available return pmsg-msg; --avl; ++pmsg; return maxlen; Draft Basler eXcite 3-57...
-
Page 128: Bsreceive And Bssend
BsReceive Usage Call \code BsReceive \endcode The BsReceive program doesn't expect any parameters. BsReceive must be started first, before executing the BsSend client program. When the message from a connected client has been exchanged, BsReceive terminates. Draft 3-58 Basler eXcite... - Page 129 /// Socket type is stream, i. e. we are using TCP const int BsSockType = SOCK_STREAM; /// Socket protocol is default const int BsSockProtocol = 0; /// Using some non-reserved port above 1024. const int BsPort= 1066; #endif //_BS_H_ Draft Basler eXcite 3-59...
- Page 130 // our port socket.sin_port= htons( BsPort ); // bind if (bind( sd, (sockaddr *)&socket, sizeof socket ) < 0) perror( "binding socket" ); exit( EXIT_FAILURE ); clog << "Socket bound to port " << BsPort << endl; Draft 3-60 Basler eXcite...
- Page 131 (cnt < 0 && errno != EINTR) perror( "reading data" ); exit( EXIT_FAILURE ); // until read w/o error } while (cnt < 0); data[cnt] = '\0'; clog << "Read : " << data << endl; Draft Basler eXcite 3-61...
- Page 132 = socket( BsSockAdrFamily, BsSockType, BsSockProtocol ); if (sd < 0) perror( "create socket" ); exit( EXIT_FAILURE ); // (2) connect with server port const char * const serverName = argc == 2 ? argv[1] : "localhost"; Draft 3-62 Basler eXcite...
- Page 133 "reading message" ); exit( EXIT_FAILURE ); // ensure terminating null character buffer[cnt] = '\0'; cout << "Recieved message: " << buffer << endl; // (5) close connection close( sd ); clog << "Closed connection" << endl; return EXIT_SUCCESS; Draft Basler eXcite 3-63...
-
Page 134: Streamingclient And Streamingserver
Build the StreamingServer using the cross-compiler for the MIPS (in Eclipse use either the Debug or the Release configuration) and launch the StreamingServer program on the eXcite. Then start the StreamingClient program on your Linux PC or on your Windows PC running coLinux. Draft 3-64 Basler eXcite... - Page 135 PORT preprocessor defines in StreamingClient.cpp and StreamingServer.cpp. Please ensure, that the values assigned to PORT are the same in both source files. Draft Basler eXcite 3-65...
- Page 136 Buffer& operator=(const Buffer&); public: Buffer( size_t nBytes ) pBuffer = new unsigned char[ nBytes ]; size = nBytes; unsigned char* getBuffer() return pBuffer; unsigned long getSize() return size; ~Buffer() delete[] pBuffer; int main(int argc, char* argv[]) Draft 3-66 Basler eXcite...
- Page 137 << "Frame size: " << width << "x" << height << " pixel" << endl; // open the stream pClient->PrepareGrab(); // allocate memory vector<Buffer*> buffers(nBuffers); for ( unsigned int i = 0; i < nBuffers; ++i ) buffers[i] = new Buffer( pClient->TotalBytes() ); Draft Basler eXcite 3-67...
- Page 138 // tell the server that we no longer want to receive data pClient->EnableStreaming = 0; // close the stream pClient->FinishGrab(); //------------------------------------------------------------------------- Clean-up //------------------------------------------------------------------------- // close the device pClient->Close(); // let the device manager destroy the device dm.DestroyDevice( pClient ); Draft 3-68 Basler eXcite...
- Page 139 = 480; // heigth of the buffers to be sent const unsigned long datadepth = 1; // we want to send 1 byte per pixel cout << endl << "Press ^C to terminate" << endl; Draft Basler eXcite 3-69...
- Page 140 << "Timeout expired. Client hasn't closed the stream" << endl; Server.Close(); return EXIT_FAILURE; cout << "Client has closed the stream" << endl; // allow the client to disconnect sleep(1); Server.Close(); // closes the server catch ( GenApi::GenericException & e ) Draft 3-70 Basler eXcite...
- Page 141 CBuffer::Height() const return m_Height; /// Return the buffer size in bytes uint32_t CBuffer::BufferSize() const return m_Width * m_Height; /// Get the Buffer uint8_t* CBuffer::Buffer() const return m_pBuffer; /// Get the Buffer uint8_t* CBuffer::Buffer() return m_pBuffer; Draft Basler eXcite 3-71...
- Page 142 Learning to Use the eXcite Draft 3-72 Basler eXcite...
-
Page 143: Excite Interface
Two status LEDs are located on the back of the eXcite. One is used to indicate power present and the other is used to indicate the state of the Ethernet connection. Figure 4-1 shows the connectors and the LEDs. Figure 4-1: Connectors and LED Draft Basler eXcite... -
Page 144: Pin Assignments And Numbering
5, and from the input power source ground to pin 6. Warning! For input power, the camera has overvoltage protection up to 30 VDC. An input voltage higher than 30 VDC will cause damage leaving the camera nonopera- tional. Draft Basler eXcite... - Page 145 Input Port 3 Output 3 Output 2 Output 1 Output 0 VCC (+10 to + 30 VDC) Not Connected Not Connected Table 4-2: Pin Assignments for the 12-pin Receptacle Figure 4-2: Pin Numbering for the 10-pin and 12-pin Receptacles Draft Basler eXcite...
-
Page 146: Connector Types
The recommended mating connector is the Hirose micro plug (part # HR10A-10P-10S). 12-pin Receptacle The 12-pin I/O connector on the eXcite is a Hirose micro receptacle (part # HR10A-10R-12P) or the equivalent. The recommended mating connector is the Hirose micro plug (part # HR10A-10P-12S). Draft Basler eXcite... -
Page 147: Led Indicators
An unlit LED can occur because the input power to the eXcite is missing or incorrect. An unlit LED can also occur if the input power to the eXcite is correct, but the eXcite is in an overtemperature condition. See Section 5.9.13.2 for more information. Draft Basler eXcite... -
Page 148: Input Power
4-5. A wiring diagram for the Y cable is shown in Figure 4-6. A power supply with the proper plug on the output cable is available from Basler. A Y cable terminated with the proper connectors is also available. Please contact your Basler sales representative to order power supplies or Y cables. - Page 149 Interface Figure 4-3: Power Supply Connected Directly to an eXcite Figure 4-4: Cable Diagram for a Power Supply Draft Basler eXcite...
- Page 150 Interface Figure 4-5: Power Supply Connected to an eXcite Through a Y Cable Draft Basler eXcite...
- Page 151 Interface Figure 4-6: Cable Diagram for a Y Cable Draft Basler eXcite...
-
Page 152: Ports
PC. The Y cable must be terminated with the proper connectors as shown in Figure 4-5. A wiring diagram for the Y cable is shown in Figure 4-6. A Y cable terminated with the proper connectors is available from Basler. Please contact your Basler sales representative to order Y cables. -
Page 153: Ethernet Port
Ethernet card in a computer, you must use a crossover Ethernet cable with a 10/100 Mbps connection. In a peer-to-peer Ethernet cable with a 1000 Mbps connection, you can use either a straight- through or a crossover Ethernet cable. Draft Basler eXcite 4-11... -
Page 154: Input And Output Ports
Interface 4.4.4 Input and Output Ports A schematic of the I/O ports is shown in the figure below. The I/O ports are described in greater detail in the subsequent sections. Figure 4-7: I/O Port Schematic Draft 4-12 Basler eXcite... -
Page 155: Input Ports
10 and a DC ground must be present on pin 5. If this voltage and ground are not present, the input ports and the output ports will not operate. Figure 4-8: Typical Input Circuit Draft Basler eXcite 4-13... -
Page 156: Output Ports
By default, output ports 0, 1, and 2 are set to a low state after power on. Output port 3 is initially set to low but will go high approximately 100 to 300 ms after power on. Output port 3 will remain high for approximately 750 ms and will then reset to low. Draft 4-14 Basler eXcite... - Page 157 Interface Figure 4-9: Typical Voltage Output Circuit Figure 4-10: Typical LED Output Signal Draft Basler eXcite 4-15...
-
Page 158: I/O Port Cabling
Close proximity to strong magnetic fields should be avoided. The required 12-pin Hirose plug is available from Basler. Basler also offers an I/O cable assembly that is terminated with a 12-pin Hirose plug on one end and is unterminated on the other end. -
Page 159: Operation And Features
10 bit, analog-to-digital converter (ADC) are attached to the end of each column bus. From the column buses, the digitized signals enter a horizontal output register. The 10 bit digital image data is then clocked out of the output register, through an FPGA, and into an image buffer. Draft Basler eXcite... - Page 160 Operation and Features Figure 5-1: CMOS Sensor Architecture Draft Basler eXcite...
- Page 161 The image buffer between the sensor and processor allows data to be read out of the sensor at a rate that is independent of the of the data transfer between the camera and the processor. This ensures that the data transfer rate has no influence on image quality. Figure 5-2: Block Diagram Draft Basler eXcite...
-
Page 162: Ccd Camera Models
CCD Sensor Vert. Vert. Vert. Vert. Shift Shift Shift Shift Pixels Pixels Pixels Pixels Reg. Reg. Reg. Reg. Horizontal Shift Register Figure 5-3: CCD Sensor Architecture Draft Basler eXcite... - Page 163 Data Data Image Control Data Connector 8 MB 128 MB 8 MB Host Nor Flash Nand Flash SDRAM Controller Memory Memory Image Connector (Linux (root file Buffer system) kernel) RS-232 Pwr/RS-232 Interface Connector Figure 5-4: Block Diagram Draft Basler eXcite...
-
Page 164: Exposure Control
The explanations above are intended to give you a basic idea of how the One Shot and the Continuous Shot parameters can be used to trigger exposure start. For a more complete description, refer to the source code for the “SimpleGrab” and the “MultiGrab” sample programs in Section 3.5. Draft Basler eXcite... -
Page 165: Controlling Exposure With A Software Trigger
2. Set the value of the camera’s One Shot parameter to true. This prepares the camera to capture a single image. To set the One Shot parameter value, access the eXcite API and use Draft Basler eXcite... - Page 166 5. At the end of the specified exposure time, readout and transfer of the captured image will take place. 6. Repeat steps 3 and 4 each time you want to begin exposure and capture an image. 7. To disable continuous-shot operation, set the value of the camera’s Continuous Shot parameter to false. Draft Basler eXcite...
-
Page 167: Controlling Exposure With An Extrig Signal
When you are triggering exposure start with an ExTrig signal, you must not capture frames at a rate that exceeds the maximum allowed for the current settings. See Section for more information about the maximum frame capture rate. Draft Basler eXcite... - Page 168 ExTrig signal rises. If the camera is set for falling edge triggering, exposure starts when the ExTrig signal falls. Figure 5-6 illustrates programmable exposure with the camera set for rising edge triggering. Figure 5-6: Programmable Exposure with Rising Edge Triggering Draft 5-10 Basler eXcite...
- Page 169 ExTrig signal to vary the exposure time in a range from 3000 µs to 5500 µs. In this case you would use the Shutter parameter setting to set the minimum exposure time to 3000 µs. Draft Basler eXcite 5-11...
- Page 170 TriggerSource object. Physical input port 0 is the default port for receiving the ExTrig signal. The electrical characteristics of the ExTrig input signal that you apply to the eXcite must be as de- scribed in Section 4.4.4.1. Draft 5-12 Basler eXcite...
- Page 171 API Reference documentation.) 3. Check the state of the TrigRdy signal: a) If TrigRdy is high, you can toggle ExTrig when desired. b) If TrigRdy is low, wait until TrigRdy goes high and then toggle ExTrig when desired. Draft Basler eXcite 5-13...
-
Page 172: Setting The Exposure Time
The Shutter Time Base smart feature can be used to change the shutter time base. For more information on the shutter time base and how to change it, see Section 5.10.2.2. Draft 5-14 Basler eXcite... -
Page 173: Overlapped And Non-Overlapped Exposure
This situation is illustrated in Figure 5-9 and is known as operating the camera with “overlapped” exposure. As you can see, running the camera with readout and exposure overlapped can allow higher frame rates because the camera is performing two processes at once. Figure 5-9: Overlapped Exposure Draft Basler eXcite 5-15... -
Page 174: Trigger Ready Signal
If you monitor the trigger ready signal and you begin the capture of each new image immediately after the signal goes high, you will be sure that the camera is operating at the maximum frame capture rate for the current conditions. Draft 5-16 Basler eXcite... - Page 175 If you signal the camera to start an exposure when trigger ready is low, the camera will simply ignore the signal. If the camera is in continuous shot mode and external triggering is disabled, the trig- ger ready output signal will not be present. Draft Basler eXcite 5-17...
-
Page 176: Integrate Enabled Signal
When you use the integrate enabled signal, be aware that there is a delay in the rise and the fall of the signal in relation to the start and the end of exposure. See Figure 5-11 for details. Draft 5-18 Basler eXcite... -
Page 177: A Recommended Method For Controlling Exposure
• The integrate enabled (IntEn) signal will rise between 10. and 14 µs after the start of expo- sure. • The actual length of exposure will be equal to the programmed exposure time. • The IntEn signal will fall between 11 and 15 µs after the end of exposure. Draft Basler eXcite 5-19... -
Page 178: Exposure Timing Charts
Frame Readout Time = [ (AOI Height + 2) x C µs ] + C µs Where: C = 11.46 for exA640-180m/c models C = 15.28 for exA640-120m/c or exA640-60m/c models You can calculate the frame transfer time with this formula: Frame Transfer Time = Packets transferred per frame x 42 µs... -
Page 179: Ccd Camera Models
Frame N+1 Readout to the Image Buffer Readout Frame Frame N Transfer to MIPS Frame N+1 Transfer to MIPS Transfer TIMING CHARTS ARE NOT DRAWN TO SCALE Figure 5-12: Exposure Controlled with an ExTrig Signal for exA1390-19m/c Models Draft Basler eXcite 5-21... - Page 180 MIPS processor. To check the value of the Packet Number parameter access the eXcite API and use the GetValue method for the PacketNumber object. (For more information on using the API, refer to the API Reference documentation.) Draft 5-22 Basler eXcite...
-
Page 181: Maximum Allowed Frame Capture Rate
You can determine the number of packets needed to transfer a frame by checking the Packet Number parameter (see Section 5.4.5). Formula 3 calculates the maximum frame capture rate based on the current exposure time: Max. Frames/s -------------------------------------------------------------------------------- - Exposure time in µs + 20.8 µs Draft Basler eXcite 5-23... - Page 182 2000 µs + 20.8 µs Max. Frames/s = 494.8 Formula one returns the lowest value. So in this case, the limiting factor is the AOI size and the maximum allowed frame capture rate would be 409.6 frames per second. Draft 5-24 Basler eXcite...
-
Page 183: On Exa640-60M/C Models
The absolute maximum allowed frame capture rate for the exA640-60m/c model of the eXcite is 60 frames per second and this limit does not change when you change the size of your AOI. The maximum allowed frame capture rate for the exA640-60m/c model can also be limited by two other factors: •... - Page 184 Example of Calculating the Maximum Allowed Frame Capture Rate Assume that you are using an exA640-60m set for an exposure time of 2000 µs. Also assume that after making all parameter settings, you check the current value of the Packet Number parameter.
-
Page 185: On Exa1390-19M/C And Exa1600-14M/C Models
Formula 2 calculates the maximum frame capture rate based on the number of packets needed to transfer a frame: Max. Frames/s ----------------------------------------------------------------------------------------------------- × Packets transferred per frame µs You can determine the number of packets needed to transfer a frame by checking the Packet Number parameter (see Section 5.4.5). Draft Basler eXcite 5-27... - Page 186 2000 µs + 157 µs Max. Frames/s = 463.6 Formula one returns the lowest value. So in this case, the limiting factor is the AOI size and the maximum allowed frame capture rate would be 61.0 frames per second. Draft 5-28 Basler eXcite...
-
Page 187: What Does The Max Allowed Frame Capture Rate Mean To Me
(see Section 5.9.4) will decrease the sensor readout time and will make this factor less restrictive. This does not apply to exA640-60m/c models. On these models, changing the height of the AOI has no effect on the frame rate. -
Page 188: Using The Bandwidth Parameter
Bandwidth object. To check the value of the Packet Number parameter access the eXcite API and use the GetValue method for the PacketNumber object. (For more information on using the API, refer to the API Reference documentation.) Draft 5-30 Basler eXcite... -
Page 189: Image Data Output Formats (On Monochrome Models)
16 bit depth. However, only 10 of the bits are effective in the exA640-120m and exA640-60m models and only 12 of the bits are effective in the exA1390- 19m and exA1600-14m models. -
Page 190: Image Data Output Formats (On Color Models)
Section 5.9.4. The image data output formats available on color cameras are related to the Bayer pattern. The output formats are explained in the next section. Figure 5-14: Bayer Filter Pattern on the eXcite’s Sensor Draft 5-32 Basler eXcite... -
Page 191: Output Formats
Only 10 of the bits are effective in the exA640-120m and exA640-60m models and only 12 of the bits are effective in the exA1390-19m and exA1600-14m models. So for each pixel covered with a red lens, you get 16 bits of red data with the reduced number of bits effective. - Page 192 LSB and the unused bits are filled with zeros. When the camera is set for 16 bit output, bytes are placed into any image buffers created in the MIPS processor in big endian format. Draft 5-34 Basler eXcite...
- Page 193 ColorCoding object. (For more information on using the API, refer to the API Reference documentation. You can also refer to the source code for the “Simple Grab” sample program to see how the Color Coding object is used.) Draft Basler eXcite 5-35...
-
Page 194: Video Modes
The parameter should always be set to VideoMode_VideoMode0. For more information on using the API, refer to the API Reference documentation. You can also refer to the source code for the “Simple Grab” sample program to see how the VideoMode object is used. Draft 5-36 Basler eXcite... -
Page 195: Image Information Parameters
Frame Interval parameter will indicate the time in seconds that it takes to capture each image. (The “frame interval” is also commonly referred to as the “frame period.”) To read the Frame Interval parameter value, access the eXcite API and use the GetValue method for the FrameInterval object. Draft Basler eXcite 5-37... -
Page 196: Standard Features
This can be useful when at your brightest exposure, a gray value of less than 255 is achieved. For example, if gray values no higher than 127 were achieved with bright light, you could increase the Draft 5-38 Basler eXcite... - Page 197 This would decrease the 8 bit value output from the camera for any given 10 bit value output from the sensor thus decrease apparent brightness of the image. Figure 5-16: Brightness Setting Changes Mapping Draft Basler eXcite 5-39...
- Page 198 CCD cameras and other Basler cameras. This means that you can not directly compare the response of an eXcite CMOS camera to another Basler cam- era that has the same gain setting.
-
Page 199: Ccd Camera Models
[µJ/cm Figure 5-18: Brightness Because increasing gain increases both signal and noise, the signal to noise ratio does not change significantly when gain is increased. Draft Basler eXcite 5-41... - Page 200 The default is 370. In normal operation, gain settings lower than 350 should not be used. When the gain is set lower than 350, the sensor output signal will not be properly mapped to the ADC input. Draft 5-42 Basler eXcite...
- Page 201 1 in the digital values output for the pixels. To set the Brightness parameter value, access the eXcite API and use the SetValue method for the Brightness object. (For more information on using the API, refer to the API Reference documentation.) Draft Basler eXcite 5-43...
-
Page 202: White Balance (On Color Models)
(0x10) to 255 (0xFF), however, only the settings from 64 (0x40) to 255 (0xFF) are useful. If you set the parameter value lower than 64 (0x40), the camera will continue to operate, but you will see unacceptable changes in the color balance. Draft 5-44 Basler eXcite... -
Page 203: Integrated Ir Cut Filter (On Color Models)
The thread length on your lens must be less than 7.5 mm. If a lens with a longer thread length is used, the eXcite will be damaged and will no longer operate. See Section 1.4.3 for more details. Draft Basler eXcite 5-45... -
Page 204: Area Of Interest (Aoi)
One of the main advantages of the AOI feature is that decreasing the height of the AOI can increase the camera’s maximum allowed frame rate (does not apply to exA640-60m/c models). See Section for more information. - Page 205 To set the X Position, Y Position, Width, and Height parameter values, access the eXcite API and use the SetValue method for the XPosition object, YPosition object, Width object, and Height object respectively. (For more information on using the API, refer to the API Reference documentation.) Draft Basler eXcite 5-47...
-
Page 206: Changing Aoi Parameters "On-The-Fly
Decreasing the height of the AOI can increase the camera’s maximum allowed frame rate. This does not apply to exA640-60m/c models. On these models, chang- ing the height of the AOI has no effect on the frame rate. See Section for more information. -
Page 207: Serial Port
You must follow the procedure below exactly as written. Failure to follow the procedure could cause the camera to become inoperable and it can be very difficult to recover. Please call Basler technical support if you have questions or need assistance. - Page 208 In the next steps you will be using the nano editor to modify the “inittab” file. This file contains a single line that begins with “TTYS0:: respawn”. Your goal is to use the editor to comment out the Draft 5-50 Basler eXcite...
- Page 209 You must follow the procedure below exactly as written. Failure to follow the procedure could cause the camera to become inoperable and it can be very difficult to recover. Please call Basler technical support if you have questions or need assistance.
- Page 210 17. Type in: fconfig And then press the Enter key. 18. When you see: Run script at boot: true Press the Enter key. 19. Type in: fi lo linux And then press the Enter key. Draft 5-52 Basler eXcite...
- Page 211 You can monitor the reboot process on your emulator screen The port is now returned to its default configuration. Console output from the processor will be directed to the port and the port will accept input from your keyboard. Draft Basler eXcite 5-53...
-
Page 212: Usb Ports
When you are transmitting data from your eXcite, keep in mind that you can transmit a maximum of 100 MBits per second of image data or other data on a 100 MBits second network. On a 1000 MBits per second network, you can transmit up to 1000 MBits per second. Draft 5-54 Basler eXcite... -
Page 213: Input Ports
Excite’s processor to react to the state of the inputs. The port assigned to receive the ExTrig input signal can’t be used to receive user-designed input signals. Draft Basler eXcite 5-55... - Page 214 PioInput object. (For more information on using the API, refer to the API Reference documentation.) Figure 5-21: PIO Input Parameter Bit to Port Assignments For some examples of how to work with the input ports, refer to the source code for the “SimpleDio” sample program in Section 3.5.6. Draft 5-56 Basler eXcite...
-
Page 215: Output Ports
The PioOut3Src object is used to set the Output Port 3 Source Select parameter value. By default, the Integrate Enabled signal is assigned to physical Output Port 0 and the Trigger Ready Signal is assigned to physical Output Port 1. Draft Basler eXcite 5-57... - Page 216 Checking the Current State of a Port Reading the value of the Output Port 0 Monitor parameter will indicate the current state of Output Port 0 as shown below. Parameter Value Result PioOut0Monitor_Low Low (non-conducting) PioOut0Monitor_High High (conducting) Draft 5-58 Basler eXcite...
-
Page 217: Parallel Output Port Control
Setting the PIO Output parameter value will only set the state of physical output ports that are configured as “User settable.” For any output ports not configured as user settable, See Section 5.9.9.1 for information on configuring the parameter value will be ignored. physical output ports. Draft Basler eXcite 5-59... -
Page 218: I/O Port Response Times
If you are making use of the timer within one of your applications running on the eXcite and the timer times out, the eXcite will automatically reboot. The SimpleWatchdog sample code in Section 3.5.7 illustrates how to use the watchdog time with your application programs. Draft 5-60 Basler eXcite... -
Page 219: Configuration Sets And Memory Channels
To set the Memory Save parameter, access the API and use the SetValue method for the SaveMemory object. Saving a configuration set to one of the memory channels will overwrite any set that was previously saved to the selected channel. Draft Basler eXcite 5-61... - Page 220 3 to select memory channel 1, memory channel 2, or memory channel 3 respectively. To set the Startup Memory Channel parameter, access the eXcite API and use the SetValue method for the StartupMemoryCh object. (For more information on using the API, refer to the API Reference documentation.) Draft 5-62 Basler eXcite...
-
Page 221: Error Monitoring And Error Indicators
LED (see Figure 4.1) will be unlit. When the input voltage is returned to approximately 11.5 VDC, the eXcite will automatically restart, i.e., the eXcite will go through the same start up process as it would if power was switched off and back on. Draft Basler eXcite 5-63... -
Page 222: Error Flags
Gain Error Flag will be set to false. If the Gain parameter is out of range, the Gain Error Flag will be set to true. To read the current value of the Gain Error Flag, access the eXcite API and use the GetValue method for the ErrorGain object. Draft 5-64 Basler eXcite... - Page 223 Flag will be set to false. If either or both of these parameters is out of range, the White Balance Error Flag will be set to true. To read the current value of the White Balance Error Flag, access the eXcite API and use the GetValue method for the ErrorWhiteBalance object. Draft Basler eXcite 5-65...
-
Page 224: Smart Features
5.10Smart Features 5.10.1 What are Smart Features Smart features are features unique to Basler cameras. Test Images or the trigger counter and trigger flag feature are examples of Basler smart features. Enabling a smart feature will simply change the behavior of the camera. The Test Image feature is a good example of this type of smart feature. - Page 225 Figure 5-24, but the starting pixel gray values on each row will not be as described above.) The mathematical expression for test image one is: Gray value [ x + y + 1 ] MOD 256 Figure 5-24: Test Image One (Example) Draft Basler eXcite 5-67...
- Page 226 Figure 5-25: Test Image Two Test Image Three Test image three is similar to test image one but it is not stationary. The image moves by 1 pixel from right to left whenever an image is captured by the camera. Draft 5-68 Basler eXcite...
-
Page 227: Shutter Time Base
4000 µs. To set the Shutter Time Base parameter, access the eXcite API and use the SetValue method for the Shutter Time Base object. (For more information on using the API, refer to the API Reference documentation.) Draft Basler eXcite 5-69... -
Page 228: Trigger Counter And Trigger Flag
For troubleshooting purposes, Basler technical support may ask you to read this register and to supply the results. (For more information on contacting Basler technical support, see Section 7.) -
Page 229: Image Data Formats And Ranges
Row n-2/Pixel 0, Row n-2/Pixel 1, Row n-2/Pixel 2 ... Row n-2/ Pixel m-2, Row n-2/Pixel m-1 Row n-1/Pixel 0, Row n-1/Pixel 1, Row n-1/Pixel 2 ... Row n-1/ Pixel m-2, Row n-1/Pixel m-1 This sequence assumes that the camera is set for full resolution Draft Basler eXcite... -
Page 230: Image Data Formats
Y value for P Y value for P Y value for P Y value for P • • • • • • Y value for P Y value for P Y value for P Y value for P Draft Basler eXcite... - Page 231 When the camera is set for the mono 16 format, the camera outputs 16 bits per pixel. However, only 10 of the bits are effective in the exA640-120m/c and exA640-60m/c models and only 12 of the bits are effective in the exA1390-19m/c and exA1600-14m/c models (see Section 5.5).
- Page 232 Green value for P Blue value for P Red value for P Green value for P Green value for P Blue value for P Red value for P Green value for P Green value for P Blue value for P Draft Basler eXcite...
- Page 233 When the camera is set for the mono 16 format, the camera outputs 16 bits per pixel. However, only 10 of the bits are effective in the exA640-120c and exA640-60c models and only 12 of the bits are effective in the exA1390-19c and exA1600-14c models (see Section 5.6). Draft Basler eXcite...
-
Page 234: Data Format With The Camera Set For Yuv 4:2:2 Output
• • • • • U value for P Y value for P V Value for P Y value for P U value for P Y value for P V Value for P Y value for P Draft Basler eXcite... -
Page 235: Image Data Ranges
The range of data values for a Y mono component and the corresponding indicated signal levels are shown below. CMOS Camera Models This Data Value Indicates This Signal Level (Hexadecimal) (Decimal) 0x03FF 1023 0x03FE 1022 • • • • • • 0x0001 0x0000 Draft Basler eXcite... - Page 236 Therefore, the highest data value you will see is 0x03FF indicating a signal level of 1023. When an eXcite CCD camera is set for 16 bit output, only 12 bits are effective. Therefore, the highest data value you will see is 0x0FFF indicating a signal level of 4095. Draft Basler eXcite...
-
Page 237: Data Range For A U Or A V Component
0x01 -127 0x00 -128 The signal level of a U component or a V component can range from -128 to +127 (decimal). Notice that the data values have been arranged to represent the full signal level range. Draft Basler eXcite... - Page 238 Image Data Formats & Ranges Draft 6-10 Basler eXcite...
-
Page 239: Troubleshooting And Support
If you do decide to contact Basler technical support, please take a look at the form that appears on the last two pages of this section before you call. Filling out this form will help make sure that you have all of the information the Basler technical support team needs to help you with your problem. -
Page 240: Before Contacting Basler Technical Support
7.2 Before Contacting Basler Technical Support To help you as quickly and efficiently as possible when you have a problem with a Basler camera, it is important that you collect several pieces of information before you contact Basler technical support. - Page 241 (If you need more space, use an extra sheet of paper.) 7 If known, what’s the cause of the problem? 8 When did the problem occur? After start. While running. After a certain action (e.g., a change of parameters): Draft Basler eXcite...
- Page 242 11 Did your application ever run without problems? 12 Parameter set It is very important for Basler technical support to know the exact camera parameters that you were using when the problem occurred. Please try to state the following parameter set- tings:...
-
Page 243: Appendix A License Information
Any application software you write for use on the eXcite that simply interfaces with the Linux kernel modules and with the eXcite API is not required to adhere to the terms of the GPL or the GenICam license. Draft Basler eXcite... - Page 244 Licensing Information Draft Basler eXcite...
-
Page 245: Revision History
Added information throughout the manual specific to the CCD models exA1390-19 m/c and exA1600-14 m/c. Made small changes throughout the manual to ensure compatibility with CCD cameras. Added Mono 16 * to exA640-60m/c and exA640-120m/c and changed power consumption to 14 W in Table 1-2 and Section 4.3. - Page 246 Added recommendation to disable the DEP feature in Sections 2.4.3 2.4.4.2. Added note related to the Basler SFF Viewer GX software in Section 3. Replaced ”offset“ by ”brightness“ in Section 5.9.1. Added ”Software Trigger / One-shot Operation” in Section 5.3.2.
-
Page 247: Feedback
Feedback Feedback Your feedback will help us improve our documentation. Please click the link below to access an online feedback form. Your input is greatly appreciated. http://www.baslerweb.com/umfrage/survey.html Draft Basler eXcite... - Page 248 Feedback Draft Basler eXcite...
-
Page 249: Index
......5-32 environmental requirements ....1-18 Draft Basler eXcite... - Page 250 ......2-15 specifications ......1-4 Draft Basler eXcite...
- Page 251 ....5-6, 5-13 raw 8 output format ....5-33, 6-4 Draft Basler eXcite...
- Page 252 ....3-38 simpletrigger sample program ....3-40 Draft viii Basler eXcite...
- Page 253 YUV 422 data range ..... . . 6-9 YUV 422 output format ....5-33, 6-6 Draft Basler eXcite...
Need help?
Do you have a question about the exA640-60m and is the answer not in the manual?
Questions and answers