Table of Contents
Advertisement
Available languages
Available languages
Quick Links
Advertisement
Table of Contents

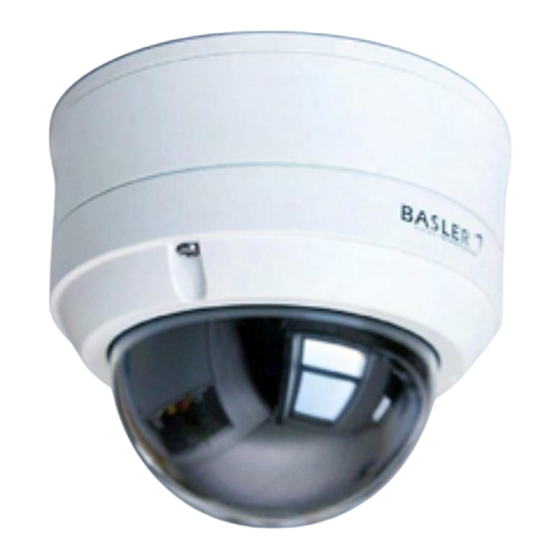
Related Manuals for Basler BIP-D1000c-dn


Summary of Contents for Basler BIP-D1000c-dn
- Page 1 Basler IP Installation Guide Fixed Dome Camera Installations- anleitung Third Language Fourth Langauge Fifth Document Number: AW000902 Version: 04 Language: 000 Language Release Date: 25 August 2010 Sixth Language Seventh Language Eighth Langauge...
- Page 2 Contacting Basler Support Worldwide Europe and the Middle East: Basler AG Phone: +49-4102-463-303 An der Strusbek 60 - 62 Fax: +49-4102-463-599 22926 Ahrensburg Email: bc.support.ip.emea@baslerweb.com Germany The Americas: Basler, Inc. Phone: +1-610-280-0171 855 Springdale Drive Fax: +1-610-280-7608 Suite 203 Email: bc.support.ip.usa@baslerweb.com Exton, PA 19341 U.S.A.
- Page 3 Installation Guide About This Document This document is intended to help you install your Basler IP Fixed Dome Camera on a network. When installation is complete, refer to the camera user’s manual for detailed information about camera operation and features.
- Page 4 The European Union has enacted Directive 2002/96/EC on Waste Electrical and Electronic Equipment (the WEEE Directive). This directive is only applicable in European Union member states. All Basler IP Fixed Dome Cameras have been manufactured after the 31st of August 2005. Basler IP Fixed Dome Camera...
-
Page 5: Basic Specifications
-35° to +50° C (-31° to +122° F) Ambient humidity: Less than 90% relative humidity Table 1: Basic IP Fixed Dome Camera Specifications Note: For full specifications, see the Basler IP Fixed Dome Camera User’s Manual. Basler IP Fixed Dome Camera... -
Page 6: Hardware Overview
DC output voltage. RS-485 Terminal Block - Provides a connection for a standard RS-485 port that can be used to communicate with an external device. Basler IP Fixed Dome Camera... - Page 7 SD Card Slot - Can hold a micro SD or a micro SDHC card. The card can be used to store alarm images or the contents of the alarm buffers. See the dome camera user’s manual for details. (An SD card is not included with the camera.) Basler IP Fixed Dome Camera...
-
Page 8: The Main Terminal Block
Make sure that the voltages are within the limits specified in Table 2 on page 8. Applying voltages outside of the specifications can seriously damage the camera. NOTICE Always switch off camera power before making or breaking connections at the main terminal block. Basler IP Fixed Dome Camera... - Page 9 If you are unable to connect the cable shields to ground or if you use unshielded cable, we recommend that you install a ferrite bead on each cable near to the camera to minimize electromagnetic interference. Basler IP Fixed Dome Camera...
- Page 10 I/O Gnd Ground for the camera’s input and output lines Note: Camera power ground, I/O ground, and RS-485 ground are all isolated from each other. Table 2: Main Terminal Block Wire Fixing Hole Assignments Basler IP Fixed Dome Camera...
- Page 11 If an inductive load such as a relay is used with the output, a diode must be connected in parallel with the load as shown in Figure 4 on page 12. Table 2: Main Terminal Block Wire Fixing Hole Assignments Basler IP Fixed Dome Camera...
- Page 12 The area between +4.0 and +5.0 VDC is a transition zone and should be avoided. The voltage applied to the input must not exceed +24 VDC. Table 2: Main Terminal Block Wire Fixing Hole Assignments Basler IP Fixed Dome Camera...
- Page 13 If an inductive load such as a relay is used with DC Out, a diode must be connected in parallel with the load as shown in Figure 5. Table 2: Main Terminal Block Wire Fixing Hole Assignments Basler IP Fixed Dome Camera...
- Page 14 Off to Gnd to Camera disable heater) Heater Off Power Circuit Camera Power Gnd (isolated) Isolated RS-485 Device Circuit RS-485 A+ RS-485 A+ RS-485 B- RS-485 B- RS-485 Gnd (isolated) Fig. 4: Switched Ground Input Basler IP Fixed Dome Camera...
- Page 15 Off to Gnd to Camera disable heater) Heater Off Power Circuit Camera Power Gnd (isolated) Isolated RS-485 Device Circuit RS-485 A+ RS-485 A+ RS-485 B- RS-485 B- RS-485 Gnd (isolated) Fig. 5: Direct Device Input Basler IP Fixed Dome Camera...
-
Page 16: The Rs-485 Terminal Block
Wires inserted into the fixing holes must have a minimum cross section of 0.2 (AWG 24) and a maximum cross section of 1.5 mm (AWG 16). 8 mm (5/16") of insulation should be stripped from the end of a wire before it is inserted into a fixing hole. Basler IP Fixed Dome Camera... -
Page 17: Installation Procedure
1. Remove the dome from the camera base. (For shipping, the dome will be held to the camera base with tape. Remove the tape to separate the dome from the camera base.) Dome Camera Base Basler IP Fixed Dome Camera... - Page 18 Use the round plug and the plug insertion tool included in the dome camera kit to plug the hole that you will not be using as shown below. Note that the plug should have an O-ring on it as shown in the drawing. Plug Insertion Tool O-ring Plug Basler IP Fixed Dome Camera...
- Page 19 If you will be routing your cables through the cable pass-through hole in the the bottom of the camera base, then you should also mark the location of the cable pass-through hole. Cable Pass-through Hole Basler IP Fixed Dome Camera...
- Page 20 The O-rings are included in the installation kit. c. When you are finished mounting the camera base, go on to Section 5.3. Basler IP Fixed Dome Camera...
- Page 21 Installation Guide Gasket Screw with O-ring (x3) Basler IP Fixed Dome Camera...
- Page 22 1. Screw the nipple into the side of the camera base. Be sure to tighten the nipple enough so that the O-ring is squeezed between the nipple and the camera base. This is required to make a weather-proof seal. O-ring Nipple Basler IP Fixed Dome Camera...
- Page 23 Installation Guide 2. Insert the cable(s) through the cap nut as shown below. Secondary Cable Ethernet Cable Basler IP Fixed Dome Camera...
- Page 24 Make sure that the ends of the cables extend 15 cm (6 inches) past the grommet as shown below. Note: If you are using only one cable, use the split grommet with only one groove. Split Grommet Split Grommet Basler IP Fixed Dome Camera...
- Page 25 Reapply the grommet to the cable and check the cables for a snug fit in the grooves. Cables Must Fit Snugly in the Grooves Basler IP Fixed Dome Camera...
- Page 26 5. Route the cable ends through the hole in the center of the nipple as shown below. 6. Continue pulling the cables through the hole until the grommet contacts the nipple and then press the grommet into the hole in the center of the nipple. Grommet Nipple Basler IP Fixed Dome Camera...
- Page 27 Installation Guide 7. Slide the cap nut up to the threaded end of the nipple and screw the cap nut onto the nipple as shown below. 8. Go on to Section 5.3. Cap Nut Nipple Basler IP Fixed Dome Camera...
- Page 28 If you will be making connections to both the main terminal block and to the RS-485 terminal block, strip about 13 cm off of the cable’s outer sheath and route the wires directly to the terminal blocks. Looped Secondary Cable Basler IP Fixed Dome Camera...
- Page 29 Insert the positive wire into the wiring fixing hole in the terminal block marked "VDC" as shown below. g. Insert the ground wire into the wire fixing hole marked "Gnd". Insert Insert Positive Ground Wire Wire Here Here Basler IP Fixed Dome Camera...
- Page 30 14 and make the appropriate wiring connections to the RS-485 terminal block now. 4. Connect the network cable to the RJ-45 connector now. It is easiest to connect the cable if you loop it as shown below. RJ-45 Connector Looped Network Cable Basler IP Fixed Dome Camera...
- Page 31 PC and that you have a Windows operating system on your PC. The procedure uses a web browser to access your Basler IP Fixed Dome Camera. The recommended web browser is Microsoft Internet Explorer version 6.0 or higher.
- Page 32 The Basler IP Fixed Dome Cameras will be listed in the Camera Finder window by their serial number. If you double click on a Basler IP Fixed Dome Camera serial number in the Camera Finder window, your web browser will open and the browser will access the Basler Surveillance Web Client in the camera.
- Page 33 Installation Guide If you hover the cursor over a Basler IP Fixed Dome Camera serial number in the Camera Finder window, information about the camera will be displayed in a tip box as shown below. The information will include the camera’s model, current firmware version, serial number, host name, IP...
-
Page 34: Accessing The Camera From A Web Browser
To access the camera: 1. Do one of the following: Use the Basler BIP Finder software to find your camera as described in Section 6 and then double click on the camera’s serial number in the BIP Finder window. Your browser will open and will access the Basler Surveillance Web Client in the camera. - Page 35 Information Bar to allow installation of an ActiveX control. The ActiveX control that the system wants to install is supplied by Basler and is used to display image streams within the browser. We strongly recommend that you install the control by performing the following steps: a.
- Page 36 Installation Guide The Basler Surveillance Web Client will display a live MJPEG stream from the camera as shown below. For complete information about using the Basler Surveillance Web Client to change the camera’s settings and view images from the camera, see the Basler IP Fixed Dome Camera User’s Manual.
- Page 37 While viewing the live image stream in the Basler Web Surveillance Client: 1. Position the camera head so that the lens is aimed at your desired viewing area.
- Page 38 Installation Guide head, observe the cable and stop the panning or rotation when the cable begins to look like it will become over-stressed. Rotation Carriage Camera Head Rotate Tilt Panning Plate Basler IP Fixed Dome Camera...
- Page 39 When complete, tighten the zoom puller. 3. Loosen the focus puller by turning it counter-clockwise. Adjust the focus by moving the puller left and right. When complete, tighten the focus puller. Focus Puller Zoom Puller Basler IP Fixed Dome Camera...
-
Page 40: Complete The Installation
Place the stick-on anchor on the camera base and cable tie the desiccant to the anchor as shown below. Clip off the end of the cable tie. Install Desiccant Pack Here Clip Off Cable Tie End Basler IP Fixed Dome Camera... - Page 41 2. Clean the dome with a soft cloth to remove any dust or fingerprints. 3. Use the screw included with the installation kit to attach the safety strap from the dome to the camera base as shown below. Safety Strap Basler IP Fixed Dome Camera...
- Page 42 Once the screws are completely tightened, the plastic dome will be locked in place. Captive Tamper-proof Screw (x3) 5. With the dome in place, double-check that the camera aim and focus is still correct. Remove the dome and make adjustments if necessary. Basler IP Fixed Dome Camera...
-
Page 43: Firmware Updates
Installation Guide 10 Firmware Updates To ensure that your camera’s functionality is up to date, you should periodically check the Downloads section of the Basler website to see if a firmware update file is available. The website address is: www.basler-ipcam.com You can use the Basler Surveillance Web Client to view the current firmware version on a camera and to perform a firmware update. - Page 44 Installation Guide Basler IP Fixed Dome Camera...
- Page 45 Basler IP-Fixed-Dome-Kamera- Installationsanleitung Über dieses Dokument Dieses Dokument soll bei der Installation einer Basler IP-Fixed-Dome-Kamera in einem Netzwerk helfen. Nach abgeschlossener Installation finden Sie detailliertere Informationen über Betrieb und Funktionen im Benutzerhandbuch der Kamera. Das Benutzerhandbuch befindet sich auf der...
- Page 46 2. Die beste Bildqualität wird erreicht, wenn die Kamera nicht im direkten Sonnenlicht platziert wird. WEEE-Richtlinie Die Richtlinie 2002/96/EG (WEEE-Richtlinie) der Europäischen Union regelt die Entsorgung von Elektro- und Elektronik-Altgeräten. Diese Richtlinie ist nur in den Mitgliedsstaaten der Europäischen Union gültig. Basler IP-Fixed-Dome-Kamera...
- Page 47 Installationsanleitung Alle Basler IP-Fixed-Dome-Kameras wurden nach dem 31. August 2005 hergestellt. Basler IP-Fixed-Dome-Kamera...
-
Page 48: Technische Spezifikationen
(Max. Sensor-Ausleserate = 30 fps) 30 fps) Betriebs- Umgebungstemperatur: bedingungen -35° bis +50° C (-31° bis +122° F) Luftfeuchtigkeit der Umgebung: weniger als 90% relative Luftfeuchtigkeit Tabelle 1: Technische Spezifikationen der IP-Fixed-Dome-Kamera Hinweis: Vollständige Spezifikationen, siehe Benutzerhandbuch der Basler IP-Fixed-Dome-Kamera. Basler IP-Fixed-Dome-Kamera... - Page 49 Hauptklemmleiste - Anschlüsse für externe Stromversorgung, wenn PoE nicht verwendet wird. Zudem ist sowohl eine Verbindung zur digitalen Eingangsleitung als auch zur digitalen Ausgangsleitung der Kamera und ein Gleichspannungsausgang vorhanden. RS-485-Klemmleiste - Verbindung für Standard-Schnittstelle RS-485 zur Kommunikation mit einem externen Gerät. Basler IP-Fixed-Dome-Kamera...
- Page 50 Geschwindigkeit der Netzwerkverbindung 10 Mbit/s (oder die Netzwerkverbindung ist unterbrochen). Leuchtet die LED, beträgt die Geschwindigkeit der Netzwerkverbindung 100 Mbit/s. Die gelbe LED zeigt die Netzwerkaktivität an. Factory Reset-Knopf - Zurücksetzen der Kamera auf Werkseinstellungen. Weitere Informationen, siehe Benutzerhandbuch der Dome-Kamera. Basler IP-Fixed-Dome-Kamera...
- Page 51 Installationsanleitung SD-Kartensteckplatz - für Speicherkarten im Format microSD oder microSDHC. Die Karte kann zur Speicherung von Alarmbildern oder Inhalten der Alarm-Puffer verwendet werden. Weitere Informationen, siehe Benutzerhandbuch der Dome-Kamera. (Eine SD-Speicherkarte ist nicht im Lieferumfang der Kamera enthalten.) Basler IP-Fixed-Dome-Kamera...
- Page 52 Schäden an der Kamera führen. Sicherstellen, dass die Spannungswerte innerhalb der in Tabelle 2 auf Seite 11 festgelegten Grenzwerte liegen. Das Anlegen von Spannungen, die außerhalb der festgelegten Grenzen liegen, kann zu schwerwiegenden Schäden an der Kamera führen. Basler IP-Fixed-Dome-Kamera...
- Page 53 Installationsanleitung HINWEIS Die Kamera ist vor jedem Anschließen oder Trennen von Verbindungen an der Hauptklemmleiste auszuschalten. Basler IP-Fixed-Dome-Kamera...
- Page 54 Leitungen auszuführen und die Leitungsschirme mit Masse zu verbinden. Wenn es nicht möglich ist, die Leitungsschirme mit Masse zu verbinden, oder wenn ungeschirmte Leitungen verwendet werden, empfehlen wir Ferritperlen in Kameranähe an den Leitungen anzubringen, um die elektromagnetische Interferenz zu verringern. Basler IP-Fixed-Dome-Kamera...
- Page 55 Heizung 7 W (bei 12 V Gleichspannung). Bei einer Stromversorgung über PoE fällt die Kamera bei eingeschalteter Heizung in die Klasse 0, bei ausgeschalteter Heizung in Klasse 2. Bei Verwendung eines PoE-Switches mit niedriger Leistungskapazität ist dies besonders nützlich. Tabelle 2: Anschlussbelegungen Hauptklemmleiste Basler IP-Fixed-Dome-Kamera...
- Page 56 Installationsanleitung Befesti- Funktion gungs- klemme I/O Gnd Masse für Ein- und Ausgänge der Kamera Hinweis: Die Masse für die Stromversorgung der Kamera, die Masse für Eingang/Ausgang (I/O) und RS-485 sind alle isoliert voneinander ausgeführt. Tabelle 2: Anschlussbelegungen Hauptklemmleiste Basler IP-Fixed-Dome-Kamera...
- Page 57 Die maximal erlaubte Last am Ausgang beträgt 500 mA und die maximale Gleichspannung ist +24 V. Wenn eine induktive Last, z. B. ein Relais an den Ausgang angeschlossen ist, muss eine Diode parallel zur Last geschaltet werden, siehe Abbildung 4 auf Seite 16. Tabelle 2: Anschlussbelegungen Hauptklemmleiste Basler IP-Fixed-Dome-Kamera...
- Page 58 Einstellung des Eingangsmodus (normal oder invertiert) von der Kamera als aktiv oder inaktiv erkannt. angelegte Spannung Eingangsmodus Eingang erkannt als 0 bis +4,0 VDC Normal Aktiv +5,0 bis +24,0 VDC Normal Inaktiv 0 bis +4,0 VDC Invertiert Inaktiv +5,0 bis +24,0 VDC Invertiert Aktiv Basler IP-Fixed-Dome-Kamera...
- Page 59 Die maximale Last am Ausgang DC Out ist 50 mA. Wenn eine induktive Last, z. B. ein Relais, an den Ausgang DC Out angeschlossen ist, muss eine Diode parallel zur Last geschaltet werden, siehe Abbildung 5. Tabelle 2: Anschlussbelegungen Hauptklemmleiste Basler IP-Fixed-Dome-Kamera...
- Page 60 Off zu Gnd, kreis Heizung Heater Off Kamera (isoliert) ausschalten) Masse Stromversorgung Kamera (isoliert) isolierter RS-485- Gerät Schaltkreis RS-485 A+ RS-485 A+ RS-485 B- RS-485 B- Masse (Gnd) Masse (Gnd) Masse RS-485 (isoliert) Abb. 4: Eingang mit geschalteter Masse Basler IP-Fixed-Dome-Kamera...
- Page 61 Off zu Gnd, kreis Heizung Heater Off Kamera (isoliert) Masse Masse Stromversorgung Kamera (isoliert) isolierter RS-485- Gerät Schaltkreis RS-485 A+ RS-485 A+ RS-485 B- RS-485 B- Masse (Gnd) Masse (Gnd) Masse RS-485 (isoliert) Abb. 5: Eingang direkt am Gerät Basler IP-Fixed-Dome-Kamera...
- Page 62 Ziehen an der entsprechenden Ader kann diese aus der Befestigungsklemme entfernt werden. Der minimal für diese Befestigungsklemmen zu verwendende Querschnitt der Ader beträgt 0,2 mm , der maximale Aderquerschnitt 1,5 mm Vor dem Einführen in die Befestigungsklemme muss die Ader am Ende 8 mm abisoliert werden. Basler IP-Fixed-Dome-Kamera...
- Page 63 (z.B. Zwischendeckenmontage). Eine entsprechende Beschreibung des Montageablaufes liegt diesem Zubehör bei. 1. Kuppelgehäuse vom Kamerasockel entfernen. (Kuppelgehäuse ist zum Transport mit Klebeband an der Basis befestigt. Klebeband entfernen, um Kuppelgehäuse vom Kamerasockel abnehmen zu können.) Kuppel- gehäuse Kamerasockel Basler IP-Fixed-Dome-Kamera...
- Page 64 Stromversorgung, zur Übertragung von digitaler Ein-/Ausgangssignalen oder von RS-485-Signalen dienen.) Beigefügten runden Blindstopfen mit Werkzeug in die nicht genutzte Kabeleinführung einsetzen, siehe unten. Der in der Abbildung gezeigte Dichtungsring um den Blindstopfen muss vorhanden sein. Werkzeug zum Einsetzen des Blindstopfens Dichtungsring Blindstopfen Basler IP-Fixed-Dome-Kamera...
- Page 65 Befestigungslöcher im Boden des Kamerasockels als Schablone zum Anzeichnen der Position der am Anbauort zu bohrenden Löcher verwenden. Wenn die Kabel durch die Kabeleinführung im Boden des Kamerasockels geführt werden sollen, auch die Position der Kabeleinführung markieren. Kabel- einführung Basler IP-Fixed-Dome-Kamera...
- Page 66 Kabels in den Kamerasockel ziehen. Die Flachdichtung ist im Lieferumfang des Montagesatzes enthalten. b. Kamerasockel an Wand oder Decke befestigen, indem die drei Schrauben von innen durch die Befestigungslöcher im Kamerasockel in die in der Wand bzw. Decke eingesetzten Dübel eingeschraubt werden. Basler IP-Fixed-Dome-Kamera...
- Page 67 Sicherstellen, dass sich auf jeder Schraube ein Dichtungsring befindet und dass gemäß der Abbildung die witterungsbeständige Flachdichtung zwischen Wand bzw. Decke und Kamerasockel eingelegt ist. Die Dichtungsringe sind im Lieferumfang des Montagesatzes enthalten. c. Ist die Montage des Kamerasockels abgeschlossen, mit Abschnitt 5.3 fortfahren. Basler IP-Fixed-Dome-Kamera...
- Page 68 Installationsanleitung Flachdichtung Schraube mit Dichtungsring (x3) Basler IP-Fixed-Dome-Kamera...
- Page 69 Installation nur darin, dass ein Dichteinsatz mit nur einer Kabelführung eingesetzt wird. 1. Kabelverschraubung seitlich in den Kamerasockel einschrauben. So festziehen, dass der Dichtungsring zwischen Kamerasockel und Kabelverschraubung gequetscht wird. Dies sorgt für die notwendige witterungsbeständige Abdichtung. Dichtungsring Kabelverschraubung Basler IP-Fixed-Dome-Kamera...
- Page 70 Installationsanleitung 2. Kabel wie unten abgebildet durch die Überwurfmutter führen. Zweites Kabel Überwurfmutter Ethernet-Kabel Basler IP-Fixed-Dome-Kamera...
- Page 71 3. Kabel wie unten abgebildet in jeweils eine Kabelführung des geteilten Dichteinsatzes einlegen. Sicherstellen, dass die Kabelenden mindestens 15 cm über den Dichteinsatz überstehen. Hinweis: Bei Verwendung nur eines Kabels den geteilten Dichteinsatz mit einzelner Kabelführung verwenden. Geteilter Dichteinsatz Geteilter Dichteinsatz Basler IP-Fixed-Dome-Kamera...
- Page 72 Kabelführungen im Dichteinsatz liegen, indem mehrere Lagen qualitativ hochwertiges Kunststoff-Klebeband um jedes Kabel gewickelt werden. c. Kabel erneut in den Dichteinsatz legen und überprüfen, ob die Kabel fest in den Kabelführungen anliegen. Kabel müssen fest in den Kabelführungen anliegen Basler IP-Fixed-Dome-Kamera...
- Page 73 Installationsanleitung 5. Verlegung der Kabelenden durch die Öffnung der Kabelverschraubung, siehe unten. 6. Kabelenden so weit durch die Kabelverschraubung ziehen, bis der Dichteinsatz in die Öffnung der Kabelverschraubung gedrückt werden kann. Dichteinsatz Kabelverschraubung Basler IP-Fixed-Dome-Kamera...
- Page 74 Installationsanleitung 7. Überwurfmutter wie in der Abbildung unten gezeigt bis zur Kabelverschraubung schieben und festschrauben. 8. Fortfahren mit Abschnitt 5.3. Überwurfmutter Kabelverschraubung Basler IP-Fixed-Dome-Kamera...
- Page 75 5 cm der Ummantelung entfernen und das Kabel wie unten gezeigt im Gehäuse in eine Schleife legen. Wenn an Hauptklemmleiste und RS-485-Klemmleiste Leitungen angeschlossen werden, circa 13 cm der Ummantelung entfernen und die Leitungen direkt zu den Klemmleisten führen. Schleife des zweiten Kabels Basler IP-Fixed-Dome-Kamera...
- Page 76 Jedes Leitungsende 8 mm abisolieren. f. Positive Leitung wie in der Abbildung unten gezeigt in die mit "VDC" bezeichnete Befestigungsklemme der Klemmleiste einführen. g. Masseleitung in die mit "Gnd" gekennzeichnete Befestigungsklemme einführen. Positive Masseleitung Leitung einführen einführen Basler IP-Fixed-Dome-Kamera...
- Page 77 Seite 18. Entsprechende Verdrahtungen dafür jetzt an der RS- 485-Klemmleiste vornehmen. 4. Verbindung zwischen Netzwerkkabel und RJ-45-Anschluss herstellen. Es ist am einfachsten das Kabel anzuschließen, wenn wie in der Abbildung unten gezeigt eine Schleife gebildet wird. RJ-45- Steckver- bindung Schleife des Netzwerk- kabels Basler IP-Fixed-Dome-Kamera...
- Page 78 Kamera im selben Subnetz wie der Rechner befindet und dass Windows als Betriebssystem des Rechners verwendet wird. Es wird ein Webbrowser verwendet, um auf die Basler IP-Fixed-Dome- Kamera zuzugreifen. Der empfohlene Webbrowser ist Microsoft Internet Explorer Version 6.0 oder höher.
- Page 79 Wenn Sie im Fenster Camera Finder auf eine Seriennummer einer Basler IP-Fixed-Dome-Kamera doppelklicken, öffnet sich der Webbrowser und greift auf den Basler Surveillance Web Client in der Kamera zu. (Weitere Informationen zum Basler Surveillance Web Client, siehe Abschnitt 7.) Basler IP-Fixed-Dome-Kamera...
- Page 80 Installationsanleitung Wenn der Cursor im Fenster Camera Finder auf die Seriennummer einer Basler IP-Fixed-Dome-Kamera bewegt wird, erscheinen im Quicktipp- Fenster Informationen über diese Kamera, siehe unten. Es werden Kameramodell, aktuelle Firmware-Version, Seriennummer, Hostname, IP- Adresse(n), Portnummer und Angaben dazu angezeigt, wann die Kamera vom BIP Finder lokalisiert wurde.
- Page 81 Kamera zu finden, und auf die Seriennummer der Kamera im Fenster des BIP Finders doppelklicken. Der Browser öffnet sich und greift auf den Basler Surveillance Web Client in der Kamera zu. (Wenn der Kamera zwei IP-Adressen zugewiesen sind, im Fenster BIP Finder auf die Seriennummer der Kamera rechtsklicken und im Drop- Down-Menü...
- Page 82 Installationsanleitung 2. Der Basler Surveillance Web Client wird wie unten dargestellt im Browser geöffnet. Beim ersten Zugriff auf die Kamera über den Webbrowser wird eventuell eine Meldung angezeigt, die die Installation eines ActiveX- Steuerelementes durch Klicken auf die Informationsleiste empfiehlt. Das ActiveX-Steuerelement wird von Basler geliefert und wird verwendet, um Bilddatenströme im Browser anzuzeigen.
- Page 83 Installationsanleitung Der Basler Surveillance Web Client zeigt nun den Live-MJPEG- Bilddatenstrom der Kamera, siehe unten. Umfassende Informationen zur Nutzung des Basler Surveillance Web Client, zur Änderung von Kameraeinstellungen und Bildansichten der Kamera, siehe Benutzerhandbuch der Basler IP-Fixed-Dome-Kamera. Das Benutzerhandbuch befindet sich auf der mit der Kamera gelieferten CD, die aktuellste Version kann im Downloadbereich der Basler Website: www.basler-ipcam.com...
- Page 84 Kamerakopf zu weit geschwenkt oder gedreht, kann das Kabel zwischen Kamerasockel und Kamerakopf beschädigt werden. Beim Betrachten des Live-Bilddatenstroms im Basler Web Surveillance Client: 1. Kamerakopf so positionieren, dass das Objektiv auf den gewünschten Überwachungsbereich ausgerichtet ist. Der Kamerakopf kann, wie in der Abbildung auf der folgenden Seite zu sehen ist, geneigt, geschwenkt oder gedreht werden.
- Page 85 Dehnung des Kabels zwischen Kamerasockel und Kamerakopf begrenzt. Beim Schwenken und Drehen des Kamerakopfes auf das Kabel achten und die Bewegungen stoppen, bevor das Kabel gedehnt wird. Schwenken Dreh- bügel Kamera- kopf Drehen Neigen Schwenk- teller Basler IP-Fixed-Dome-Kamera...
- Page 86 Regler nach links und rechts bewegen und so den Zoomfaktor einstellen. Ist der Zoomfaktor eingestellt, Zoomregler festziehen. 3. Schärferegler durch Drehen nach links lösen. Regler nach links und rechts bewegen und so die Bildschärfe einstellen. Ist die Bildschärfe eingestellt den Schärferegler festziehen. Schärfe- Regler Zoom- Regler Basler IP-Fixed-Dome-Kamera...
-
Page 87: Installation Abschließen
Klebesockel für Kabelbinder aus dem Zubehör benötigt. Kabelbinder Trockenmittel- beutel Klebesockel für Kabelbinder b. Klebesockel für Kabelbinder am Kamerasockel anbringen und Trockenmittelbeutel mit dem Kabelbinder am Klebesockel befestigen, wie in der folgenden Abbildung gezeigt. Ende des Kabelbinders abschneiden. Trockenmittel hier anbringen Ende abschneiden Basler IP-Fixed-Dome-Kamera... - Page 88 Installationsanleitung 2. Kuppelgehäuse mit einem weichen Tuch abwischen, um Staub und Fingerabdrücke zu entfernen. 3. Beiliegende Schraube nutzen, um mit dem Sicherheitsband das Kuppelgehäuse am Kamerasockel zu befestigen. Sicherheits- band Basler IP-Fixed-Dome-Kamera...
- Page 89 Kuppelgehäuse mit dem Objektiv gleichgerichtet ist. Sind die Schrauben erst fest angezogen, ist die Polycarbonatkuppel im Kuppelgehäuse eingerastet. Unverlierbare, manipulationssichere Schraube (x3) 5. Nachdem das Kuppelgehäuse angebracht wurde, nochmals nachprüfen, ob Kameraausrichtung und Bildschärfe korrekt sind. Gegebenenfalls Kuppelgehäuse abnehmen und Korrektur vornehmen. Basler IP-Fixed-Dome-Kamera...
- Page 90 Dateien zum Update der Firmware gibt. Die Internetadresse lautet: www.basler-ipcam.com Mithilfe des Basler Surveillance Web Clients können Sie sich die aktuell installierte Firmware-Version auf der Kamera anzeigen lassen und ein Firmware-Update durchführen. Weitere Informationen zur Anzeige der aktuellen Firmware-Version und zum Firmware-Update über den Web Client...
- Page 91 Installationsanleitung Basler IP-Fixed-Dome-Kamera...
Need help?
Do you have a question about the BIP-D1000c-dn and is the answer not in the manual?
Questions and answers