
Related Manuals for Cashkeeper ZEUS

Summary of Contents for Cashkeeper ZEUS
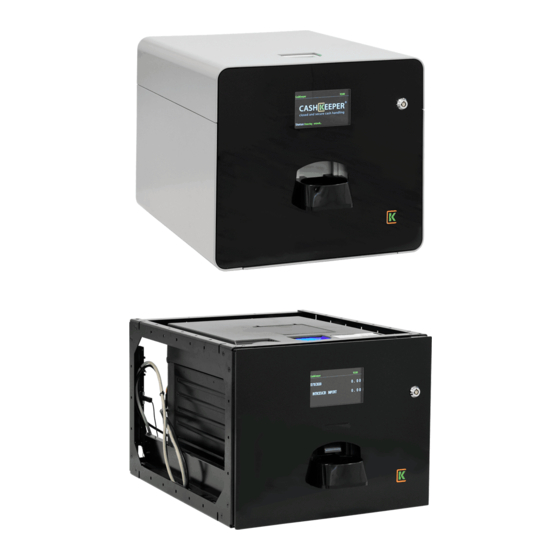
- Page 1 USER MANUAL COINS MODULE ZEUS ENGLISH USER MANUAL ZEUS MODEL (V0.2) AUTOMATIC DRAWER FOR SAFE CASH MANAGEMENT...
-
Page 2: Table Of Contents
USER MANUAL COINS MODULE ZEUS CONTENTS 1 PACKAGING CONTENT AND DIMENSIONS 1.1 Coin module box 1.2 Capabilities 2 EXPLODED VIEW 2.1 Coins Module ALU 2.1.1 Exploded view ALU 2.1.2 Functional elements 2.1.3 Connections 2.2 Coins Module NCK 2.2.1 Exploded view NCK 2.2.2 Functional elements... - Page 3 USER MANUAL COINS MODULE ZEUS 7.7 Filling the hoppers 7.8 Emptying the hoppers 7.9 Emptying the dust tray 8 ERROR AND WARNING CODES 9 INCIDENT MANAGEMENT 9.1 Removing jammed coins on the acceptance unit 9.2 Removing jammed coins on hoppers 10 WARRANTY 10.1 Terms and Conditions...
-
Page 4: Packaging Content And Dimensions
USER MANUAL COINS MODULE ZEUS 1 PACKAGING CONTENT AND DIMENSIONS THE MACHINE COMES FIXED, PALLETIZED AND PLASTICIZED WITH A SEMI EUROPEAN PALLET (600x800 mm). 1.1 Coin module box ALU VERSION NCK VERSION 1 COIN MODULE ALU 1 COIN MODULE NCK... -
Page 5: Capabilities
USER MANUAL COINS MODULE ZEUS 1.2 Capabilities The coin recycling module consists of 8 small containers, called "hoppers", each containing a type of denomination of coins. 4/48... -
Page 6: Exploded View
USER MANUAL COINS MODULE ZEUS 2 EXPLODED VIEW 2.1 Coins Module ALU 2.1.1 Exploded view ALU 1. External cover ALU 2. Structure 3. Rear panel 4. Anchoring interface 5. Sliding tray (contains electronic board) 6. Swing door Level 1 7. ON / OFF switch 8. -
Page 7: Functional Elements
USER MANUAL COINS MODULE ZEUS 2.1.2 Functional elements 1. Coin input 2. Led 1 (Coin input information) 3. Safety Lock Level 1 4. Coin output 5. Led 2 (Coin output information) 6. Informative screen TFT 5 ” 2.1.3 Connections Back panel connections:... -
Page 8: Coins Module Nck
USER MANUAL COINS MODULE ZEUS 2.2 Coins Module NCK 2.2.1 Exploded view NCK 1. NCK Structure 2. PCB housing 3. Sliding tray (contains the electronic board) 4. Pivoting door 5. ON / OFF switch 6. Validator + Coins Recycler 7. Power supply + Cable Schuko... -
Page 9: Functional Elements
USER MANUAL COINS MODULE ZEUS 2.2.2 Functional elements 1. Coin input 2. Led 1 (Coin input information) 3. Lock Level 1 4. Coin output 5. Led 2 (Coin output information) 6. Informative screen TFT 5 " 2.2.3 Connections Back panel connections:... -
Page 10: Keys And Security
There is the possibility of mastering the locks. For more information on master key combinations and prices contact your dealer. Both in this manual and in all the documentation related to CashKeeper®, whenever necessary, the level of security that, in each operation, can be compromised will be indicated. For this... -
Page 11: Electrical Characteristics
USER MANUAL COINS MODULE ZEUS 4 ELECTRICAL CHARACTERISTICS 4.1 Coin module The device must be connected to a network outlet with the following characteristics: Supply voltage of the external source: 2 00 - 240V 50Hz Voltage Power supply of the module:... -
Page 12: Assembly Of The Anchoring Interface
USER MANUAL COINS MODULE ZEUS 5 ASSEMBLY OF THE ANCHORING INTERFACE The module m ust be anchored to the furniture that supports it through the base destined for that purpose. If you do not do it, when you open it you can turn forward. - Page 13 USER MANUAL COINS MODULE ZEUS Slide together the levers of the guides , right and left. One down and the other Remove the tray from the structure. Fix the structure to the counter by means of 4 screws> M6x16 Reinsert the tray in its guides, until the levers "click".
- Page 14 USER MANUAL COINS MODULE ZEUS Slide again and at the same time levers of the guides , right and left. One down and the other Reconnect the 4 cables on the back of the tray. ATTENTION! In view R, make sure to put...
-
Page 15: Nck Version
USER MANUAL COINS MODULE ZEUS 5.2 NCK version ONLY TO BE FITTED INTO A FURNITURE. Order Description Image Open with the key of Level 1. The front panel tilts forward about 20º. Slide the tray forward until it stops. D: Indicates... - Page 16 USER MANUAL COINS MODULE ZEUS Remove the module from the structure. Slide at the same time l evers of the guides , right and left. One down and the other up. Remove the sliding tray from the structure. Insert the...
- Page 17 USER MANUAL COINS MODULE ZEUS Re-insert the tray into its guides, until the levers "click". FACE IT CORRECTLY. Slide together the l evers of the guides , right and left. One down and the other up. Reconnect the 4 cables on the back of the tray.
-
Page 18: Main Components
USER MANUAL COINS MODULE ZEUS 6 MAIN COMPONENTS Description of main components and locations. 6.1 Main components and functional elements 6.1.1 Front view Lid for future applications. Status lighting: operating status of the device. Coin entry funnel. Lock 2: open the payment unit. - Page 19 USER MANUAL COINS MODULE ZEUS Fig. 2: Rear view: functional elements Lid. Higher acceptance unit. Lower acceptance unit. Payment unit. Fig. 3: Layered structure 18/48...
-
Page 20: Modular Structure
USER MANUAL COINS MODULE ZEUS 6.1.3 Modular structure • Lid with: Coin entry funnel Drive elements such as lock, push button, handle • Coin acceptance unit in 2 layers (locked with key, accessible only by authorized personnel) with: Centrifugal disc... -
Page 21: Upper Coin Acceptance Unit
USER MANUAL COINS MODULE ZEUS 6.1.3.2 Upper coin acceptance unit Conveyor belt. Waste cover. Centrifugal disk. Validator arm. Coin validator. Coin reject pin. Spiral coin sorting. Fig. 5: Device with upper acceptance unit open showing the upper acceptance unit from below and the lower acceptance unit from above 6.1.3.3 Lower coin acceptance unit / Coin payment unit... -
Page 22: Device Status Lighting
USER MANUAL COINS MODULE ZEUS Fig. 6: Device with the lower acceptance unit open showing the payment unit 6.2 Device status lighting The upper illumination informs about the operating status of the device, the lower one indicates that the coin return tape is transporting coins to the tray return:... - Page 23 USER MANUAL COINS MODULE ZEUS Illumination On / Meaning Blinking for 2 seconds Initialization completed correctly (Led 1) constantly lit Solid green Standby mode: C oins will be rejected (Led 1) or Light off Blue light Enabled mode: R eady to receive coins (Led 1) Warning! Solving the problem.
-
Page 24: Lower Locks And Handle
USER MANUAL COINS MODULE ZEUS 6.3 Lower locks and handle In case of maintenance, the payment unit can be opened by unlocking the lower lock and opening the device with the handle. Do not unlock the lid or press the button to open it when the payment unit is open. This opens the coin acceptance unit and may damage the device or cause injury. -
Page 25: Coin Entry Funnel
USER MANUAL COINS MODULE ZEUS 6.4 Coin entry funnel Do not insert more than 50 coins 1 € size at a time so that all coins can be accepted correctly and not be rejected or stuck, which, in the worst case, can damage the device. - Page 26 USER MANUAL COINS MODULE ZEUS Fig. 11: Hopper detail (1), payment disc (2), tape (3) and return tray (4), lower status illumination (5) 1 Detail of Photoelectric height sensors that initiate the device when detecting coins in the entry funnel.
-
Page 27: Coin Validator And Classification Spiral
USER MANUAL COINS MODULE ZEUS 6.5 Coin validator and classification spiral Lever: measures the diameter of the coin. Coil: analyzes the material properties of the coin, detects the currency type, indicates the accepted currency (with valid measurement values) and increases the corresponding deposit counter. -
Page 28: Hoppers And Coin Return Tray
USER MANUAL COINS MODULE ZEUS 1 Sorting control located in front of each coin slot (capacitive sensor) detects the position of the accepted currency (green) with valid measurement values. Fig. 14: Classification spiral with classification control sensors that detect coins that fall into deposits 6.6 Hoppers and coin return tray... -
Page 29: Operating Instructions
(see electrical characteristics in section 4 ). Turn on the ZEUS module using the switch on the inside of the front door: Connect it to the network (LAN) of your establishment or directly to your POS (depending on the type of hardware, you may need a crossover cable). -
Page 30: Turning The Device On/Off
USER MANUAL COINS MODULE ZEUS Under no circumstances you should connect a network cable longer than 3 meters between the network switch or your equipment and the device. The default properties for network connection are as follows: DHCP: Active Host name:... -
Page 31: Opening And Closing The Lid Of The Device
USER MANUAL COINS MODULE ZEUS Fig. 16: Switching the device On / Off (1) 7.3 Opening and closing the lid of the device Even if the device stops working when the lid is opened, you should always wait until you have finished an operation before opening the lid so as not to affect the coin counters. -
Page 32: Opening And Closing The Coin Acceptance Unit
USER MANUAL COINS MODULE ZEUS Fig. 17: Upper lock (1), opening the button (2) and handle (3) Fig. 18: Open the cover 7.4 Opening and closing the coin acceptance unit The unit consists of a top layer and a bottom layer. The top layer can be opened using a bayonet mount to eliminate a jam, for example. - Page 33 USER MANUAL COINS MODULE ZEUS Close it in reverse order and make sure that the indication of the bayonet mount is green again Fig. 19: Correct closing of the bayonet mount Fig. 20: Arm of the coin validator raised 32/48...
- Page 34 USER MANUAL COINS MODULE ZEUS Fig. 21: Disconnecting the bayonet mount Fig. 22: Bayonet mount disconnected 33/48...
-
Page 35: Opening And Closing The Coin Payment Unit
USER MANUAL COINS MODULE ZEUS Fig. 23: Acceptance unit open 7.5 Opening and closing the coin payment unit The coin payment unit can be opened and closed with the key of the lower lock, for example, to eliminate the coin jam or to repair the device: Give the key to open the payment unit only to the staff have access to cash. -
Page 36: Removal And Reinstallation Of A Hopper
USER MANUAL COINS MODULE ZEUS To close the payment unit: Close the module again. Turn the key clockwise to the end and remove it. Reconnect the device (see section "7.2 on / off device".) Fig. 24: top lock (1) and handle (2) Fig. - Page 37 USER MANUAL COINS MODULE ZEUS Observe the color code of the hopper and the position code (the red hopper fits in the red position). Reinsert the hopper in its corresponding position with the label pointing inside the payment unit and press on both front corners of the hopper (pointing to the return belt) until the reservoir engages in its three attachment points [Fig.
- Page 38 USER MANUAL COINS MODULE ZEUS Fig. 28: Correct tilting of the handles of the hopper in front (towards the lid) 37/48...
-
Page 39: Filling The Hoppers
USER MANUAL COINS MODULE ZEUS 7.7 Filling the hoppers So that the hoppers can be filled and all coins can be registered / counted in the filling mode, you need to have the software dependent on the product installed in the computer of the connected control unit. -
Page 40: Emptying The Hoppers
USER MANUAL COINS MODULE ZEUS 7.8 Emptying the hoppers In order for the hoppers to be emptied, you need to have the software dependent on the product installed in the computer of the connected control unit, in order to decrease the counters of coins. -
Page 41: Emptying The Dust Tray
USER MANUAL COINS MODULE ZEUS 7.9 Emptying the dust tray Open the lid of the device (see section "7.3 Opening and closing the lid of the d evice"). Lift the fork [Fig. 32] and carefully tilt and pull the tray [Fig. 33]. -
Page 42: Error And Warning Codes
USER MANUAL COINS MODULE ZEUS 8 ERROR AND WARNING CODES Each coin module is equipped with a man-machine interface located on the front face of the device. This section describes how to locate an error using the upper and lower illuminations. The green, yellow and red LEDs [Fig 39] are used. - Page 43 USER MANUAL COINS MODULE ZEUS blink Attention! (Depending on the There is no error. configuration) Wait until the lighting is ● Processing currencies. blue to insert coins. ● Do not insert coins Insert the coins and ● Problem solved and write down the problem ●...
-
Page 44: Incident Management
USER MANUAL COINS MODULE ZEUS 9 INCIDENCE MANAGEMENT 9.1 Removing jammed coins on the acceptance unit If a coin jam occurs in the acceptance unit, the device switches off. To eliminate the coins and make sure that the accounts of the coins of the deposit correspond with the counts, we recommend that you proceed as follows: Switch off the appliance using the module on / off switch ( see section "7.1 Starting the coin... -
Page 45: Removing Jammed Coins On Hoppers
USER MANUAL COINS MODULE ZEUS 9.2 Removing jammed coins on hoppers If the accumulation of coins and the disc pressure is very high, the coins may get stuck in the payment, solve it as follows: Turn off the device using the power switch turned off on the back (see section "7.2 Switching the device on / off"). - Page 46 USER MANUAL COINS MODULE ZEUS Fig. 36: Check protective tab Fig. 37: Remove hopper tray and payout disc Fig. 38: Insert hopper tray 45/48...
-
Page 47: Warranty
ATTENTION: In the event that the customer must send the device or a component thereof to the factory or a workshop designated by CashKeeper SL, it must be packed very well, if possible, in its original packaging. The client is responsible for that. CashKeeper SL will not be responsible for any damage caused during transport. -
Page 48: Warranty Does Not Cover
For assistance and technical support you should contact your dealer or the Authorized Technical Service designated by your dealer. CashKeeper S.L. does not provide direct technical service to the client, unless there is a maintenance contract for this purpose between CashKeeper S.L. and the client.
Need help?
Do you have a question about the ZEUS and is the answer not in the manual?
Questions and answers