Table of Contents
Advertisement
Available languages
Available languages
Quick Links
Advertisement
Table of Contents

Related Manuals for Majestic SILENO 50 FLIP


Summary of Contents for Majestic SILENO 50 FLIP
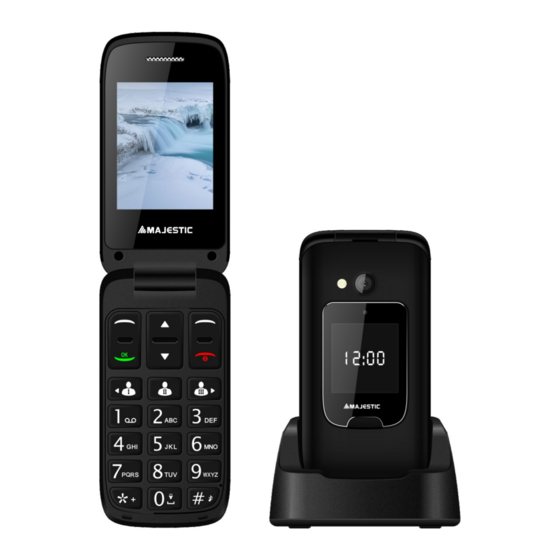
- Page 3 Istruzioni sui tasti 1. Altoparlante (orecchio) 2. Tasti freccia su/giù 3. Tasto selezione sinistra 4. Tasto chiamata 5. Segreteria telefonica 6. Tasto accensione torcia 7. Tasto selezione destra 8.Fine chiamata/accensione/spegnimento 9. Tasti chiamata rapida 10. Silenzioso/metodo di inserimento 11. Tasto SOS Indicatore LED(ricarica,chiamate perse, sms ricevuti)
- Page 4 Installazione scheda di memoria MicroSD Inserire la scheda MicroSD (NON FORNITA) facendola scorrere con attenzione nel supporto. Fare attenzione che i contatti della scheda siano rivolti verso il basso.
- Page 5 La scheda di memoria MicroSD viene utilizzata come memoria aggiuntiva del telefono, quando il telefono viene collegato al computer tramite il cavo USB è possibile copiare file MP3 nella cartella My Music e immagini nella cartella Photos. Installazione scheda SIM Inserire la scheda SIM facendola scorrere attentamente nell’alloggiamento.
- Page 6 Installazione batteria Per il primo utilizzo, scaricare la batteria completamente e ricaricarla per circa 4 ore. Rimuovere il coperchio della batteria, inserire la batteria nel comparto e rimettere il coperchio.
- Page 7 Rubrica Ricerca: è possibile velocizzare la ricerca del contatto inserendo l’iniziale del nome. Nuovo contatto: È possibile aggiungere un nuovo contatto sulla scheda SIM o sul telefono, premere ok per confermare. 1. inserire il nome e il numero di telefono 2.
- Page 8 Impostazione rubrica memoria in uso: è possibile salvare un nuovo contatto sulla scheda SIM, sul telefono o entrambi. stato memoria: controllare quanti contatti sono presenti sulla scheda SIM e sul telefono (250 max). copia contatti: è possibile copiare i contatti sulla scheda SIM o sul telefono. sposta contatti: è...
- Page 9 selezionare un messaggio dalla lista e premere Opzioni per visualizzare il messaggio. Altre opzioni di seguito: risposta come SMS inserire il messaggio da spedire al mittente chiamata al mittente selezionare per chiamare il mittente inoltra selezionare per inoltrare il messaggio ad un altro contatto elimina selezionare per cancellare il messaggio elimina tutto...
- Page 10 Impostazioni messaggi Tramite questo menù è possibile verificare tutti i settaggi inerenti ai messaggi SMS, fra cui la memoria in uso, la posizione di salvataggio, ecc. Chiamate Storico chiamate in modalità standby, premere Menu e scorrere fino a “chiamate”, e premere OK. utilizzare i tasti per scorrere le chiamate perse/effettuate/ricevute o cancellare la lista.
- Page 11 3. Inserire l'ora direttamente da tastiera. 4. Scorrere per selezionare ripetizione e scegliere tra Una volta, Ogni giorno o Personalizzato. Allo stesso modo impostare il tipo di avviso tra Tono allarme, Snooze o Tipo allarme. Nota: l’allarme è disponibile anche se il telefono è spento, quando la batteria ha un residuo di carica.
- Page 12 Ricerca dispositivi: ricerca dei dispositivi audio bluetooth disponibili. In alcuni casi è necessario l’uso di una password, inserirla e premere ok. Il mio nome: visualizza il nome del dispositivo corrente. SIM Toolkit Questi sono i servizi integrati nella SIM dal proprio gestore telefonico. Calendario Nel calendario è...
- Page 13 premere il tasto freccia su per scattare una foto. per visualizzare le foto premere Opzioni e seleziona Foto Attenzione: se la memoria è insufficiente, cancellare alcuni dati oppure inserire una scheda di memoria aggiuntiva (NON FORNITA). Visualizzatore foto Visualizza tutte le foto salvate tramite questo menu. Radio FM premere il tasto Menu selezionare multimedia e scorrere a Radio FM e premere OK, la radio è...
- Page 14 premere i tasti freccia per selezionare il canale e ricerca manuale delle frequenze, e i tasti per effettuare la ricerca automatica delle frequenze. la funzione “Registra” è disponibile solo nel caso vi sia inserita una scheda di memoria aggiuntiva (NON FORNITA). Servirsi della voce “Elenco file” per riprodurre le eventuali registrazioni della Radio FM.
- Page 15 premere il tasto per tornare in modalità standby. Nota: il telefono supporta solo il formato musicale MP3. Immagini Come prima cosa, creare una cartella di nome “Photos” (senza virgolette) e copiate dei files JPG nella scheda di memoria aggiuntiva (NON FORNITA) Visualizzare immagini ...
- Page 16 6. Entrare in SOS sms per modificare il messaggio. 7. Entrare in tono di avviso per controllare lo stato del tono acceso o spento. Effettuare una chiamata SOS Prima di effettuare chiamate di emergenza, impostare lo stato SOS come acceso e completare le impostazioni di SOS.
- Page 17 Modalità aereo Attiva/disattiva modalita aereo Display Cambiare lo sfondo: 1.Selezionare Display, entrare in sfondo. 2.Qui è possibile selezionare lo sfondo dal telefono o dalla scheda di memoria. Opzioni chiamata Premere menu e scorrere fino a impostazioni, selezionare impostazioni chiamata e premere È...
- Page 18 3. premere a lungo il tasto per passare in modalità Riunione. 4. dopo aver selezionato una modalità è possibile impostare il tipo allarme, tipo suoneria, suoneria chiamata in arrivo, volume suoneria, tono/volume messaggio, tono/volume tastiera, tono accensione/spegnimento. Chiamata rapida I tasti e i tasti numerici da 2 a 9 possono essere usati per la composizione rapida di un numero.
- Page 19 tasto “giù”. Rete GSM Tramite questo menù è possibile impostare la modalità di connessione alla rete GSM. Sicurezza Qui potete modificare le impostazioni di sicurezza per la scheda SIM, il telefono e la tastiera. 1. Protezione SIM Qui è possibile attivare o disattivare il PIN della scheda SIM. E’...
- Page 20 Non mettere il telefono o la batteria in luoghi superiori a 40°C, come il cruscotto dell’auto durante il periodo estivo. Non cercare di smontare il telefono cellulare o gli accessori. Utilizzare solo un panno umido o antistatico per pulire il telefono. Non usare prodotti chimici o detergenti contenenti ingredienti abrasivi che potrebbero danneggiare il dispositivo.
- Page 21 SPECIFICHE TECNICHE Schermo TFT a colori da 2.4” (240x320 pixel) Doppio status LED (mostra la ricarica della batteria, chiamate perse messaggi ricevuti) (128x128pixel) (ora/chiamate perse/SMS ricevuti) Display esterno 1.44” Ingresso Micro SD (supporta schede fino a 16GB) Supporto Reti GSM Quad Band 850/900/1800/1900Mhz Tasto SOS programmabile Funzione tastiera parlante (pronuncia vocale dei tasti digitati) Radio FM...
- Page 22 INFORMAZIONE AGLI UTENTI DI APPARECCHIATURE DOMESTICHE Ai sensi dell’art. 13 del Decreto Legislativo 25 luglio 2005, n. 151 "Attuazione delle Direttive 2002/95/CE, 2011/65/EU e 2003/108/CE, relative alla riduzione dell'uso di sostanze pericolose nelle apparecchiature elettriche ed elettroniche, nonché allo smaltimento dei rifiuti". Il simbolo del cassonetto barrato riportato sull’apparecchiatura o sulla sua confezione indica che il prodotto alla fine della propria vita utile deve essere raccolto separatamente dagli altri rifiuti.
- Page 23 Gentile Cliente, La ringraziamo per il Suo acquisto e Le ricordiamo che il prodotto risponde alle normative vigenti in fatto di costruzione e di sicurezza. Nel caso si dovessero riscontrare anomalie o difetti del prodotto, la New Majestic S.p.A. offre una Garanzia convenzionale soggetta alle condizioni qui riportate (precisando che la Garanzia convenzionale lascia impregiudicati i diritti del consumatore di cui al D.Lgs.
- Page 24 Per interventi in Garanzia si prega di rivolgersi presso uno dei Centri Assistenza Autorizzati della New Majestic S.p.A., la cui lista completa è consultabile sul sito www.newmajestic.com, oppure presso il punto vendita dove è stato acquistato il prodotto, consegnando il tagliando di Garanzia debitamente compilato ed allegando lo scontrino fiscale relativo l’acquisto.
- Page 25 DICHIARAZIONE DI CONFORMITA' CE La sottoscritta Società: NEW MAJESTIC S.P.A. Via Rossi Martini 41 26013 CREMA (CR) dichiara sotto la propria responsabilità che il prodotto: TIPO: TELEFONO CELLULARE MARCA:MAJESTIC MODELLO: SILENO 50 FLIP è costruito in conformità alle seguenti normative:...
- Page 26 1999/5/EC, 2014/30/EU, 2014/35/EU, 2009/125/EC e 2011/65/EU. Crema il 19/07/16 NEW MAJESTIC S.P.A. Noris Lacchinelli – Presidente DATA DI PRODUZIONE: 08/2016...
- Page 29 Instructions of button and telephone appearance 1. Earpiece 2. Arrow keys 3. Left selection key 4. Call key 5. Voice mail 6. Torch key(On/Off) 7. Right selection key 8. End call/Power on/Power off 9. Speed dial keys 10. Silent/Input method 11.
-
Page 30: Table Of Contents
Contents Installation..........................4 T-FLASH Installing memory card..................4 Installing the SIM card......................6 Installing the battery......................7 Phonebook..........................8 Search............................8 Add new contact........................8 Photo contact.......................... 8 Phonebook settings........................ 9 Messages..........................9 Write Message........................9 Inbox............................10 Drafts............................11 Outbox........................... 11 Sent messages........................11 Message settings........................11 Call history...........................12 Magnifier.......................... - Page 31 Organizer..........................13 Calendar..........................13 Calculator..........................14 Bluetooth..........................14 Multimedia........................... 15 Camera...........................15 Image viewer......................... 15 FM radio..........................15 File manager.......................... 16 Settings..........................17 SOS setting..........................17 Phone settings........................18 Call settings........................... 19 Profiles...........................20 Speed dial..........................20 Block function........................21 Up/Down key shortcuts......................22 Security settings........................22 Restore factory settings......................23 Safety and Attentions......................
-
Page 32: Installation
111111111111111 1 Installation111 11111111 IMPORTANT Turn off the phone and disconnect the charger before removing the battery cover. Installing T-FLASH memory card Insert the memory card into the slot under the SIM card holder, make sure card's contacts face downwards, take care and please do not scratch or bend the contacts on the card. You can check the pictures as below:... - Page 33 T-Flash card is used as phone storage, when connect to computer by USB cable, You can copy Music, Picture or Photos inside.
-
Page 34: Installing The Sim Card
Installing the SIM card Insert SIM Card into the SIM card slot upon the memory card holder. (Make sure the SIM card’s contacts are facing inwards.) Before taking out the SIM card, please turn off the phone first. -
Page 35: Installing The Battery
Installing the battery For the first time use, please use up the battery and charge for 4 hours to achieve the best state of battery. Remove the battery cover ,insert the battery into the battery compartment, replace the battery cover. -
Page 36: Phonebook
Phonebook Search You can speed search the contact person by entering the initial letter. Add new contact: You can add the new contact to the SIM card or phone, by press Save to confirm. 1. Enter name and telephone number. 2. -
Page 37: Phonebook Settings
option and select the ringtone; press options again and select save. 2. The selected picture will be displayed during contact calling. Phonebook settings: 1. Preferred storage: you can save the new contact to the SIM card , phone or both. 2. -
Page 38: Inbox
2. Select Write message and select SMS then press OK. 3. Input your message then press Options. 4. Choose Send to to add receiver phone number and then press OK to send. Inbox 1. Press Menu enter into Messages and press OK. 2. -
Page 39: Drafts
Delete all received messages. 6) Save to phonebook Here you can save the sender's phone number to phonebook. Drafts Here you can see the messages which you saved. Outbox 1. Press Menu enter into Messages and press OK. 2. Select Outbox and press OK. 3. -
Page 40: Call History
Call history Call History 1. In the standby mode, press Menu, scroll to Call history and press OK. 2. Use scroll to view Missed calls/Dialled calls/Received calls/All calls or Delete call logs. Magnifier In standby mode, Press Menu, scroll to Magnifier. With the camera’s magnifier, users can zoom in by adjusting the focus distance. -
Page 41: Alarm
Alarm 1. To edit an alarm press Menu then choose Alarm and press OK. 2. Use key select Status On/Off. 3. Enter time with number keypad . 4. Scroll to select Repeat to select Once/Everyday/Custom. The same way to setup Alarm tone, Snooze (min) and Alert type. -
Page 42: Calculator
Calculator Press Menu enter into Organizer, press OK to select Calculator. a) Enter the first number and use to input into decimal point. + - * ÷ b) Use to select ( ) then press OK Connectivity Bluetooth 1. Press Menu scroll to Organizer and press OK . 2. -
Page 43: Multimedia
Torch Long press “0” to turn on/off the torch light. Multimedia Camera 1. Press Menu scroll to Camera and press OK. 2. Press Up arrow key to take photo. 3. To view photos, press Options and select Photos. Warning! If memory card is insufficient, delete some documents or expand the storage with T card. -
Page 44: File Manager
3.If in advanced options the point “always play”, press back to standby mode. The radio will continue to play. Important Press the key to turn on/off the FM radio Press key to control volume Press the Arrow keys to select channel and manual search, press keys to start frequency auto search. -
Page 45: Settings
1. In the standby mode, press Multimedia → Audio Player and press OK. 2. Select a music file and press Play. 3. While playing, adjust volume by 4.To stop by press , to change track press , Press back to the standby mode. Note: the phone only support MP3 format music. -
Page 46: Phone Settings
Scroll to Status and setup SOS status On/Off. Scroll to SOS number to setup SOS number, here you can setup 5 numbers. Scroll to SOS SMS ON/OFF to choose whether to send SOS sms or not. Scroll to SOS SMS to edit SOS emergency message. Scroll to Warning Tone to control warning tone status on or off. -
Page 47: Call Settings
Setup Time and date 1. Select Time and date and press OK. 2. Select Set home city to choose your local city. 3. Select Set time/date to set time, date and the status of Daylight saving then you can press Save to save what you have set. 4. -
Page 48: Profiles
2. You can set Call waiting, Call divert, Call barring and Advanced settings. 3. Here you can enter into Advanced settings to set the functions as below : Blacklist Auto redial Call time display Answer mode Profiles 1. Press Menu, scroll to Settings, select Profiles and press OK. 2. -
Page 49: Block Function
select Status to set the status On/Off, then select Set numbers and press to set key number from the phonebook, then press OK to save. Remark: When in standby mode, long press key , Popup” No speed number. Assign now?” press Yes to set number from the phonebook. 2. -
Page 50: Up/Down Key Shortcuts
Up/Down key shortcuts The default setting of Up key is Messages, use key to change it to be Alarm, Bluetooth, Calendar, Camera, FM radio, Phonebook, Multimedia, Magnifier, Organizer, Photo contact or Messages. The default settings of Down key is Photo contact, use key to change it to be Alarm, Bluetooth, Calendar, Camera, FM radio, Phonebook, Multimedia, Magnifier, Organizer, Photo contact or Messages. -
Page 51: Restore Factory Settings
Phone security: Under this menu, you can turn on or turn off Phone lock and change the phone password. The default phone password is “1234”. Restore factory settings In this menu Restore factory settings, after you input the phone password and the phone powers on again, you can let all the settings of the phone back to the original settings. - Page 52 as well. Therefore, please power off your mobile phone. When you are driving, do not use your mobile phone. If you have to use it, please park your car then have your calling. Don’t use your mobile phone in the hospital so as not to disturb the operation of ...
- Page 53 batteries in specific recycle spots. No charging without the battery. When you take off the battery, please power off the mobile phone so as not destroy the property of the phone. The phone is not waterproof. Please keep it dry. ...
Need help?
Do you have a question about the SILENO 50 FLIP and is the answer not in the manual?
Questions and answers