Advertisement
Advertisement

Subscribe to Our Youtube Channel
Summary of Contents for Toshiba TCB-IFMB641TLE
- Page 1 Modbus INTERFACE Installation Manual Modbus Interface Model name: TCB-IFMB641TLE...
-
Page 2: Table Of Contents
Installation Manual Modbus Interface • Thank you very much for purchasing this TOSHIBA Modbus Interface. • Please read this manual carefully beforehand for proper installation of the Modbus Interface. Contents 1 Precautions for safety ..........2 2 Introduction . -
Page 3: Precautions For Safety
Installation Manual Modbus Interface Precautions for safety • Read these “Precautions for Safety” carefully before installation. • The precautions described below include important items regarding safety. Observe them without fail. Understand the following details (indications and symbols) before reading the body text, and follow the instructions. -
Page 4: Introduction
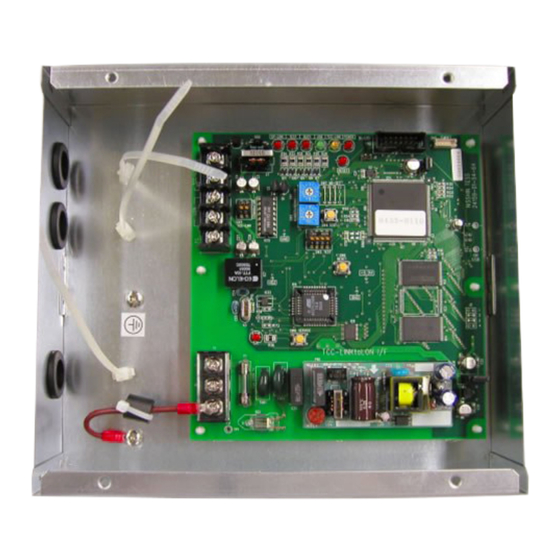
Installation Manual Modbus Interface Introduction Applications / Functions / Specifications Applications • The Modbus Interface is used to connect air conditioners (with TCC-LINK installed) and TCB-IFCG1TLE to Modbus* system. Functions • The Modbus Interface converts signals between TCC-LINK and Modbus Master. Specifications Power supply 220 - 240 VAC, 50/60 Hz... -
Page 5: Before Installation
Installation Manual Modbus Interface Before installation Check the following package contents. Item Quantity Remarks Modbus Interface Installation Manual Screw M4 x 12 mm tapping screws Cable clamp Clamp filter Tie-wrap For fixing the clamp filter CD-R Use the following wiring materials to connect the communication cables and power cables. (locally procured) Line Description Type... -
Page 6: Connection Of Power Cables / Earth Wires / Communication Cables
Installation Manual Modbus Interface Connection of power cables / earth wires / communication cables CAUTION • The RS-485 communication cables have polarity. Connect A(+) to A(+), and B(-) to B(-). If connected with incorrect polarity, the unit will not work. •... - Page 7 Installation Manual Modbus Interface The shielded wire of the The shielded wire of the RS-485 To connect 2 cables, TCC-LINK communication communication cable must be earthed on change the preset cable cable must be earthed on the address 1 (Modbus Interface address SW=1) clamp to the provided one air conditioner.
- Page 8 Installation Manual Modbus Interface Do not connect the shielded wire of TCC-LINK communication cable to the earth. Set the RS-485 terminator resistor on the TCC-LINK U1 and Modbus-Master address1 unit (Modbus Interface address U2 have no polarity. SW1=1) and host system. Do not set it here. (Locally procured) TCC-LINK terminator resistor is set on the air conditioner side.
-
Page 9: Setting
Not used SW2 Test switch (0 usually) Bit1: Switches variable specification. 1 2 3 4 OFF TCB-IFMB641TLE mode, ON TCB-IFMB640TLE mode. Bit2: Switches the LED5 display for test runs. OFF RS-485 communication status indicator. ON TCC-LINK communication status indicator. Bit3, 4: RS-485 baud rate setting (9600/19200/38400) bps. -
Page 10: Test Run Check
Installation Manual Modbus Interface Test run check Before starting test run • Set the indoor unit central control address so that it does not match any other indoor unit addresses. • Be sure to press the reset switch SW7 on the Modbus Interface when the indoor unit central control address setting has been changed or added. -
Page 11: Tcb-Ifmb640Tle Product Replacement
TCB-IFMB641TLE setting Set the RS-485 baud rate and the address switches of the TCB-IFMB641TLE according to “6 Setting”, the same as the installed TCB-IFMB640TLE. (For address 1, set the terminator of the RS-485) Switching variable specification To switch from the TCB-IFMB641TLE variable specification to the TCB-IFMB640TLE variable specification, set bit1 of SW3 to ON. - Page 12 DEA0509101...


Need help?
Do you have a question about the TCB-IFMB641TLE and is the answer not in the manual?
Questions and answers