
Related Manuals for GSI Group PNEG-1204


Summary of Contents for GSI Group PNEG-1204
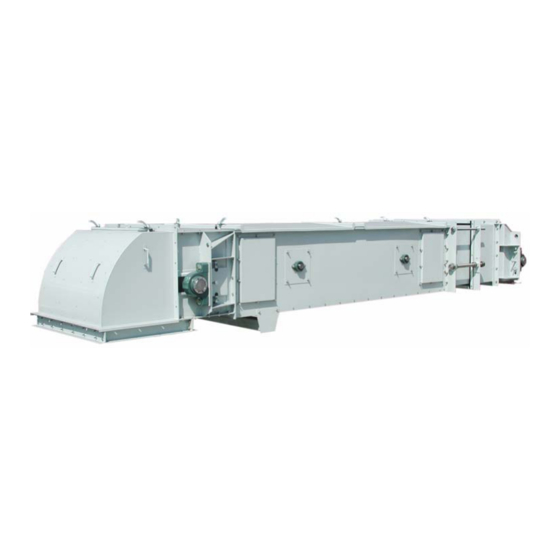
- Page 1 Enclosed Belt Conveyor Installation and Operation Manual PNEG-1204 Date: 12-21-20 PNEG-1204...
- Page 2 Assumption, IL. 62510 Phone: 1-217-226-4421 All information, illustrations, photos, and specifications in this manual are based on the latest information available at the time of publication. The right is reserved to make changes at any time without notice. PNEG-1204 Enclosed Belt Conveyor...
-
Page 3: Table Of Contents
Chapter 10 Care and Maintenance ........................47 Bearings ............................47 Welding .............................. 47 Motor ..............................47 Support .............................. 47 Storage .............................. 48 Chapter 11 Troubleshooting ..........................49 Chapter 12 Appendix 1 - Reference Information ....................50 Chapter 13 Warranty ............................51 PNEG-1204 Enclosed Belt Conveyor... -
Page 4: Chapter 1 Introduction
Should the equipment be abused or modified to change its performance beyond the factory specifications, the warranty will become void and field improvements may be denied. PNEG-1204 Enclosed Belt Conveyor... -
Page 5: Chapter 2 Safety
CAUTION, used with the safety alert symbol, indicates a CAUTION hazardous situation which, if not avoided, could result in minor or moderate injury. NOTICE is used to address practices not related to NOTICE personal injury. PNEG-1204 Enclosed Belt Conveyor... -
Page 6: Safety Instructions
Entanglement in rotating idlers can cause serious injury or death. Keep all shields and covers in place at all times. Wear close fitting clothing. Stop and lock out power source before making adjustments, cleaning, or Entanglement Hazard maintaining equipment. PNEG-1204 Enclosed Belt Conveyor... - Page 7 • If you use solvent or paint stripper, remove stripper with soap and water before welding. Remove solvent or stripper containers and other flammable material from area. Allow fumes to disperse at least 15 minutes before welding or heating. PNEG-1204 Enclosed Belt Conveyor...
- Page 8 A respirator may be needed to prevent breathing potentially toxic fumes and dust. Wear a hard hat to help protect your head. Hard Hat Wear appropriate fall protection equipment when working at elevations greater than six feet (6'). Fall Protection PNEG-1204 Enclosed Belt Conveyor...
-
Page 9: Chapter 3 Decals
DANGER DANGER ROTATING BELT AND PULLEY WILL CUT OR ENTANGLE. KEEP HANDS CLEAR Disconnect and lockout power before adjusting or servicing. Failure to heed will result in personal injury or death. DC-1672 GSI Group 217-226-4421 DC-1672 PNEG-1204 Enclosed Belt Conveyor... -
Page 10: Tail Section Decal Locations
Failure to heed will result in personal injury or death. GSI Group 217-226-4421 DC-1672 DC-1672 CAUTION FALLING HAZARD Open shroud may fall if unrestrained and cause bodily injury Secure open shroud with chain. DC-1690 GSI Group 217-226-4421 DC-1690 PNEG-1204 Enclosed Belt Conveyor... -
Page 11: Loader Section Decal Locations
Figure 3E Swing-Up Skirt Loader WARNING MOVING BELT CAN CUT OR ENTANGLE. KEEP HANDS CLEAR Disconnect and lockout power before adjusting or servicing. Failure to heed can result in personal injury or death. GSI Group 217-226-4421 DC-1671 DC-1671 PNEG-1204 Enclosed Belt Conveyor... -
Page 12: Intermediate Section Decal Locations
Failure to heed can result in Failure to heed will result in personal injury or death. personal injury or death. GSI Group 217-226-4421 DC-1672 GSI Group 217-226-4421 DC-1671 DC-1672 DC-1671 PNEG-1204 Enclosed Belt Conveyor... -
Page 13: Belt Guard Cover
Do not operate with guard removed. Disconnect and lockout power before servicing. DC-994 DC-994 WARNING SHEAR POINT Keep hands clear of moving parts. Do not operate with guard removed. Disconnect and lockout power before servicing. DC-995 DC-995 PNEG-1204 Enclosed Belt Conveyor... -
Page 14: Chapter 4 Conveyor Assembly
10. Check drive belts for tension. Also check the oil level in the speed reducer. Reducers are shipped without oil. Refer to Page 50 for the type and quantity of oil. (DO NOT overfill reducer.) PNEG-1204 Enclosed Belt Conveyor... -
Page 15: Intermediate Section Installation
Also, it is important that the inside dimensions of the box measure equidistant from side-to-side both top and bottom of the intermediate section (Dimension A = Dimension B). (See Figure 4A.) Figure 4A End View of Intermediate Section (Liners not shown for clarity.) PNEG-1204 Enclosed Belt Conveyor... - Page 16 3. Two (2) inspection intermediate sections are included on each installation. They should be assembled at the head and tail. The inspection holes should be oriented closest to the head or tail. (See Figure 4C.) Ref # Description Tail Section Intermediate Inspection Section Inspection Door Figure 4C PNEG-1204 Enclosed Belt Conveyor...
- Page 17 (See Figure 4D.) Figure 4D Ref # Description Adapter Angle with Slotted Holes 5. A special cover channel is provided with the tail as shown in Figure Figure 4E Ref # Description Tail Cover Channel PNEG-1204 Enclosed Belt Conveyor...
-
Page 18: Cover Installation
2. When a loader is on the conveyor, the cover section may have to be cut accordingly to accommodate the loader. (See Figure 4G.) For installation of a loader, see loader installation on Page Figure 4G Ref # Description Easy Grip Handles PNEG-1204 Enclosed Belt Conveyor... - Page 19 This depends on the position of the loader. (See Figure 4H.) 4'-7" Figure 4H Standard Cover Length NOTE: DO NOT walk on conveyor covers. PNEG-1204 Enclosed Belt Conveyor...
-
Page 20: Loader Installation
(See Figure 4I.) Figure 4I Fixed Skirt Loader Figure 4J NOTE: GSI’s recommendation for loader installation includes a minimum distance of no less than 6" between the center of loader inlet and the tail assembly. (See Figure 4J.) PNEG-1204 Enclosed Belt Conveyor... - Page 21 • If you use solvent or paint stripper, remove stripper with soap and water before welding. Remove solvent or stripper containers and other flammable material from area. Allow fumes to disperse for at least 15 minutes before welding or heating. PNEG-1204 Enclosed Belt Conveyor...
-
Page 22: Chapter 5 Motor Assembly
Belt Guard Motor Adjustment Plate Belt Guard Bracket Jack Screw V-Belt Motor Mount Base Plate Keep as close as possible Head Section Allow sufficient distance between bushing and bearing to remove bushing assembly bolts. Driven Pulley PNEG-1204 Enclosed Belt Conveyor... - Page 23 Motor and Shaft Torque Arm II Installation (Continued) NOTE: Belt guards not shown for clarity. Figure 5B Ref # Description Motor Head Section Driven Pulley Drive Pulley V-Belt Hood Reducer Drive Torque Arm Turnbuckle Assembly Torque Arm Bracket Intermediate Inspection Section PNEG-1204 Enclosed Belt Conveyor...
-
Page 24: Motor And Torque Arm Ii Reducer Installation
(See Figure 5D.) NOTE: For more detailed motor mounting details specific to the installation, refer to the manual provided with the motor. Figure 5C Ref # Description Bushing Conveyor Drive Shaft Shaft Mount Reducer Figure 5D PNEG-1204 Enclosed Belt Conveyor... - Page 25 (See Figure 5F, Figure 5G and Figure 5H.) NOTE: The holes in the intermediate side must be drilled out to 9/16" diameter. Attach with provided hardware. Figure 5G Figure 5F Figure 5H PNEG-1204 Enclosed Belt Conveyor...
- Page 26 Thread another nut onto each jack screw to secure adjustment plate. Use these nuts to adjust the motor height. 11. Attach the motor to the adjustment plate using bolts and lock nuts. (See Figure 5J.) Figure 5J PNEG-1204 Enclosed Belt Conveyor...
- Page 27 (Approximately 11/16") 1. 3-1/2' = 42" 2. 1/64" = 0.015625" 3. 42" x 0.015625" = 0.65625" 4. 0.65625" = 21/32" of Deflection Figure 5K Ref # Description Span Force Belt Deflection 1/64" per inch of Span PNEG-1204 Enclosed Belt Conveyor...
- Page 28 Ref # Description Grease Bearing Housing Figure 5L Lubricate Bearings 17. Grease bearings on head, tail and idlers. Lubricate bearings according to bearing manufacturer’s recommendations. (See Page 50.) Ref # Description Grease Idler Bearings Figure 5M PNEG-1204 Enclosed Belt Conveyor...
-
Page 29: Chapter 6 Belting Assembly
(2) and marked. Using a straight edge, draw a centerline using the points as a guide. (See Figure 6A.) Figure 6A Ref # Description Centerline Belt End Belt Width Center Point of Width Measurements PNEG-1204 Enclosed Belt Conveyor... -
Page 30: Squaring The Belt End
NOTE: The second arc should be slightly less than half of the width of the belt. Figure 6B Ref # Description Belt Width Pivot Point of First Arc Centerline Pivot Point of Second Arc Intersection Point Cut Line PNEG-1204 Enclosed Belt Conveyor... -
Page 31: Check The Squareness Of The Belt Cut
The intersection point of the two (2) lines of the “X” should be in line with the centerline of the belt. (See Figure 6C.) Figure 6C Ref # Description Belt Centerline Diagonal Line Intersection Point Cut Edge of Belt Belt Width PNEG-1204 Enclosed Belt Conveyor... -
Page 32: Installation Of Belt
Factory Supplied Splice Protector (Flipper) 2" x 12" Block of Wood Field cut, square and punch holes in field this end of belt. Tail End Install flippers on end belt that has been pre-punched and cut by factory. Head End PNEG-1204 Enclosed Belt Conveyor... -
Page 33: Splicing The Belt
(See Figure 6G and Figure 6H.) NOTE: Splice protector design may vary due to type of conveyor. I.E. - Reversible conveyors and conveyors with low profile head discharges do not have splice protectors with tails (flippers). Figure 6G Figure 6H PNEG-1204 Enclosed Belt Conveyor... - Page 34 5. Align bolts with template teeth and place the other belt end over bolts. Remove template. (See Figure 6K.) 6. Place top plates over bolts using bolt horn. (See Figure 6L.) Figure 6I Figure 6K Figure 6J Figure 6L PNEG-1204 Enclosed Belt Conveyor...
- Page 35 9. Pull tape tight and hold in position by tightening a fastener at each end. Then tighten all other plates. (See Figure 6O.) 10. Tighten all nuts uniformly. NOTE: A Flexco Power Wrench used with an impact tool will speed this step considerably. (See Figure 6P.) Figure 6M Figure 6O Figure 6N Figure 6P PNEG-1204 Enclosed Belt Conveyor...
- Page 36 There will be a larger gap between the outside flipper and the edge of the belt. (See Figure 6S.) 14. Punch or bore holes. Attach flippers using same connectors as splice. Repeat Steps 10 on Page 35- above. 15. Finished splice. Figure 6Q Figure 6R Direction of rotation Figure 6S PNEG-1204 Enclosed Belt Conveyor...
-
Page 37: Belt Tension
NOTE: Do not over tighten belt. Over tightening can cause premature wear of bearings and shafts. Ref # Description Leveling Rod Take-Up Rod Nuts Flanges To tighten belt tension, adjust tail section in this direction. Figure 6T Figure 6U Tail Section PNEG-1204 Enclosed Belt Conveyor... -
Page 38: Belt Tracking
3. After conveyor has been installed, check to see if the unit is level (width wise). The conveyor must be level for proper belt tracking. (See Figure 6V.) Figure 6V Ref # Description Bearing Shims Bearing Adjustment Bolts Tail Section Head Section PNEG-1204 Enclosed Belt Conveyor... - Page 39 (four (4) on each side). After loosening these bolts, the end of the idler can shift either forward or backward. (See Figure 6Y.) Ref # Description Bearing Adjustment Bolts Loosen these four (4) nuts on both sides for adjustment. Figure 6Y PNEG-1204 Enclosed Belt Conveyor...
- Page 40 (See Figure 6Z.) Ref # Description Book moves like this direction Push Book Figure 6Z PNEG-1204 Enclosed Belt Conveyor...
-
Page 41: Chapter 7 Loading
This method of loading results in grain tumbling on belt. (See Figure 7B.) Figure 7B Avoid Grain should be loaded in the same direction of belt travel and at the same speed. (See Figure 7C.) Figure 7C Incorrect Ref # Description Grain Flow Belt Direction PNEG-1204 Enclosed Belt Conveyor... -
Page 42: Spouting Location
1. Grain should come out from storage and make a 90° turn by use of baffles and load straight into the conveyor at approximately a 45° angle. (See Figure 7D.) Figure 7D Ref # Description Belt Direction Pit or Bin Top View Side View End View PNEG-1204 Enclosed Belt Conveyor... -
Page 43: Belt Conveyor Loading
If the material is still tumbling as it passes the skirt end, the skirts should be lengthened. Figure 7E CORRECT - Evenly Loaded Figure 7G Effect of Improper Loading Ref # Description Belt Shift Spill Figure 7F INCORRECT - Loaded to One Side PNEG-1204 Enclosed Belt Conveyor... -
Page 44: Chapter 8 Options
Ref # Description Monitored Shaft 18/30 mm Bracket (Supplied) Tap Shaft for 1/2'' UNC Centered 10 mm Screws Four (4) (Supplied) Cover 50 mm Screws Four (4) (Supplied) Whirligig Flexible Conduit M800 Sensor Flexible Strap Cylindrical Sensor PNEG-1204 Enclosed Belt Conveyor... -
Page 45: Pressure Plug Switch Option
Figure 8B Models GX/GX-SS Ref # Description Ø 0.22" Six (6) Places (For #10 Screws) Sensitivity Adjust Load 1 Load 2 Power Source within Load and Bin Monitor Specifications Standard Switch X-Sens. Switch Figure 8C Wiring Diagrams PNEG-1204 Enclosed Belt Conveyor... -
Page 46: Chapter 9 Start-Up
NOTE: While accessing the tail pulley, the tail shroud may either be removed or pivoted in an upright position. If pivoted upright, then secure the shroud by placing the chain in the slot as shown in Figure Figure 9A Ref # Description Chain Slot Shroud PNEG-1204 Enclosed Belt Conveyor... -
Page 47: Chapter 10 Care And Maintenance
It is recommended that supports be installed at vertical portions of flanges leaving bottoms of intermediate sections clear. By attaching supports in this manner, the removable bottoms are unobstructed for ease of replacement. Support legs are available as an option. PNEG-1204 Enclosed Belt Conveyor... -
Page 48: Storage
2. Loosen the V-belt tension to relieve the stress placed on the bearings and shafts of the drive and tail sections. 3. Lubricate shafts and drive chain components with a good grade of light machine oil. PNEG-1204 Enclosed Belt Conveyor... -
Page 49: Chapter 11 Troubleshooting
5. Use loader to position material on 2. Loader not being used. center of belt. All material must be directed through hopper. 1. Tighten so belt conforms to crowned Lack of capacity. 1. Conveying belt slippage. pulleys. PNEG-1204 Enclosed Belt Conveyor... -
Page 50: Chapter 12 Appendix 1 - Reference Information
Enter the required manual number into the search field. See list below. MN1601 - Dodge Torque-Arm II Speed Reducer Installation MN3033 - Dodge S-2000 Spherical Roller Bearings MN3040 - Dodge TAF Pillow Blocks and S-1 Units PNEG-1204 Enclosed Belt Conveyor... -
Page 51: Chapter 13 Warranty
Limited Warranty — N.A. Grain Products The GSI Group, LLC. (“GSI”) warrants products which it manufactures, to be free of defects in materials and workmanship under normal usage and conditions for a period of 12 months from the date of shipment (or, if shipped by vessel, 14 months from the date of arrival at the port of discharge). - Page 52 Authorities having jurisdiction should be consulted before installations are made. GSI Group 1004 E. Illinois St. Assumption, IL 62510-0020 Phone: 1-217-226-4421 Fax: 1-217-226-4420 www.gsiag.com GSI is a worldwide brand of AGCO Corporation. Copyright © 2013 by GSI Group Printed in the USA CN-308616...
Need help?
Do you have a question about the PNEG-1204 and is the answer not in the manual?
Questions and answers