Advertisement
Quick Links
Advertisement

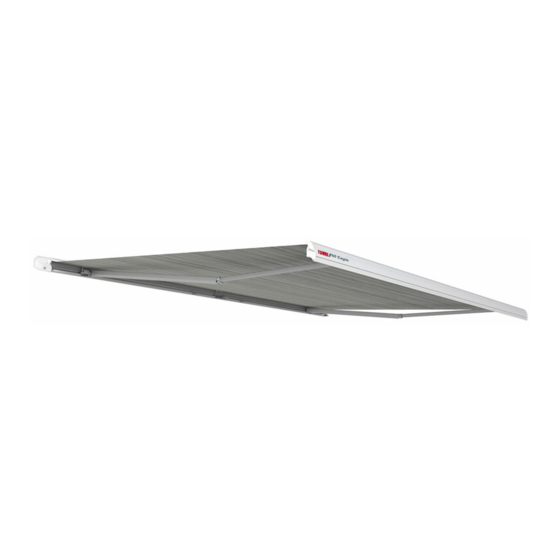
Related Manuals for FLAMMA F65 Eagle

Summary of Contents for FLAMMA F65 Eagle
- Page 1 ® ® Montage und MARKISEN Gebrauchsanleitung Installation AWNINGS and use instructions Instructions de montage STORES et mode d’emploi Instrucciones TOLDOS de montaje y uso Istruzioni TENDALINI di montaggio e d’uso POLAR WHITE 12Vdc 12Vdc TITANIUM fiamma.com fiamma.com...
- Page 2 To install the bracket, not included, pls. follow the specific installation instructions Pour fixer la patte, non fournie, nous vous conseillons de Adapter F65 EAGLE vous tenir aux instructions de montage spécifiques. Para la fijación del estribo, no suministrado, atenerse a las instrucciones específicas por cada modelo Per il fissaggio della staffa, non fornita, attenersi alle istruzioni di montaggio specifiche per modello.
- Page 3 ENGINE MICRO SWITCH SISMIC SENSOR CONTROL UNIT BATTERY CONTROL SYSTEM Um die Markise optimal nutzen zu k önnen , lesen Sie bitte die Bedienungsan- leitung aufmerksam durch und bewahren sie zur sp äteren Verwendung gut auf. To use the awning in the best way, read the user’s instructions carefully and keep them on hand for consultation in the future.
- Page 4 MONTAGEANLEITUNG INSTALLATION INSTRUCTION 1. Die Montage soll von fachkundigem Personal durchgeführt werden. 2. Suchen Sie zur Anbringung der Markise die Stellen mit den Wandverstärkungen aus. 3. Die Markisenkassette muss waagerecht montiert werden. 4. Vergewissern Sie sich vor dem Bohren der Montagelöcher, dass im Inneren des Fahrzeugs an den vorgesehenen Stellen keine Hindernisse, insbesondere Gas- oder Stromleitung, liegen.
- Page 5 INSTRUCTIONS DE MONTAGE INSTRUCCIONES DE MONTAJE 1. Le montage doit être effectué par des techniciens compétents 2. Testez la paroi du véhicule et vérifiez la position des points d’ancrage ou informez-vous auprès du revendeur de votre véhicule. 3. Montez le store en position horizontale. 4.
- Page 6 6. Solo dopo aver verificato i punti di cui sopra, posizionare il tendalino sulla staffa e fissarlo. La F65 EAGLE è un tendalino speciale a braccia autoportanti: assicurarsi che le pareti del mezzo siano sufficientemente solide per supportare sia il tendalino che le sue sollecitazioni;...
- Page 7 ACHTUNG: Bitte ausschliesslich die Adapter der F65 EAGLE verwenden. CAUTION: Use only the adapters for the F65 EAGLE. ATTENTION : Utilisez exclusivement les étriers conçus pour le F65 EAGLE. PRECAUCION: Usar solo los soportes para el F65 EAGLE. ATTENZIONE: Usare esclusivamente gli adapter per la F65 EAGLE.
- Page 8 To install the bracket, not included, pls. follow the specific installation instructions Pour fixer la patte, non fournie, nous vous conseillons de Adapter F65 EAGLE vous tenir aux instructions de montage spécifiques. Para la fijación del estribo,no suministrado, atenerse a las instrucciones específicas por cada modelo.
- Page 9 ANBRINGUNG DER MARKISE AN DEN HALTERUNGEN FIXING OF THE AWNING ON THE BRACKET INSTALLATION DU STORE SUR L’ÉTRIER MONTAJE DEL TOLDO SOBRE EL ESTRIBO MONTAGGIO DEL TENDALINO SULLA STAFFA Bitte immer die Sicherheits- schrauben benützen. Please use always the security screws. Utilisez toujours les vis de sécurité.
- Page 10 Öffnen der Markise Open the awning Ouvrir le store Abrir el toldo Aprire il Tendalino IMPORTANT WICHTIG CUIDADO IMPORTANTE Achtung Sicherheit Entfernen Sie die Etikette nur nachdem die Markise an der Halterung befestigt wird. Attention Security Remove this label only after fixing the awning on the bracket.
- Page 11 BATTERY des Sensors, des Motores und des Mikroswitch durchzuziehen. F65 EAGLE Before wiring, make a cable outlet on the back of the engine rear cover and run the cables of the sensor, of the motor and the micro-switch. Avant de câbler, faites un orifice passe-câbles sur l’arrière du cache du moteur inférieur et y faire passer les câbles du détecteur, du...
- Page 12 MICRO SWITCH SISMIC ENGINE SENSOR Das Kabel des Sensor am Gelenkarm entlang einführen und mit der Führung P blockieren. Am Gehäusekasten entlang bis zum Motor weiterführen und dann das Kabel abschneiden. Insert the wire of the sensor along the housing of the arm blocking it with sheath P, go on to motor and then cut the cable.
- Page 13 Den Sensor im Innern der Frontblende positionieren und mit den Schrauben befestigen. Position and fix the sensor , inside the lead bar with glue. Placez et fixez le détecteur à l’intérieur du bandeau frontal avec de la colle. Poner y fiyar el Sensor en el interior del frontal con cinta adhesiva.
- Page 14 SISMIC SENSOR SISMIC SENSOR Um den SISMIC SENSOR anschliessen zu können, die Abdeckung öffnen und das Kabel, welches von der Vermittlungsstelle hergeht, anschliessen. Den Zylinder des Sensores regulieren, wobei der Zeiger nach oben positioniert werden muss, die Abdeckung schliessen und alles dann mit beidseitigem Klebestreifen oder Kleber an der Frontblende der Markise befestigen.
- Page 15 GRAFISCHE DARSTELLUNG DER ELEKTRISCHEN VERBINDUNG. GRAPHIC REPRESENTATION OF THE ELECTRICAL CONNECTIONS SCHÉMA DES BRANCHEMENTS ÉLECTRIQUES REPRESENTACION GRAFICA DE LAS CONEXIONES ELECTRICAS. RAPPRESENTAZIONE GRAFICA DEI COLLEGAMENTI ELETTRICI. ENGINE MICRO SWITCH Black SISMIC SENSOR CONTROL UNIT CONTROL SYSTEM Black FUSE 16 A FUSE 16 A BATTERY RELÈ...
-
Page 16: General Precautions
ALLGEMEINE GEBRAUCHSANWEISUNG Dieser Artikel funktioniert auf 12 V Achtung: Niemals an eine andere Spannung verbinden. Die Kabel werden nicht mitgeliefert. Es wird empfohlen, Kabel mit einem Mindestdurchmesser von 1,5 mm² zu verwenden. Nach Anbringung des elektrischen Systemes eine generelle Probe wie folgt durchführen: - Vergewissern Sie sich, dass die Markise, wenn sich der Schalter in der Position EXTEND befindet, öffnet und das sich die Markise, wenn der Schalter in der Position... -
Page 17: Advertencias Generales
ADVERTENCIAS GENERALES Este producto funciona a 12 Vdc. No conectar nunca a una tensión de funcionamiento diferente. Los cables no son suministrados de serie. Se aconseja utilizar los cables de diámetro mínimo 1,5 mm² y. Después del montaje del sistema eléctrico, hacer una prueba general de funcionamiento: - asegurarse que el toldo se abre completamente con el interruptor en posición EXTEND y que se cierre con el interruptor en posición RETRACT;... - Page 18 Anschluss an die 12 V Stromzufuhr. Supply connection 12V. Branchement d’alimentation 12V. Black Conexión de alimentación 12V. Collegamento alla alimentazione 12V. CONTROL UNIT Black FUSE 16 A FUSE 16 A CONTROL UNIT BATTERY RELÈ RELÈ START 12 V 20A 12 V 20A 1 FORM C 1 FORM C +12V...
- Page 19 Motorverbindung. Engine connection. Branchement du moteur. Conexión del motor. Purple/white Collegamento del motore. Purple ENGINE CONTROL UNIT Mikroswitchverbindung. Micro switch connection. Branchement du micro-interrupteur. Conexión del micro interruptor. Collegamento del micro switch. Blue/black Black MICRO SWITCH Black CONTROL UNIT ® ®...
- Page 20 Sismic Sensor Verbindung. Connection of the sismic sensor. Branchement du sismic sensor. Conexión del sismic sensor. Collegamento del sismic sensor. SISMIC SENSOR CONTROL UNIT Control System Verbindung. Control system connection. Branchement du control system. Conexión del control system. Collegamento del control system. CONTROL SYSTEM CONTROL 45 mm...
- Page 21 Regulierung der Ansprechempfindlichkeit des Sismic Sensors. Regulation of the sensivity of the sismic sensor. Réglage de la sensibilité du sismic sensor. Ajuste de la sensibilidad del sismic sensor. Regolazione della sensibilità del sismic sensor. CONTROL UNIT Der Drehwiderstand (Potenziometer) zur Regulierung der Ansprechempfindlichkeit des Sismic Sensors dient um auf den Kennwert eingreifen zu können;...
- Page 22 Anbringung der Motorabdeckungen Installation of the motor cover Installation du couvercle du moteur Montaje de las coberturas del motor Montaggio delle coperture motore ø ø 3,2 mm 3,2 mm ® ®...
- Page 23 ACHTUNG : IM NOTFALL DIE HANDKURBEL BENÜTZEN (N) ATTENTION : IN CASE OF EMERGENCY USE THE HANDLE PROVIDED (N) ATTENTION : EN CAS D’URGENCE UTILISEz LA MANIVELLE FOURNIE (N) CUIDADO : EN CASO DE EMERGENCIA, USAR EL ASTA EN DOTACION (N) : IN CASO DI EMERGENZA UTILIZZARE L’ASTA IN DOTAZIONE (N) ATTENZIONE ®...
- Page 24 REGULIERUNG DER NEIGUNG INCLINATION ADJUSTMENT RÉGLAGE DE L’INCLINAISON REGULACIÓN DE LA INCLINACIÓN REGOLAZIONE DELL’INCLINAZIONE Die Markise hat eine vom Werk aus eingestellte Standardneigung. Falls gewünscht, sollte diese Neigung nicht mit den Anforderungen hinsichtlich der Anbringung übereinstimmen, wie folgt fortfahren: The inclination of the awning is fixed in advance, but you can change it accoding to your needs of fixing;...
- Page 25 1 - Die Schraube A leicht lösen 2 - Die Regulierungsschraube C komplett abschrauben 3 - Eingriff auf Schraube B: im Uhrzeigersinn hebt sich der Gelenkarm an und reduziert die Neigung; gegen den Uhrzeigersinn setzt sich der Gelenkarm ab und erhöht die Neigung 4 - Den Winkelanzeiger D kontrollieren, um die einheitliche Neigung der beiden Gelenkarme zu prüfen 5 - Bei Bedarf den Vorgang auch auf der linken Seite vornehmen.
- Page 26 6 - Übergehend nun auf die Innenseite der Frontblende die beiden Schrauben lösen und das Blockierungsplättchen in Position (siehe Zeichnung) der Anzahl der vorhergehenden eingestellten Neigung drehen. 6 - Then operate inside the lead bar, unscrew the two screws and rotate the stop plate F in the position (see drawings) of the number of degrees fixed in advance.
- Page 27 GEBRAUCHSANLEITUNG GEBRAUCHSANLEITUNG INSTRUCTIONS FOR USE INSTRUCTIONS FOR USE MODE D’EMPLOI MODE D’EMPLOI MODO DE EMPLEO MODO DE EMPLEO ISTRUZIONI D’USO ISTRUZIONI D’USO CONTROL SYSTEM EXTEND Markise öffnen RETRACT Open the awning Ouvrez le store Markise schliessen Abre el toldo Close the awning Apre il tendalino Fermez le store Cierra el toldo...
- Page 28 SISMIC SENSOR AUTOMATISCHE FUNKTION Die EAGLE ist mit dem Sismic Sensor ausgestattet, d. h. bei geöffneter Markise ermittelt dieser Sensor die Schwingungen der Frontblende und z. B. bei starkem Wind das Überschreiten des eingestellten Schwellenwertes, wodurch die Markise dann automatisch geschlossen und somit geschützt wird. AUTOMATIC OPERATION The EAGLE is equipped with the sismic sensor that, when the awning is open, detects the oscillatory movements of the front bar and, when the movement...
- Page 29 Wenn die Markise automatisch geschlossen wird, kann dieser Vorgang nicht unterbrochen werden! Der Schliessvorgang kann nicht gestoppt noch kann die Markise nicht geöffnet werden. During the automatic closing of the awning, don’t stop the movement! You can’t stop nor reopen it. Pendant la fermeture automatique le mouvement ne peut pas être arrêté...
- Page 30 GEBRAUCHSANLEITUNG Sich vergewissern, dass die Markise korrekt aufgerollt wird. - Bitte vergewissern Sie sich vor jeder Abfahrt, dass die Markise korrekt geschlossen ist. - Die roten Anzeiger an den Seiten der Frontleiste sind bei komplett aufgerollter Markise nicht sichtbar. Wenn das Tuch beschädigt ist, kann die Markise nicht richtig aufgerollt werden.
-
Page 31: Es Instrucciones De Uso
INSTRUCCIONES DE USO Asegurarse que el toldo se cierre perfectamente, cuando el toldo está perfectamente cerrado las banderillas rojas no se veen. - Antes que partir, comprobar que el toldo esté cerrado perfectamente. - Un cierre imperfecto del toldo puede ser causado por la lona estropeada. - No usar el toldo con la lona estropeada. - Page 32 Achtung Sicherheit Bitte vergewissern Sie sich vor jeder Abfahrt, dass die Markise korrekt geschlossen ist. Attention Security Before leaving, make sure the awning is correctly closed. Attention Sécurité Avant de partir, vérifiez que le store est bien fermé. Atención-Seguridad Antes que partir, comprobar que el toldo esté...
- Page 33 REPARATURHILFEN TROUBLESHOOTING QUE FAIRE EN CAS DE PROBLÈME INTERVENCION EN CASO DE PROBLEMAS INTERVENTI IN CASO DI PROBLEMI Die Markise wird mit optimaler Regulierungseinstellung und nach Prüfung von Fiamma ausgeliefert, dennoch können sich durch den Gebrauch Abweichungen feststellen lassen.Sollte sich das entsprechende Problem nicht durch die beschriebenen Regulierungsschritte, welche auf den folgenden Seiten dieses Handbuches aufgeführt sind, beheben, wird empfohlen einen Fiammahändler aufzusuchen und die Referenzen der Markise sowie die...
- Page 34 Fiamma comunicando gli estremi del modello ed il SERIAL NUMBER, tutto indicato sulla targhetta posta sul braccio del tendalino. Qualore il malfunzionamento sia legato al motore, chiediamo di comunicare anche il numero di serie posto all’interno della copertura del motore. F65 EAGLE 400 S/N : 9000000 DELUXE GREY 701732 Im Notfall bitte folgende Nummer angeben.
- Page 35 ARMREGULIERUNG PROBLEM ARM ADJUSTMENT PROBLEM PROBL ME RÉGLAGE DU BRAS È REGULACION DEL BRAZO PROBLEMA REGOLAZIONE DEL BRACCIO PROBLEMA DIE FIAMMA MARKISEN WERDEN MIT OPTIMALER ARMREGULIERUNG AUS DEM WERK GELIEFERT - BEIM BENUTZEN KÖNNEN SICH DIE ARME ABSENKEN.- BITTE WIE ABGEBILDET REGULIEREN. FIAMMA AWNINGS LEAVE OUR WAREHOUSE WITH OPTIMUM REGULATION .THE ARM MAY LOWER ITSELF WITH THE WEAR AND TEAR OF TIME.REPOSITION THE ARM AS FOLLOWS.
- Page 36 SCHRAUBE SCREW TORNILLO VITE SCHRAUBE SCREW TORNILLO VITE REGULIERUNGSSCHRAUBE RESTOP SCREW VIS DE BLOCAGE TORNILLO DE BLOQUEO VITE DI FERMO 1 - Die Markise vollständig öffnen 2 – Die Schraube A leicht lösen 3 – Den Regulierungsdübel C solange aufschrauben bis er sich fast löst (hierbei handelt es sich um eine Blockierungsschraube) 4 –...
- Page 37 1 - Completely open the awning. 2 - Lightly loosen the screw A. 3 - Unscrew, till nearly take it out, the dowel for regulation (it is a stop screw). 4 - Then operate on screw B, gradually, rotating clockwise to rise the arm and rotating anti clockwise to lower it always checking that the lead bar moves in a horizontal position.
- Page 38 SCHRAUBE SCREW TORNILLO VITE SCHRAUBE SCREW TORNILLO VITE REGULIERUNGSSCHRAUBE RESTOP SCREW VIS DE BLOCAGE TORNILLO DE BLOQUEO VITE DI FERMO 1 - Aprire completamente il Tendalino. 2 - Allentare leggermente la vite A. 3 - Svitare fino quasi a toglierlo, la vite di fermo C. 4 - A questo punto intervenire sulla vite B, molto gradualmente, girando in senso orario per far alzare il braccio e girando in senso antiorario per abbassarlo controllando di volta in volta che il frontale si porti...
- Page 39 PROBLEM TUCHREGULIERUNG PROBLEM CANOPY ADJUSTMENT PROBL ME RÉGLAGE DE LA TOILE È PROBLEMA REGULACION DE LA LONA PROBLEMA REGOLAZIONE DEL TELO ANLEITUNG ÜBER DIE EINSTELLUNG DES TUCHES Fiamma Markisen verlassen die Qualitätskontrolle mit einwandfrei eingestel- lter und korrekt schliessender Frontblende. Sollte sich das Tuch, z.B. durch Witterungseinflüsse oder ähnlichem im Laufe der Zeit etwas ausdehnen und dadurch ein 100%iges Schliessen nicht mehr gewährleistet sein, kann es durch das neue Rollenregulierungssystem PRESTO FIX ausgeglichen werden.
- Page 40 PROBLEM - Auf der linken Seite schliesst die Markise nicht ordnungsgemäss PROBLEM - Lead Bar does not close on the side opposite the winch PROBLÈME - Le store ne feme pas bien du côté opposé à celui du treuil PROBLEMA - El toldo no cierra bien en el lado opuesto del molinete PROBLEMA...
- Page 41 Funktionszweck. Durch das Drehen der Spannschraube (A) im Uhrzeigersinn, dehnt sich der Flansch (B) zunehmend aus: reguliert sich durch die Einkerbungen an der Abdeckung (C). Operation way. Rotating ring nut (A) clockwise, flange (B) will move widening (see the picture): it can be regulated by notches on cap (C). Principe de fonctionnement.
- Page 42 GEBRAUCHSANWEISUNG UND RATSCHLÄGE Alle unsere Markisen werden auf höchsten Anspruch ‘Made in Fiamma’ hergestellt. Die Fiamma Markisen sind sorgfältig hergestellte Artikel. Dennoch ist es möglich, dass sich Besonderheiten der Materialien (wie z. B. kleine Imperfektionen der Lackierung oder die Linie des Aluminiumprofils; kleine Macken oder leichte Deformierungen der Plastikkomponenten) feststellen, welche als Unvollkommenheit angesehen werden könnten, die jedoch von den eigenen Materialen und den spezifischen Arbeitsprozessen abhängen.
- Page 43 GARANTIE FIAMMA . FIAMMA garantiert nur für Produkte, die innerhalb 24 Monate ab Kaufdatum durch den Endverbraucher reklamiert werden und durch Kaufbescheinigung nachgewiesen werden können. Die Garantie bezieht sich nur auf das Produkt, nicht auf die eventuelle Folgen eines nicht sachgemässen Gebrauch. FIAMMA erkennt die Garantie nur bei Schäden, verursacht durch Material- oder Produktionsfehlern an.
-
Page 44: Maintenance Instructions
MAINTENANCE INSTRUCTIONS All our awnings ‘Made in Italy’ and manufactured following high standards. The awnings are made with precision, but some of the characteristics of the materials (as little imperfections on paint or linearity of aluminium profiles; little marks or light deformations of plastic parts) , which could be interpreted as defects, derive from the materials and from the specific work processes, and these characteristics occur even... - Page 45 WARRANTY FIAMMA . FIAMMA products have a guarantee of 24 months from the date the product is purchased by the final consumer. The warranty covers only the product, and not possible damages caused by an improper use. FIAMMA warranty covers claims for damages that are due to defective material or production failures.
- Page 46 INSTRUCTIONS ET CONSEILS Tous nos stores sont “Made in Italy” selon des standards de grande exigence. Les stores ont été conçus avec le plus grand soin cependant, il est possible que vous recontriez; vous pouvez toutefois rencontrer certaines particularités sur les matériaux (par exemple des imperfections sur la peinture ou sur la linéarité...
- Page 47 GARANTIE FIAMMA . FIAMMA garantit ses produits pour une période de 24 mois à partir de la date d'achat effectué par le consommateur final. La garantie Fiamma ne couvre que l’article et pas les dommages causés par une mauvaise utilisation. Fiamma reconnaît la garantie pour des dommages dus à...
- Page 48 ADVERTENCIAS Y SUGERENCIAS Todos nuestros toldos son “Made in Italy” y fabricados según estandares muy exigentes. Fiamma produce todos los toldos con esmero, pero unas particularidades del material (como pequeñas imperfecciones sobre la pintura o linealidad de los perfiles de aluminio;pequeños signos o ligeras deformaciones de las partes de plástico) , que podrán ser interpredadas como imperfecciones, dipenden de los mismos materiales y de los procesos de producción aunque Fiamma use maquinarias y técnicas de...
- Page 49 GARANTIA FIAMMA . FIAMMA garantiza los propios productos por un periodo de 24 meses a partir de la fecha de adquisición La garantía Fiamma cubre sólo el producto y no los posibles daños causados por un uso incorrecto. FIAMMA reconoce la garantía por averías debidas a defectos de la lona o que no son en conformidad de producción.
-
Page 50: Avvertenze E Suggerimenti
AVVERTENZE E SUGGERIMENTI Tutti i nostri tendalini sono “Made in Italy” e fabbricati secondo standard esigentissimi. I tendalini sono prodotti accuratamente, ma certe particolarità dei materiali (come piccole imperfezioni sulla vernice o linearità dei profili di alluminio; piccoli segni e leggere deformazioni delle parti plastiche), che potrebbero essere interpretare come imperfezioni, dipendono dai materiali stessi e dagli specifici processi di lavorazione, e si verificano nonostante il fatto che Fiamma utilizzi macchinari e tecniche di produzione e... - Page 51 GARANZIA FIAMMA . FIAMMA garantisce i propri prodotti per un periodo di 24 mesi dalla data di acquisto da parte del consumatore finale. La garanzia copre solo il prodotto, e non gli eventuali danni causati da un uso non corretto. FIAMMA riconosce la garanzia per guasti dovuti a difetti del materiale o non conformità...
- Page 52 PIECES DETACHEES ERSATZTEIL RECAMBIOS SPARE PARTS RICAMBI POLAR WHITE TITANIUM ® ®...
- Page 53 Im Rücksendungsfall bitte Markisen wie folgt verpacken: How to wrap the awning in case of returns: En cas de retour, veuillez svp emballer les stores comme indiqué ci- dessous : Como embalar un toldo en caso de devolución: Come imballare il tendalino in caso di reso: ®...
- Page 54 ENTSORGUNG VON VERPACKUNGSMATERIALIEN Das Verpackungmaterial ist zu 100 % wiederverwertbar. Werfen Sie das Verpackungsmaterial deshalb nicht einfacht fort, sondern entsorgen Sie es so, wie es die verantwortlichen Stellen vorschlagen. DISPOSAL OF PACKAGING MATERIALS The packaging material is 100% recyclable. Therefore packing materials should not be dissipated in the environment but disposed of as directed by local authorities.
- Page 55 MAßE DIMENSIONS DIMENSIONS TAMAÑOS MISURE D NGOMBRO ’I 17 cm F65 Eagle 400 420 cm 385 cm 250 cm 37.5 ® ®...
-
Page 56: Made In Italy
10 2012 FIAMMASTORE All rights reserved. Fiamma S.p.A. reserves the right to modify at any time, without MADE IN ITALY ® notice, prices, materials, specifications and models or to cease production of any model FIAMMA S.p.A. - Via San Rocco, 56 21010 Cardano al Campo - ITALY fiamma.com ®...
Need help?
Do you have a question about the F65 Eagle and is the answer not in the manual?
Questions and answers