Advertisement
Quick Links
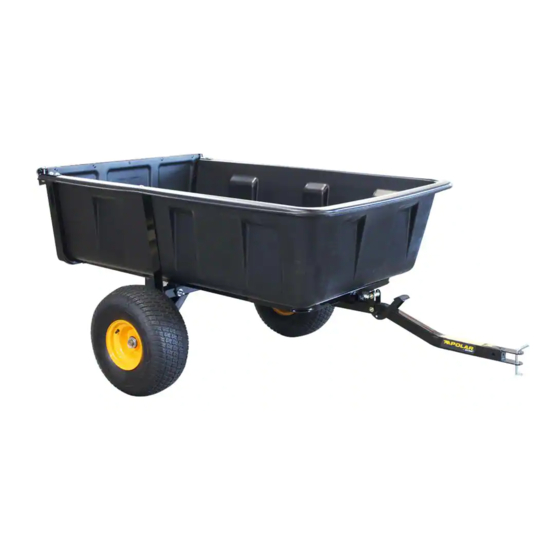
HD MAX
- S P E C IF I C AT I O N S:
Part Number:
Load Capacity:
Load Size:
Overall Dimensions:
Overall Weight:
Tires:
Instruction P/N
Please contact customer service directly at the E-mail or phone number listed below for any
quality issues. ONCE USED THIS PRODUCT CANNOT BE RETURNED TO STORE.
** Warranty cannot be honored without an original, dated receipt **
IMPORTANT-PLEASE READ:
CLAM OUTDOORS INC. warrants to the original retail purchaser its product be free from manufacturers defects for (5)
years from the date of the original purchase. Clam Outdoors Inc will replace or repair any part found defective within the
(5) year time limit. All parts must be returned to Clam Outdoors Inc. Before returning any parts, you must first call or
write and acquire a return authorization. All returns must be returned postage-prepaid and include the original cash
register receipt (date and purchase price).
To submit a warranty claim request, please use one of the following methods:
Customer Service Hrs: 9am to 4pm, Monday – Friday Central Standard Time
Clam Corporation
Attn: Customer Service – Warranty Department
12135 Brockton Lane
Rogers, MN 55369
Phone: 763-231-4120
Fax: 763-231-4121
customerservice@clamcorp.com
Email:
Polartrailer.com
Website:
The warranty does not apply to any Polar Trailer which has been subjected to an accident, improper installation,
modification, adjustment, repair, misuse, misapplication, neglect, including but not limited to improper maintenance, or
use of unauthorized parts or attachments.
LIMITATION OF LIABILITY
It is expressly understood that Clam Outdoors Inc. liability for its products, whether due to breach of warranty,
negligence, strict liability, or otherwise, is limited to the repair of the product as stated above. Clam Outdoor Inc. is not
liable for any injury, loss, damage, or expense, whether direct or consequential, including but not limited to loss of use,
income, profit, or damage to material arising in connection with the sale, installation, use of, inability to use, or the repair
or replacement of Clam Outdoor Inc. products. Clam Outdoor Inc. reserves the right to make alterations or
modifications in its products at any time, which in its opinion, may improve the performance and efficiency of the
product. It shall not be obligated to make such alterations or modifications to products already in service.
110535
1800 lbs.
27 Cubic Feet
93" x 55" x 39"
200 lbs.
20 X 8.00-8
105135
WARRANTY INFORMATION
MODEL 10535
Advertisement

Related Manuals for Clam POLAR TRAILER HD MAX 10535


Summary of Contents for Clam POLAR TRAILER HD MAX 10535
- Page 1 Clam Outdoors Inc will replace or repair any part found defective within the (5) year time limit. All parts must be returned to Clam Outdoors Inc. Before returning any parts, you must first call or write and acquire a return authorization.
- Page 2 WARNING: ▪ THIS PRODUCT IS INTENDED FOR USE IN LAWN CARE AND HOME APPLICATIONS. ▪ DO NOT TOW BEHIND A VEHICLE OR USE ON A HIGHWAY OR IN ANY HIGH SPEED APPLICATION. ▪ THIS PRODUCT HAS BEEN DESIGNED FOR OFF-ROAD USE ONLY. Transporting Loads Safely •...
-
Page 3: Parts List
PARTS LIST QTY. PART NO. DESCRIPTION 105131 BASE, HD MAX 2800 105005 ASSY, 20 X 8.00 - 8, WHEEL 105135 INSTRUCTIONS, HD MAX 105470 DECAL MODEL HD MAX 109265 SCREWDRIVER, #4 PHILLIPS INNERPACK, HD MAX 2800 (INCLUDES THE FOLLOWING) 105137 105113 WLDMT, UPRIGHT SUPPORT 105106... - Page 4 FASTENERS...
- Page 5 STEP-1 *USING A DROP OF OIL ON ALL NUTS WILL EASE THE ASSEMBLY PROCESS. *IT IS BEST TO USE THE AID OF ANOTHER PERSON DURING ASSEMBLY. 1. INSTALL (105113) to (105110) WITH FASTENERS AS SHOWN. SECURELY TIGHTEN. STEP-2 1. ASSEMBLE AXLE COMPONENTS WITH FASTENERS AS SHOWN AND SECURELY TIGHTEN.
- Page 6 STEP-3 1. INSTALL FRAME ASSEMBLY FROM STEP-1 TO AXLE ASSEMBLY STEP-2 WITH FASTENERS AS SHOWN. SECURELY TIGHTEN. RED REFLECTIVE TAPE MUST BE ON THIS SIDE WHEN ASSEMBLING. STEP-4 1. LOOSELY INSTALL REAR OF BASE TO FRAME ASSEMBLY WITH ALL FASTENERS REQUIRED. DO NOT TIGHTEN FASTENERS .
- Page 7 STEP-5 1. LOOSELY INSTALL BOTTOM OF BASE TO FRAME AND SIDE STRAPS AS SHOWN. SECURELY TIGHTEN ALL LOOSE FASTENERS AT THIS POINT.
- Page 8 STEP-6 1. ASSEMBLE, TUBE (101721) AND TONGUE ASSEMBLY (105130) TO THE TRAILER FRAME USING FASTENERS AS SHOW. DO NOT OVER TIGHTEN FASTENERS! BOTH TUBE (101721) AND TONGUE ASSEMBLY (105130) MUST MOVE FREELY AND ROTATE ONCE SECURED IN PLACE.
- Page 9 STEP-7 1. ASSEMBLE THE WHEELS (105005) TO AXLE AS SHOWN AND SECURE IN PLACE WITH LYNCH PIN (101823) LYNCH PIN (101823) MUST BE LOCKED IN POSITION AS SHOWN BEFORE MOVING TRAILER...
- Page 10 STEP-8 1. INSTALL THE TAILGATE AND SLIDE INTO BRACKETS AS SHOWN AND INSTALL THE LYNCH PINS. SLIDE INTO BRACKET BOTH SIDES LOCKING PIN (101314) MUST BE LOCKED IN POSITION AS SHOWN TO KEEP TAILGATE IN POSITION...
- Page 11 LATCH OPERATION PULL BAR UPWARD TO UNLOCK AND LOCK TAILGATE. DUMP OPERATION 1. PUSH DOWN ON FOOT PEDAL TO RELASE TRAILER BOX KEEP CLEAR OF ROTATING BOX AREA TO AVOID INJURY TAILGATE MUST BE OPEN AND POSITIONED ON TOP OF BASE AS SHOWN...
- Page 12 VISIT OUR WEB-SITE FOR ADDITIONAL ACCESSORIES THAT MAY BE AVAILABLE FOR YOUR TRAILER TOOL RACK PART# 110517 TOOL ORGANIZER PART# 110518...
Need help?
Do you have a question about the POLAR TRAILER HD MAX 10535 and is the answer not in the manual?
Questions and answers