Table of Contents
Advertisement
Quick Links
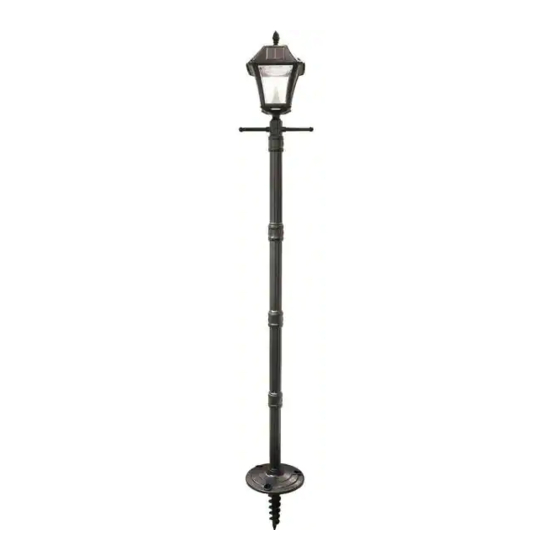
BAYTOWN II
SOLAR LAMP POST
US Patent # 7172307
Patent Pending DIY Installation
For Solar Lamp Post
Instruction Manual
Model: GS-105SG
Introduction
Thank you for your purchase!
® solar charged accent lighting eliminates
GAMA SONIC
the problems associated with most solar lighting available today.
® solar
GAMA SONIC
charged lights are brighter and last all night with a typical solar charge. Unique
design, superior light output and numerous installation options confirm the
1
Advertisement
Table of Contents

Subscribe to Our Youtube Channel
Related Manuals for Gama Sonic BAYTOWN II GS-105SG


Summary of Contents for Gama Sonic BAYTOWN II GS-105SG
- Page 1 Model: GS-105SG Introduction Thank you for your purchase! ® solar charged accent lighting eliminates GAMA SONIC the problems associated with most solar lighting available today. ® solar GAMA SONIC charged lights are brighter and last all night with a typical solar charge. Unique...
- Page 2 ® has been recognized as a worldwide GAMA SONIC leader in the lighting industry for over 20 years. The company also offers unique multi-purpose rechargeable products that range from party lights to emergency lighting products.
- Page 3 3. Turn on switch to desired setting. 4. Attach top(A) to the body(B) with the two supplied screw caps. 6. Screw on top Ornament. 5. Attach Side handles provided. 7. Assemble pole by screwing the four pieces together. Two easy ways for installation: Flat mount (8.1 - 8.2) EZ Anchor (9.1 - 9.7)
- Page 4 Flat installation (Installing the lamp post without anchor): 8.1 Mark three holes with the base plate as a 8.2 After assembling attach the three template. With an electric drill, drill the decorative caps provided. holes into concrete. Assemble with the and screw the fixture to the base.
- Page 5 Operation Instructions 1. Remove the top (A) by unscrewing the 2 screw caps. Turn the operation switch to “summer” (for greater brightness) or “winter” (for longer duration) position. The Solar Lamp will automatically operate at dusk. 2. Reattach top (A) and secure with the 2 screw caps.
- Page 6 2. Unscrew the battery compartment (Fig.2) screw located on the silver reflector and remove the compartment door. 3. Unclip the connector and remove the old battery (Fig.4). Make sure the new battery is a Gama Sonic - 3.2V/1,500mAh, Li-ion Rechargeable Battery with a connector.
- Page 7 WARNING: Do not dispose of Li-Ion battery in the regular trash, municipal waste stream or by fire as batteries may leak or explode. Do not open, short circuit, or mutilate batteries as injury may occur. Preserve our environment by recycling Li-Ion batteries or disposing of them in accordance with local, State and federal regulations.
Need help?
Do you have a question about the BAYTOWN II GS-105SG and is the answer not in the manual?
Questions and answers