
Subscribe to Our Youtube Channel
Related Manuals for Sencore OmniHub XMINI


Summary of Contents for Sencore OmniHub XMINI
- Page 1 [Keywords] Transconding Platform [Subject] May 2021 www.sencore.com | 1.605.978.4600 Revision...
- Page 2 This document may also have links to third-party web pages that are beyond the control of Sencore. The presence of such links does not imply that Sencore endorses or recommends the content on those pages. Sencore acknowledges the use of third-party open source software and licenses in some Sencore products.
- Page 3 – Revision History Date (MM/DD/YY) Version Description Author 05/21/20 First Draft 05/26/20 Modified some editing errors 06/30/20 Optimized some functions Page 3 (47)
- Page 4 Replacement Parts: When replacement parts are required, be sure the service technician uses replacement parts specified by Sencore, or parts having the same operating characteristics as the original parts. Unauthorized part substitutions made may result in fire, electric shock or other hazards.
- Page 5 Always refer to the manual for safe operation. If you have a question about the application or operation email ProCare@Sencore.com WARNING – To reduce the risk of fire or electrical shock never allow your equipment to be exposed to water, rain or high moisture environments.
- Page 6 – Package Contents The following is a list of the items that are contained: 1. OmniHubXMINIChassis 2. OmniHub XMINI Software 3. AC Power Cable 4. AC Adapter 5. Quick Start Guide these items were omitted from packaging, please email ProCare@Sencore.com to obtain a replacement.
-
Page 7: Table Of Contents
– Table of Contents SECTION 1 OVERVIEW .............................9 ........................10 RODUCT NTRODUCTION ........................11 RONT ANEL VERVIEW ........................11 ANEL VERVIEW SECTION 2 INSTALLATION ..........................12 ..........................13 NSTALLATION AC P ........................13 OWER ONNECTIONS ..........................13 AINTENANCE ..........................13 ETWORK ETUP SECTION 3 WEB-INTERFACE OPERATION .....................14 XMINI W ..................15 MINI NTERFACE... - Page 8 – 3.6.1 Backup Video ...........................32 3.6.2 Logo Graphic ..........................33 3.6.3 Resource ..........................33 3.6.4 Timing Task ..........................36 3.6.4.1 Substitle Overlay........................... 36 3.6.4.2 Graphic Overlay ............................ 38 3.6.4.3 Video Insertion ............................. 38 3.6.5 Output Channel Settings ......................39 3.6.6 Output Channel Settings ......................39 3.6.7 Output Channel Settings ......................39 SECTION 4 APPENDICES ..........................41...
-
Page 9: Section 1 Overview
– Section 1 Overview Introduction This section includes the following topics: ........................10 RODUCT NTRODUCTION ........................11 RONT ANEL VERVIEW ........................11 ANEL VERVIEW Page 9 (47) -
Page 10: Product Introduction
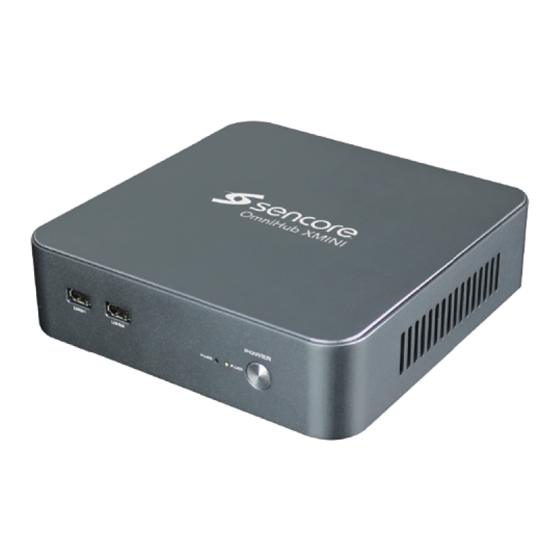
– Product Introduction The new OmniHub XMINI is designed to be agile, supporting new codecs and video formats through software-based updates versus traditional fixed ASIC hardware design. XMINI is a small form factor appliance offering cost-effective linear transcoding for a single service with a resolution up to 1080p60. -
Page 11: Front Panel Overview
ProCare@Sencore.com Rear Panel Overview The OmniHub XMINI server has dual network ports on the motherboard. Either port can be used to access the web-interface or send and receive MPEG/IP. 1. LAN1: One of the two available RJ45 Ethernet ports for management or MPEG/IP 2. -
Page 12: Section 2 Installation
– Section 2 Installation Introduction This section includes the following topics: ..........................13 NSTALLATION AC P ........................13 OWER ONNECTIONS ..........................13 AINTENANCE ..........................13 ETWORK ETUP Page 12 (47) -
Page 13: Rack Installation
Maintenance Refer to the server manufacturer documentation for details regarding server hardware maintenance. To request a copy of the latest XMINI software or release notes from Sencore, email ProCare@Sencore.com Network Setup For the info on initial network configuration menu, see the Sencore OminiHub XMINI... -
Page 14: Section 3 Web-Interface Operation
– Section 3 We b-Interface Operation Introduction This section includes the following topics: XMINI W ..................15 MINI NTERFACE VERVIEW ............................16 TATUS ..........................18 YSTEM ETTINGS ..........................24 NPUT ETTINGS ......................25 RANSCODING UTPUT ETTINGS Page 14 (47) -
Page 15: Ominihub Xmini Web Interface Overview
– OminiHub XMINI Web Interface Overview 3.1.1 Login to the XMINI Web Interface To open the OmniHub XMINI web interface, use one of the following supported browsers and navigate to the unit’s IP address: Internet Explorer11& above Firefox29& above ... -
Page 16: Status
– Status The Status panel in the OmniHub XMINI web interface is used to provide detailed info of current input and output status, including specific media info of input TS and configuration info of output after transcoding. 3.2.1 Channel List Overview This section will give you an overview about detailed current status and media info of input and output. -
Page 17: Detailed Input Overview
– 3.2.1.2 Detailed Input Overview Clicking under the menu bar of Detailed Input Settings, you will see media information of the input source. Channel Engine Status 3.2.2 Clicking will lead you to a new page, where you can see a detailed list of transconding configuration. -
Page 18: System Settings
– System Settings Clicking the System Settings tab will allow you to control many global settings and maintenance tasks on the OmniHub XMINI. 3.3.1 Network Settings The Default Gateway of the web-interface can also be pointed at a chosen network port (LAN1 or LAN2). -
Page 19: Ethconfiguration
– management port. Gateway Four decimal octets: This option is only available if Static Mode is set. This is the Gateway address assigned to the XXX.XXX.XXX.XXX management port. DNS Address Four decimal octets: This option depends on whether the user needs to connect a DNS XXX.XXX.XXX.XXX 3.3.2... -
Page 20: Firmware Upgrade
Get License File Inputing a device name and then clicking , you will obtain a config file of the XMINI system with a suffix of .pkg. Send the .pkg file to Sencore to get a customized license upgrade file. 3.3.4.2... -
Page 21: System Resource
– 3.3.5 System Resource The current available and used disk space of the server is shown in System Resource page in the Web interface. 3.3.6 Password The XMINI can be assigned an access password and the current access password can be changed. -
Page 22: Config Backup
– Domain Name Date YYYY /MM/DD This option is only available when Static Mode is set. This is the IP address assigned to the management port. 00:00:00 – 24:00:00 Time This setting is the user defined time. The time is based on a 24-hour clock. -
Page 23: System Logs
Click to download system logs. 3.3.10 Advance Config Usually this function is for Sencore Technician to troubleshoot issue when system is abnormal. 3.3.11 About System Under the About tab, there is info about the current software version and the specific serial number the system owns. -
Page 24: Input Settings
– IP Source Settings This menu allows you to configure the source input. 3.4.1 Config Steps 1. Select the right Network Interface which the TS feeds into (eth1 corresponds to LAN2, eth0 corresponds to LAN1) 2. Select the right Protocol which the source uses. 3. -
Page 25: Optional Protocol
– 3.4.2 Optional Protocol OmniHub XMINI supports receiving transport streams of different protocols shown as below. the option maybe updated in future. RTP Multicast/Unicast UDP Multicast/Unicast RTMP RTSP TS over HTTP FLV over HTTP Transcoding Output Settings This section will give you a detailed introduction to configuring the transcoding output. - Page 26 – Page 26 (47)
-
Page 27: Output Channel Settings
– Output Channel Settings 3.5.2 1. Click under the Output Channel Section to enter the config interface of Channel Engine Settings. 2. Check the box to config the transcoding parameters. 3. Click to make the configured parameters take effect. 4. Click to return the homepage of the Transcoding Engine Settings 5. -
Page 28: Config Copy
This section will tell you how to configure output transport protocols. 1. Select an eth port for output. 2. Select a protocol for output. The config of different protocols is different. You can get support from Sencore if you meet any problems here. Page 28 (47) -
Page 29: Configuring Video Stream
This section shows you how to configure transcoding parameters of video output. Select a video codec for output. Different video codecs have different config parameters. You can get support from Sencore if you meet any problems here. Page 29 (47) - Page 30 – Setting Range Description Codec: Copy Copy the codec of video source. Codec: None No video data will be output. Entropy Coding cabac Two entropy coding mode. Mode cavlc B frames to use Disable/1/2/3 Support to disable B frams or use 1 or 2 or 3 of B frames.
-
Page 31: Configuring Audio Stream
This section shows how to configure transcoding parameters of audio output. The XMINI supports 4 audio tracks. Select an audio track and an audio codec for output. Different audio codecs have different config parameters. You can get support from Sencore if you meet any problems here. Setting Range... -
Page 32: Configuring Logo
– Setting Range Description Codec: Copy Copy the codec of stream source. Codec: None No subtitle will be output. Codec: Hard Support only one track with hard codec. Codec:webvvt Support only one track with webvvt codec. Input ID 1/2/3/4/5/6/7/8 The ID of input subtitle. 3.5.2.6 Configuring Logo This section shows how to upload or delete a logo of a program. -
Page 33: Logo Graphic
– 3.6.2 Logo Graphic (Licensed feature) Click to add Logo: Fill in Logo name; 2. Click to select intending uploaded Logo; 3. Click to upload Logo. 3.6.3 Resource (Licensed feature) XMINI supports Subtitle Overlay, Graphic Overlay and Video Insertion functions. User can edit subtitle, graphic and video on this section. - Page 34 – Subtitle Overlay Page 34 (47)
- Page 35 – Font Graphic Page 35 (47)
-
Page 36: Timing Task
– Video 3.6.4 Timing Task(Licensed feature) XMINI supports to run tasks set in advance. 3.6.4.1 Subtitle Overlay Select channel number through drop-down list to display task of selected channel. Page 36 (47) - Page 37 – Follow steps showed on picture to copy task to other channel. Click to establish a new task. Page 37 (47)
-
Page 38: 3.6.4.2 Graphic Overlay
– 3.6.4.2 Graphic Overlay Please refer to chapter 3.6.4.1 Subtitle Overlay for settings. 3.6.4.3 Video Insertion Please refer to chapter 3.6.4.1 Subtitle Overlay for settings. Page 38 (47) -
Page 39: Output Channel Settings
– 3.6.5 Task retention period Set a retention period for task. 3.6.6 Manual Task(Licensed feature) XMINI supports to run tasks set instantly. Refer to chapter 3.6.4.1 Timing Task(Licensed feature)for settings. 3.6.7 Overlay Log(Licensed feature) User is allowed to check insertion history though log on this section. Page 39 (47) - Page 40 – Page 40 (47)
-
Page 41: Section 4 Appendices
– Section 4 Appendices Introduction This section includes the following appendices: APPENDIX A – ACRONYMS AND GLOSSARY APPENDIX B – EVENT AND ERROR LIST APPENDIX C – SPECIFICATIONS APPENDIX D – WARRANTY APPENDIX E – SUPPORT AND CONTACT INFORMATION Page 41 (47) - Page 42 – Appendix A – Acronyms and Glossary AAC: Advanced Audio Coding AAC-LATM: Advanced Audio Coding-Low-overhead MPEG-4 Audio TransportMultiplex AAC-LC: Advanced Audio Coding-Low Complexity ABR: Average Bit Rate AC-3: Also known as Dolby Digital ATSC: Advanced Television Systems Committee Bit Rate: The rate at which the compressed bit stream is delivered from the channel to the input of a decoder.
- Page 43 – MPEG-2: Refers to ISO/IEC standards 13818-1 (Systems), 13818-2 (Video), 13818-3 (Audio), 13818-4 MP2: MPEG-1 Audio Layer II MP3: MPEG-1 Audio Layer III NFS: Network File System NTP: Networking Time Protocol OTT: Over The Top PAT: Program Association Table PCR: Program Clock Reference PID: Packet Identifier.
- Page 44 – Appendix B – Event and Error List Event or Error Description Date/Time Changed The Date/Time setting of the system was changed. Set Timezone Successfully The time zone setting of the system was changed. Input Video Unsupported The video source format or codec is unsupported. Using NTP Server online The DNS must be configured to connect a external server.
- Page 45 – Appendix C –Specifications OmniHub XMINI Minimum Requirements CPU: Intel Core i5-6360U, 2.0GHz RAM: 4GB DDR4 2133MHz HDD: 128GB SSD IP Input General – Connector: 2x 10/100/1000 auto negotiate Base-T RJ-45 Ethernet Ports MPEG-2 MP@ML/HL Video Codecs: H.264 MP@L1.2/2.2/3.0/3.1, HP@L3.1/4.0/4.1 H.265 MP@MT L1/2/2.1/3/3.1/4/4.1, 8-bit...
- Page 46 – H.264/MPEG-2 HD (up to 1080p30) 1 x HEVC/H.264/MPEG-2 HD (1080p60) to OTT Mode: H.264 HD with up to 3 proles: Prole 1: up to 1080p60 Prole 2: up to 720p60 Prole 3: up to 576p25 Page 46 (47)
- Page 47 Once an RMA number has been issued, the unit needs to be packaged and shipped back to Sencore. It’s best to use the original box and packaging for the product but if this not available, check with the customer service representative for the proper packaging instructions.
Need help?
Do you have a question about the OmniHub XMINI and is the answer not in the manual?
Questions and answers