
Related Manuals for SEFRAM 7314


Summary of Contents for SEFRAM 7314
- Page 1 SEFRAM 7314 6000 ULTIMÈTRE NUMÉRIQUE POINTS TRMS ’ OTICE D UTILISATION ’ S MANUAL...
-
Page 2: Table Of Contents
Sommaire Sécurité Prescription de sécurité Déballage et inspection Spécifications Environnement Caractéristiques générales Spécifications électriques Mise en œuvre Fonctions Maintenance Remplacement du fusible Remplacement de la pile Test du fusible et des cordons M731400M00... -
Page 3: Sécurité
1. Sécurité Il est impératif de prendre connaissance des prescriptions de sécurité avant toute utilisation de l’instrument. Symboles utilisés sur les appareils et dans le manuel Danger – Risque de choc électrique Attention – Se référer au manuel Double isolement – Protection contre les chocs électriques Conformité... -
Page 4: Déballage Et Inspection
• Pour éviter toute mesure erronée qui pourrait occasionner un risque de choc électrique, remplacer la pile dès appari- tion du symbole à l’affichage • Avant toute mesure de résistance, s’assurer que les cir- cuits à tester sont déchargés • Ne pas utiliser l’appareil avec des cordons endommagés •... -
Page 5: Spécifications
3. Spécifications 3.1 Environnement Votre multimètre à été conçu pour être utilisé dans les condition suivantes : Altitude d’utilisation : inférieure à 2000 mètres Utilisation à l’intérieur Température d’utilisation : 0°C à 50°C avec une humidité relative de 80% entre 10°C et 30°C, de 75% max entre 31°C et 40°C et de 45% max de 41°C à... -
Page 6: Spécifications Électriques
3.3 Spécifications électriques Toutes les précisions sont données en % lecture + nombre de digits et à 23ºC ± 5ºC (HR <80% max). (1) Tensions continues Gamme Précision Résolution Protection 600mV 100µV ± (0.5% + 2dgt) 10mV DC 1000V eff. 600V 100mV 1000V... - Page 7 Méthode de conversion : TRMS couplé AC La spécification est donnée pour un affichage compris entre 600 points et 4000 points. Entre 4000 et 6000 points, ajouter 0,6% à la précision. Facteur de crête : 3 max. à 2000 points – Ajouter 1,5% à la précision CMRR / NMRR : (Réjection de mode commun) (Réjection mode série)
- Page 8 (4) Courant alternatifs Chute de Gamme Précision Résolution tension 600µA Non spécifié 0.1µA <4mV/µA 6000µA 1µV ±(1.0% + 2dgt) 2V max. 10mA Protection : entrée µA – 600V eff. Entrée 6A / 10A : fusible F10A / 500V (rapide) 10KA HPC Bande passante : 50 –...
- Page 9 (5) Résistances Gamme Précision Résolution Protection 600Ω (*1) 0.1Ω 6KΩ 1Ω ± (0.7% + 2dgt) 60KΩ 10Ω 600V eff. 600KΩ 100Ω ± (1.0% + 2dgt) 6MΩ 1KΩ ± (1.5% + 2dgt) 60MΩ (*2) 10KΩ Protection : 600V eff. sur tous les calibres Tension en circuit ouvert : -1.3V environ (* 1) <...
- Page 10 (8) Fréquence Gamme Précision ** Sensibilité Protection 6000 Hz(*) 60 KHz 100 mV eff. 600 KHz ± (0.1% + 1dgt) 600V eff. 600 KHz 6 MHz 250 mV eff. 60 MHz 1V eff. Protection : 600V eff. * en dessous de 20 Hz, la sensibilité est de 1.5V eff. ** Sensibilité...
-
Page 11: Mise En Œuvre
(10) Arrêt automatique Si le multimètre n’est pas utilisé pendant 10 minutes (environ), l’alimentation est coupée. 4. Mise en œuvre Mesures de tensions (AC, DC) et fréquence Brancher selon le schéma ci-dessous Il est normal de voir un affichage instable lorsque les cordons ne sont pas branchés au dispositif de mesure. - Page 12 Mesures de resistances Brancher selon le schéma ci-dessous Attention : ne jamais effectuer de mesure sur un circuit sous tension ou un circuit qui présente des capacités chargées à un potentiel élevé. La tension de mesure est inférieure à 1,5V. Cependant les circuit intégrant des dispositifs à...
- Page 13 Mesures de courant AC et DC Brancher selon le schéma ci-dessous Danger : ne jamais ouvrir ou effectuer une mesure sur un circuit dont la tension par rapport à la terre est supérieure à 500V (par exemple un système tri-phasé 440V). L’appareil pourrait être endommagé...
- Page 14 Mesures de capacités Brancher selon le schéma ci-dessous Attention : pour éviter tout risque de dommage à l’appareil ou à l’équipement sous test, il est impératif de s’assurer que les capacités à mesurer soient déchargées. Vérifier en V DC que le potentiel aux bornes est bien nul.
- Page 15 Test diode Brancher selon le schéma ci-dessous BON ! BON ! ERREUR ! Utiliser le test diode pour vérifier les jonctions de semi-conducteurs (entre 0.4V et 0.9V). Attention : s’assurer avant toute mesure que les circuits ne sont pas sous tension et qu’il n’y a pas de capacités chargées. Test de continuité...
-
Page 16: Fonctions
5. Fonctions Gammes automatiques et manuelles APPUI APPUI APPUI APPUI APPUI APPUI Le changement de gammes s’effectue par appui sur la touche « Range ». L’appareil est par défaut en changement de gammes automatique (indication de AUTO sur l’afficheur). En mode manuel, l’indication AUTO est effacée. - Page 17 Fonction HOLD APPUI APPUI Note : la fonction MIN MAX n’est pas possible en mode HOLD. Fonction Arrêt automatique Dans le cas où le multimètre est inactif pendant 10 mn, c’est à dire aucun appui sur une touche et pas de changement de position du commutateur rotatif, le multimètre s’arrête dans la configuration actuelle.
-
Page 18: Maintenance
6. MAINTENANCE Aucune maintenance n’est nécessaire. Il est recommandé de nettoyer périodiquement l’appareil avec un chiffon doux et humide. Ne pas utiliser de solvants. Dans le cas d’un stockage prolongé (plus de 2 mois), il est recommandé de retirer la pile. Remplacement du fusible Attention : s’assurer au préalable que les cordons sont débranchés de tout dispositif externe. -
Page 19: Remplacement De La Pile
Test du fusible et des cordons Test du fusible Test des cordons Il est recommandé de tester périodiquement le fusible et les cordons. Service après-vente En cas de problème avec votre appareil, merci de bien vouloir contacter le service après-vente SEFRAM. M731400M00... - Page 20 Title Page Safety Safety Compliance And Certification Introduction Making Basic Measurements Features Using The Features Maintenance Cleaning and Storage Fuse Replacement Battery Replacement Trouble Shooting Specification General Specification Electrical Specification Terms in the Specification M731400M00...
-
Page 21: Safety
Safety Warning Caution Alert Symbol " " " " Statement : Warning" Alert Symbol A " Warning" Statement identifies hazardous conditions and actions that could cause BODILY HARM or DEATH. " Caution" Alert Symbol A " Caution" Statement: identifies conditions and actions that could DAMAGE the Meter or the equipment under test. - Page 22 Warnings Cautions " " " " : ˙ When using test leads or probes, keep your fingers behind the finger guards. ˙ Remove test lead from Meter before opening the battery door or Meter case. ˙ Use the Meter only as specified in this manual or the protection by the Meter might be impaired.
- Page 23 Cautions ˙ Disconnect the test leads from the test points before changing the position of the function rotary switch. ˙ Never connect a source of voltage with the function rotary switch in Ω/9/ A /:/Hz position. ˙ Do not expose Meter to extremes in temperature or high humidity.
- Page 24 Symbols and Terms in The Manual Symbols : : Caution, Risk of Danger. Warning : Identifies hazardous conditions and actions that could cause BODILY HARM or DEATH Caution : Identifies conditions and actions that could DAMAGE the meter or equipment under test. Fuse.
-
Page 25: Safety Compliance And Certification
PER IEC1010 Pollution degree POLLUTION Addition of foreign matter, solid, liquid or gaseous (ionized gases), that may produce a reduction of dielectric strength or surface resistivity. POLLUTION degree For the purpose of evaluating spacing of this product, the following degrees of POLLUTION in the microenvironment are defined. -
Page 26: Introduction
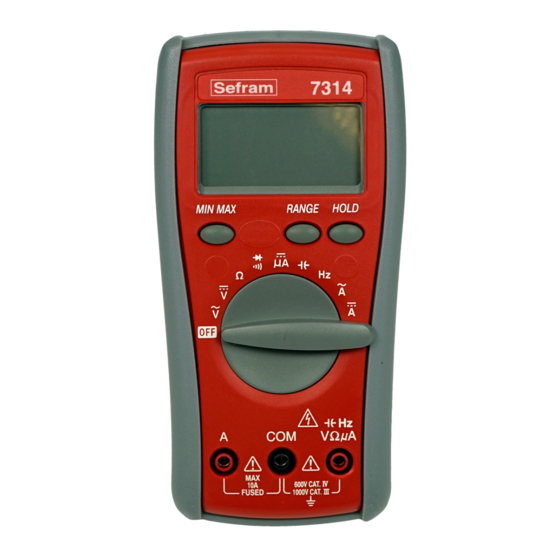
Introduction Unpacking and Inspection Upon removing your new Digital Multimeter from its packing, you should have the following items. 1. Digital Multimeter. 2. Test lead set (one black, on red) 3. User Manual. 4. Protective holster. Environmental Conditions This product is safe at least under the following conditions: 1. - Page 27 The Meter Description Front Panel Illustration 1. 6000 counts LCD display. 2. Push-buttons for features. 3. Rotary switch to turn the Power On or Off and to select a function. 4. Input Terminal for A current function. 5. Input Terminal for all functions EXCEPT current (A) functions.
-
Page 28: Making Basic Measurements
Making Basic Measurements Preparation and Caution Before Measurement : Observe the rules of Warnings Cautions When connecting the test leads to the DUT (Device Under Test) connect the common (COM) test lead before connect- ing the live lead ; when removing the test leads removing the test live lead before removing the common test lead The figures on the following pages show how to make basic measurements. - Page 29 Measuring Resistance Caution To avoid possible damage to the Meter or to the equip- ment under test, disconnect circuit power and discharge all high-voltage capacitors before measuring resistance. Note – The Meter provides an open voltage ≦–1.5V to the circuit under test that causes the diode, transistor junction to conduct so it is better to disconnect the resistance from the circuit to get a correct measurement.
- Page 30 Measuring DC µA, DC A, AC A Current Warning Never attempt an in–circuit measurement where the open–circuit potential to earth potential is greater than 500V for example a 3-phase system measurement, you may damage the Meter or be injured. M731400M00...
- Page 31 Caution To avoid possible damage to the Meter or to the equip- ment under test, check the Meter’s fuses before measur- ing current. Use the proper terminals, function, and range for your measurement. Never place the probes across (in parallel with) any circuit or component when the leads are plugged into the current terminals When measuring current, the Meter acts like an impedance...
- Page 32 Measuring Capacitance Caution To avoid possible damage to the meter or to the equip- ment under test, disconnect circuit power and discharge all high-voltage capacitors before measuring capacitance. Use the DC voltage function to confirm that the capacitor discharged. Note–...
- Page 33 Testing for Diode and Continuity Diode : Good ! Good ! Bad ! Continuity : Caution For in-circuit test, turn circuit power off and discharge the high-voltage capacitors through an appropriate resistance load. Note – Use the diode test to check the semiconductor junction is good or bad.
-
Page 34: Features
Features Feature Description The Meter has Features : Display Hold – Freezes the display. Min Max Hold – Record the Max or Min reading of the display. Range – Selects the manual ranging mode. The default mode is Automatic Range. APO (Auto Power Off) (Battery Saver) –... -
Page 35: Using The Features
Using The Features Manual Ranging and Auto Ranging Note - The Range button is pressed to select manual ranging and to change ranges. When the Range button is pressed once, the indicator turns off. Press Range button to select the appropriate range for measurement you want to make. - Page 36 Note - Press HOLD button in MIN MAX mode to make the Meter stop updating the maximum and minimum value. When display Hold mode is nested in MIN MAX mode, the MIN MAX mode must be released before the display Hold. Display Hold Note - Press the Hold button to toggle in and out of the display Hold mode.
- Page 37 Note – If the Meter idles for more than 10 minutes, the Meter automatically turns the power off. When this happens, the LCD displaying-state of the Meter is saved. The Meter can be turned back on by pushing any button, the LCD displays the saved state.
-
Page 38: Maintenance
Maintenance Caution Do not attempt to repair this meter. It contains no user- ˙ serviceable parts. Repair or servicing should only be performed by qualified personal. ˙ Failure to observe this precaution can result in injury and can damage the meter. Cleaning and storage Periodically wipe the housing with a damp cloth and mild detergent. -
Page 39: Fuse Replacement
Fuse Replacement Refer to the following figure to replace fuse : Caution ˙ Use ONLY a fuse with the amperage, interrupt, voltage, and speed rating specified. ˙ Fuse rating : 10A, 500V Battery Replacement Refer to the following figure to replace the battery : ... -
Page 40: Trouble Shooting
Trouble Shooting Do not attempt to repair your Meter unless you are qualified to do so and have the relevant calibration, performance test and service information. Basic Trouble Shooting If the Meter fails, first check the battery, the battery connection, fuse, test leads, and replace as necessary. -
Page 41: Specification
Specification General Specifications Display : 6000 counts updates 1.5/sec. Polarity Indication : Automatic, positive implied, negative indicated. Overrange Indication : “OL” or “-OL” Low Battery Indication : “<” is displayed when the battery voltage drops below operating voltage. Auto Power Off : Approx 10 minutes. Operating Ambient : Non-condensing ≦10°C,11°C ~ 30°C (≦80% R.H) 31°C ~ 40°C (≦75% R.H), 41°C ~ 50°C (≦45% R.H),... -
Page 42: Electrical Specification
Electrical Specifications Accuracy is ± (% reading + number of digits) at 23ºC ± 5ºC , less than 80% R.H. (1) DC / AC Volts Range DC Accuracy AC Accuracy 600.0mV Unspecified 6.000V 60.00V ±(0.5% + 2dgt) ±(0.9% + 5dgt) 50Hz ~ 500Hz 600.0V DC1000V / AC750V... - Page 43 (2) DC / AC Current Voltage Range DC Accuracy AC Accuracy Burden 600.0µA <4mV /µA 6000µA ±(1.0% + 2 dgt) 6.000A ±(1.5% + 5 dgt) 50Hz ~ 500Hz 2V max 10.00A Overload Protection : A input : 10A (500V) fast blow fuse µA input : 600V rms.
- Page 44 (4) Diode Check and Continuity Range Resolution Accuracy 10 mV ±(1.5% + 5 dgt)* * For 0.4V ~ 0.8V Max.Test Current : 1.5mA Max. Open Circuit Voltage : 3V Overload Protection : 600V rms. Continuity : Built-in buzzer sounds when resistance is less than approximately 100Ω.
- Page 45 (6) Capacitance Range Accuracy 6.000nF 60.00nF 600.0nF 6.000µF ±(1.9% + 8 dgt) 60.00µF 600.0µF 6.000mF * Overload Protection : 600V rms. * < 100 dgt of reading rolling. (7) Auto Power Off (APO) If the Meter idles for more than 10 minutes, the Meter automatically turns the power off.
-
Page 46: Terms In The Specification
Terms In The Specification RMS : The physical meaning of RMS (Root ← Mean ← Square) : If the heat energy, temperature, in a resistor produced by a AC signal during the periodic time T is the same as pro- duced by a DC signal during the same time T then we know “... - Page 47 Average sensing RMS calibrated technical : Most digital multimeters use an average sensing RMS calibrated technique of an electrical average circuit to measure RMS value of AC signals. This technique is scaling the output average value of the average sensing circuit by the ratio of RMS value to average value, for sine wave the ratio is 1.11.
- Page 48 True RMS technical : The true RMS technique multimeter use the RMS mathematic operation procedures in the electric circuit to obtain the true RMS value. So the true RMS measurement is independent of the wave form of the signal under test normally. The applications for true RMS measurement, for example, is the measurement of the energy content of SCR waveforms at differing firing angles and measurement of noise and meas-...
- Page 49 CMRR (Common Mode Rejection Ratio) : The CMRR is the ability of a multimeter to reject the Common Mode Voltage Vcm (The voltage present on both the COM and VOLTAGE input terminal with respect to earth ground). The Vcm normally comes from the electromagnetic interference of high voltage power source line or generators.
- Page 50 DECLARATION DE CONFORMITE CE suivant directives CEE et norme NF EN 45014 SEFRAM INSTRUMENTS & SYSTEMES 32, rue Edouard MARTEL 42100 SAINT-ETIENNE (FRANCE) Déclare que le produit désigné ci-après est conforme à : La directive Européenne basse tension CEE 73/23 NF EN 61010-1 Règles de sécurité...
- Page 51 SEFRAM Instruments et Systèmes 32, Rue Edouard MARTEL F42100 – SAINT-ETIENNE / FRANCE Tel : 0825 56 50 50 (0,15€TTC/mn) Fax : 04 77 57 23 23 Site WEB : www.sefram.fr e-mail : sales@sefram.fr...
Need help?
Do you have a question about the 7314 and is the answer not in the manual?
Questions and answers