Table of Contents
Advertisement
Quick Links
MimioTeach Hardware Set Up Guide
Step 1: Remove contents from
box.
Step 4: Connect the other end
of the USB cable to the bottom
of the MimioTeach bar. Plug the
power supply to the electrical
outlet.
Step 2: Install software from Self
Service not from disk that came in
box. It is called "Mimio Studio 9.12
updated package" and you can find
it in the featured section or the
interactive whiteboard section.
Once installed, the software can be
found in the "Mimio" folder in your
applications folder.
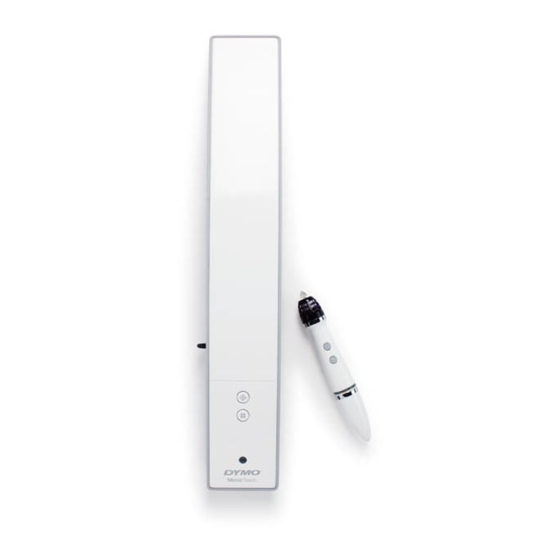
Step 5: Unscrew the top of the
Stylus and remove the tag that
protects the battery during
shipping.
Step 3: Connect the USB cable
to the USB power supply.
Step 6: Attach the MimioTeach
to the left side of the whiteboard.
Advertisement
Table of Contents

Related Manuals for Mimio MimioTeach


Summary of Contents for Mimio MimioTeach
- Page 1 Step 3: Connect the USB cable Service not from disk that came in box. to the USB power supply. box. It is called “Mimio Studio 9.12 updated package” and you can find it in the featured section or the interactive whiteboard section.
- Page 2 Step 10: Make sure to turn on Status Lights: The status light Note: The status light is also the projector to calibrate on the MimioTeach bar will tell power button. MimioTeach bar. Follow the you the status of the connection onscreen directions to calibrate.
Need help?
Do you have a question about the MimioTeach and is the answer not in the manual?
Questions and answers