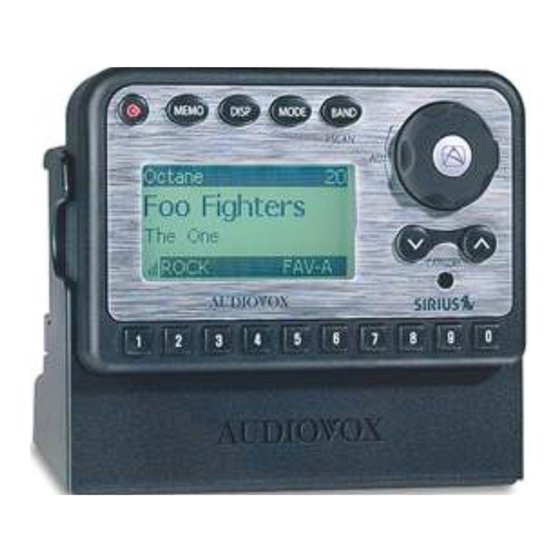
Audiovox Sirius Shuttle SIR-CK1 Installation Manual
Audiovox sir-ck1: installation guide
Hide thumbs
Also See for Sirius Shuttle SIR-CK1:
- Installation manual (1 page) ,
- Installation manual (16 pages)
Table of Contents
Advertisement
Quick Links
Vehicle Installation Guides
SIR-CK1 and SIR-CK2
Revision A: Changed the Switching Box Part Number to SIR-SWB 9/29/03.
Revision B: Corrected Part Number for DC Power Adapter (112B3294)
and added pages for formatting purposes 2/9/04.
Rev C: Changed antenna part number and CK2 part number4-7-04.
Rev D: Changed cradle and shuttle connector and image 4-27-04.
SHUTTLE
128-6813D
1 of 16
Advertisement
Table of Contents

Summary of Contents for Audiovox Sirius Shuttle SIR-CK1
- Page 1 Vehicle Installation Guides SIR-CK1 and SIR-CK2 Revision A: Changed the Switching Box Part Number to SIR-SWB 9/29/03. Revision B: Corrected Part Number for DC Power Adapter (112B3294) and added pages for formatting purposes 2/9/04. Rev C: Changed antenna part number and CK2 part number4-7-04.
- Page 2 ESPN, ABC, CNBC, Bloomberg, Discovery and Radio Disney are developing news, sports and entertainment programming. Your Audiovox Shuttle must be used with an adapter kit, such as the Audiovox Home kit or Vehicle/ Boat Kit as required by your specific installation needs. These kits are available at retailers where Audiovox main units are sold.
-
Page 3: Cautions And Warnings
Cautions and Warnings 1. Do not install the Shuttle in a position that hinders your view through the windshield, or obstructs view ing of the dashboard indicators and displays. 2. Do not install the unit where it may obstruct the operation or deployment of safety devices, such as airbags, etc. -
Page 4: Hardware Kit
Contents SIR-CK1 and SIR-CK2 HARDWARE KIT - Base Audio Cable P/N 150-1519 Install Manual P/N 1286813C P/N 112B3293 P/N 136C3484 Phillips Machine Split Lock Washer, M4 Screw (M4 x 8mm) 1 pc. 1 pc. 1 pc. 4 pcs 4 pcs. -
Page 5: Installation/Wiring Precautions
1. Cabling Interconnections You can begin to enjoy Sirius® Satellite Radio as soon as the Shuttle and Vehicle Kit installation are complete. Set up your Audiovox Shuttle using the following installation instructions, or enlist the help of a professional installer: 2. -
Page 6: Interconnect Diagram
Interconnect Diagram AUDIO CABLE SHUTTLE CRADLE CK1 OR CK2 TO AUXILIARY AUDIO INPUT OF RADIO OR ENTERTAINMENT SYSTEM TO VEHICLE +12 VDC POWER RECEPTACLE DC POWER SHUTTLE ADAPTER ANTENNA Interconnect Diagram FM Option FM FREQUENCY SELECTION SWITCH. SELECT 1 OF 4 AVAILABLE FREQUENCIES AND SET YOUR EXISTING CAR RADIO TO THE SAME FREQUENCY. - Page 7 CAUTION: Do not install the mounting base on a leather or fabric surface, or in a position that could impair your vision, block air bag(s) or obstruct vehicle dashboard controls and/or radio CD/casette operational displays. NOTE: The adhesive backing on the base will not permit easy repositioning once it has been mated to the surface;...
- Page 8 f. Insert the end of the ball strut into the keyed opening on the cradle mounting plate, and secure the plate to the ball strut using the flatwasher, lockwasher and flat-head screw through the back of the plate. g. Reattach the mounting plate assembly to the rear or bottom of the cradle assembly, as desired, using the two flat-head screws removed previously.
- Page 9 NOTE: Allow a 72-hour period for the adhesive backing to cure completely. k. Using the star nut, attach the cradle assembly to the base threaded socket; do not overtighten the star nut. 3. Installing the Cradle Using Double-Sided Tape You can mount the cradle directly to your dashboard or other flat surface without using the cradle mount in the kit.
- Page 10 16-PIN SYSTEM TOP RETAINING CONNECTOR CLIP ANT CONNECTOR BOTTOM LEFT SLIDE CLIP 6. Sirius Program Listening Options The Shuttle and Cradle provide an audio output signal in three manners: 1. When using CK1 or CK2 cradle, the audio signal can be routed through an audio cable which is applied to the auxiliary inputs of a radio or entertainment system.
- Page 11 7. Mounting the Vehicle Antenna The antenna should be placed on a relatively flat surface on the vehicle exterior, preferably on the roof (high point) or on the trunk (convertible). To mount the antenna: a. Plug the antenna into the ANT connector on the back of the cradle.
- Page 12 e. Plan the routing of the antenna cable to the Shuttle RF input. Make sure you avoid any obstructions that could crimp, kink or twist the cable; use protective grommets wherever rough openings are encountered. f. Route the cable from the antenna position to the interior of the vehicle, working the cable under the rear window molding;...
- Page 13 i. Plug the antenna cable into the ANT connector on the back of the cradle; then plug the cigarette lighter adapter into the lighter receptacle. The integral power LED of the power button ( ) will light red. j. You are now ready to enjoy Sirius programming within your vehicle.
- Page 14 THIS PAGE LEFT BLANK INTENTIONALLY -14- 128-6813D 14 of 16...
-
Page 15: 12 Month Limited Warranty
AUDIOVOX CORPORATION (the Company) warrants to the original retail purchaser of this product that should this product or any part thereof, under normal use and conditions, be proven defective in material or workmanship within 12 months from the date of original purchase, such defect(s) will be repaired or replaced with new or reconditioned product (at the Company's option) without charge for parts and repair labor. - Page 16 © 2004 Audiovox Electronics Corporation 128-6813D 128-6813D 16 of 16...


Need help?
Do you have a question about the Sirius Shuttle SIR-CK1 and is the answer not in the manual?
Questions and answers