Table of Contents
Advertisement
Advertisement
Table of Contents

Related Manuals for Neogen Corporation AccuPoint Advanced Next Generation

Summary of Contents for Neogen Corporation AccuPoint Advanced Next Generation
- Page 1 AccuPoint Advanced ® Next Generation User Guide...
-
Page 2: Table Of Contents
TABLE OF CONTENTS Chapter 1 — Introduction 02 Introduction Chapter 2 — Operating Principles and Technology 03 System Components Chapter 3 — Operating Guidelines and Precautions 05 Electrical Warnings 05 Proper Use of the Sampler Cartridges 05 Proper Care of the Instrument 06 Cleaning the Instrument Chapter 4 —... - Page 3 Chapter 7 — Menu Navigation 16 Sites 16 Results 16 Settings 16 Learn RFID 17 Wi-Fi 17 About Chapter 8 — RFID 18 Learn RFID 18 Use RFID Chapter 9 — Wi-Fi 19 Sync Results 19 Disconnect Wi-Fi 19 Connect Wi-Fi Chapter 10 —...
-
Page 4: Introduction
CHAPTER ONE Introduction NEOGEN ’s AccuPoint Advanced Next Generation (NG) sanitation monitoring system is a lightweight, handheld ® diagnostic tool used to validate and verify a sanitation program’s effectiveness by detecting organic residues remaining on surfaces and in liquids after cleaning when using the AccuPoint Advanced samplers. The system is composed of three primary components: an electronic luminometer;... -
Page 5: Chapter 2 - Operating Principles And Technology
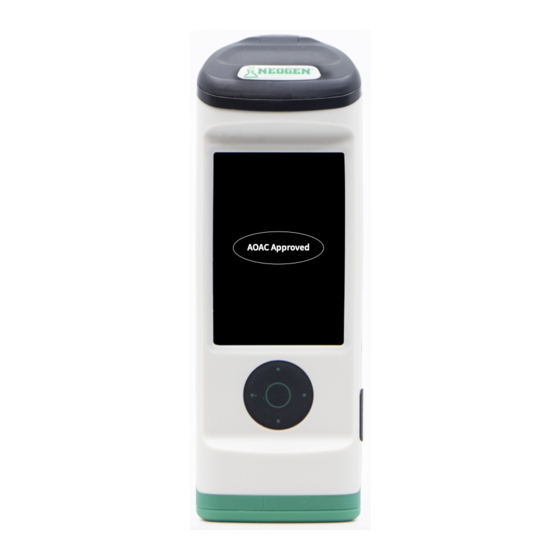
CHAPTER TWO Operating Principles and Technology The AccuPoint Advanced ATP samplers utilizes ATP bioluminescence to determine the cleanliness of test samples. ATP ® is a chemical compound found in all living cells, including bacteria, food debris, yeast, and mold. Bioluminescence is a chemical reaction that produces light. - Page 6 Operating Principles and Technology Sampler compartment Eject button RFID antenna Full color, touch screen display USB data and charging port On/Off and navigation (d-pad) NEOGEN.com...
-
Page 7: Chapter 3 - Operating Guidelines And Precautions
CHAPTER THREE Operating Guidelines and Precautions Electrical Warnings The instrument should be used according to the instructions provided in this manual. If used otherwise, the electrical protection provided may be impaired. The power source for charging the AccuPoint Advanced NG sanitation monitoring instrument must be adequate and ®... -
Page 8: Cleaning The Instrument
Operating Guidelines and Precautions Cleaning the Instrument Clean the outer surfaces of the instrument with a disinfectant wipe approved by your organization or company. If a disinfectant wipe is not available, a solution of 70% isopropyl alcohol can be applied to a clean, cotton or lint-free cloth and used to clean and disinfect the instrument. -
Page 9: Chapter 4 - Preparing The Instrument For Use
CHAPTER FOUR Preparing the Instrument for Use Power the Instrument On/Off First, power the instrument on by pressing and holding the center button on the d-pad. To power the instrument off, press and hold the center button on the d-pad. A message will appear, asking if you would like to power the instrument off. -
Page 10: Home Page
Preparing the Instrument for Use Home Page The home page is considered the landing page once the AccuPoint Advanced NG instrument is turned on. You will ® find the following items on the home page: • Date and Time — The time and date that each test result will be tagged. Both can be changed in the menu. The date and time will also be updated when the AccuPoint Advanced NG instrument connects to the data manager software on your PC. -
Page 11: Running Quick Tests
Preparing the Instrument for Use Running Quick Tests The quick test option can be used anytime to take a test not associated with a site in the master site plan. This can be especially useful during training or demos when a site plan is not needed. To run a quick test, select the quick test option on the home screen, and insert the sampler to run the test. -
Page 12: Sample Procedure
Preparing the Instrument for Use Sample Procedure 01. To power on the instrument, press and hold the center button on your AccuPoint Advanced NG. Enter user name ® and pin if required. 02. Select standard test (when using a site plan) or quick test for general sampling. Under standard testing, select the correct site to be tested. - Page 13 Preparing the Instrument for Use 06. With the instrument held upright, press the eject button and insert the sampler. 07. Close the door to depress the sampler and begin test. Note: keep instrument upright while the sample is being read. 08.
-
Page 14: Chapter 5 - User Access
CHAPTER FIVE User Access Logging In The user login information is set up and administered through the data manager software.For information on setting up users, see the user management section of the AccuPoint data manager user guide. By default, when no users are ®... -
Page 15: Chapter 6 - Running Standard Tests
CHAPTER SIX Running Standard Tests Select Plan Plans are subsets of the master site plan. The master site plan is comprised of all unique test sites in the facility. Sites are organized under groups, and groups are organized under areas in the plan. For more information on setting up site plans, see the AccuPoint data manager user guide. -
Page 16: Select Group
Running Standard Tests Select Group Navigate to the appropriate group in the groups list by scrolling with the up and down keys on the d-pad or use the search field to search for a specific group by name. Select the appropriate group by tapping on the display and proceed to site selection. -
Page 17: Testing Screen
Running Standard Tests Testing Screen A progress indicator will appear, displaying the progress of the sample. Once complete, the results screen will appear. Results Screen The results screen for scheduled tests will display: • Result • User • Date/Time • Plan (if applicable) •... -
Page 18: Chapter 7 - Menu Navigation
CHAPTER SEVEN Menu Navigation Sites The sites list will show a list of all sites programmed into the instrument. This list can be used to select a site to be tested. Simply navigate to the appropriate site in the list by scrolling with the up or down buttons on the d-pad or use the search field to search for a specific site by name. -
Page 19: Wi-Fi
Menu Navigation Wi-Fi This instrument offers wireless data transfer capabilities over Wi-Fi connection. The Wi-Fi connection is initiated and configured through the data manager software. See the setting up Wi-Fi section of the data manager guide for details on setting up the Wi-Fi connection. Once the instrument is connected to Wi-Fi, test results can be transferred wirelessly to the data manager software through the Wi-Fi menu on the instrument. -
Page 20: Chapter 8 - Rfid
CHAPTER EIGHT RFID Learn RFID Once a site plan has been exported to the instrument from the data manager software, select learn RFID from the menu. Then, select the appropriate group from the list by scrolling with the up and down arrows on the d-pad or search by name using the search field. -
Page 21: Chapter 9 - Wi-Fi
CHAPTER NINE Wi-Fi Wi-Fi The AccuPoint Advanced NG instrument can be configured for wireless communication over WiFi. Wireless configuration ® is managed through the data manager PC software. For more information on configuring the AccuPoint Advanced NG device for wireless communication, see the data manager user guide. Sync Results Once the AccuPoint Advanced NG instrument is configured for WiFi communication, the sync results button can be used to send new readings data to the active data manager database. -
Page 22: Chapter 10 - Additional Features
CHAPTER TEN Additional Features The AccuPoint Data Manager Software ® The AccuPoint Advanced NG instrument can be utilized with the data manager software version 4.0 (or later) to upload test site information and to download test results. The use of this combination allows for the compiling, tracking, and analyzing of facility-wide testing results over its entire population of users and instruments. -
Page 23: Troubleshooting
Additional Features Troubleshooting Error 01: Door open during unit initialization while powering on. Error 02: Try to run test when unit is being charged. NEOGEN.com... - Page 24 Additional Features Error 03: Reminder to remove used sampler after testing is complete. Error 04: Please wait — baseline in progress. NEOGEN.com...
- Page 25 Additional Features Error 05: Leaving the door open when the unit is trying to take a baseline reading. Error 06: The unit battery is low, charge unit soon by connecting to the USB charger. NEOGEN.com...
- Page 26 Additional Features Error 07: The unit battery is depleted, the unit is shutting down. Connect the unit to the USB charger. Error 08: Tilt warning flag, unit was not kept upright during the test. Test results are marked with this flag because the results may be compromised.
-
Page 27: Chapter 11 - Technical Information
CHAPTER ELEVEN Technical Information Electromagnetic Compatibility (EMC) This device complies with part 15 of the FCC rules. Operation is subject to the following two conditions: (1) This device may not cause harmful interference, and (2) this device must accept any interference received, including interference that may cause undesired operation. -
Page 28: Electrical Requirements
Technical Information Electrical Requirements The power supply is designed for indoor use only. AC line voltage/frequency: 110 to 240 VAC, 47 to 63 Hz. Maximum input current: 0.32A. Installation category: This instrument can withstand transient overvoltage according to Installation Category II, as defined in IEC 1010-1. - Page 29 NEOGEN.com ©NEOGEN Corporation, 2021. NEOGEN and AccuPoint are registered trademarks of NEOGEN corporation, Lansing, MI 48912 U.S...
Need help?
Do you have a question about the AccuPoint Advanced Next Generation and is the answer not in the manual?
Questions and answers