Table of Contents
Advertisement
Quick Links
Advertisement
Table of Contents

Related Manuals for RCA G2


Summary of Contents for RCA G2
- Page 1 RCA G2 MOBILE PHONE USER MANUAL...
-
Page 2: Table Of Contents
Content General Information ..............................5 Profile ................................5 Safety Warning and Precautions ........................5 Your phone ................................13 Phone Layout ..............................13 Functions of Keys ............................14 Status bar ..............................16 Getting started ................................19 Installing the Micro SIM Cards, SD card and the Battery ................19 Charging the Battery ............................. - Page 3 Using the Menus ............................... 35 Browser ................................. 35 Calculator ..............................37 Calendar ................................ 38 Camera and video ............................39 Clock ................................39 Contacts ................................ 40 Send a Text Messaging ..........................40 Downloads ..............................40 Email ................................41 4.10 File Manager ..............................43 4.11 FM Radio ...............................
- Page 4 4.17 SIM Toolkit ..............................50 4.18 Videos................................50 Appendix ................................... 50...
-
Page 5: General Information
1. General Information 1.1 Profile Please read and follow all instructions in this manual before using the device to ensure the longest lifespan of your device and battery. The specifications and features are subject to change without notice, and the final right to interpret the performance of this mobile phone is reserved. - Page 6 RCA Customer Service. Failure to do so may result in fire or explosion.
- Page 7 SWITCH OFF BEFORE ENTERING RISKY AREAS Strictly observe the relevant laws, codes, and regulations on the use of mobile phones in risky areas. Switch off your mobile phone before entering a place susceptible to explosion, such as an oil station, oil tank, chemical plant or a place where a blasting process is under way.
- Page 8 Only RCA approved personnel may install or repair phone equipment. Installing, disassembling, modifying or repairing the mobile phone on your own may bring great danger and void your manufacturer’s warranty. If your device needs servicing, contact RCA Customer Service. ...
- Page 9 ACCESSORIES Use only approved accessories and batteries. RCA cannot be responsible for the user’s safety when using accessories that are not approved by RCA. BATTERY SAFETY CAUTION: Use only RCA-approved chargers, batteries, and cables. Unapproved chargers or cables can cause the battery to explode or damage the device.
- Page 10 terminals with a cotton ball or a towel. Do not dispose of the battery or device in a fire. Do not use a damaged charger or battery. Do not place the battery or device near or in heating devices, such as heaters, microwave, stoves, hot cooking equipment, or high-pressure containers or radiators.
- Page 11 PRECAUTIONS Keep the mobile phone and all its fittings as SIM cards beyond children's reach. Keep the mobile phone dry. Keep away from rain, moisture, liquid or other substances that may damage and corrode electronic circuits. Do not use or store the mobile phone in dusty places, ...
- Page 12 Do not store your device in very hot areas such as inside a car in the summertime. Doing so may cause the screen to malfunction, result in damage to the device, or cause the battery to explode. High temperature will also shorten the life of electronic circuits and damage the battery and some plastic parts.
-
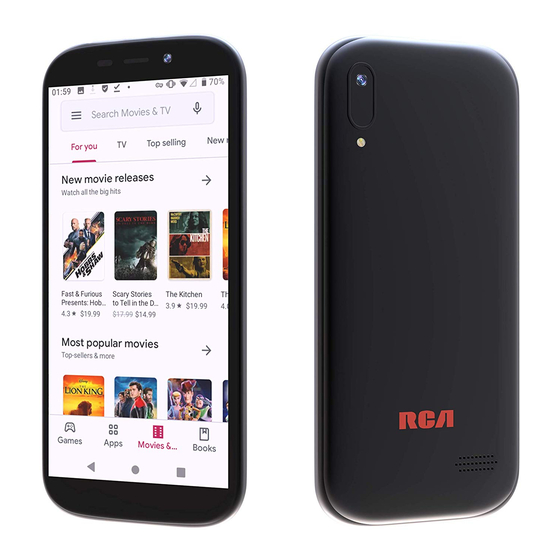
Page 13: Your Phone
Do not use a headset while driving or riding. Doing so, may distract your attention and cause an accident, or may be illegal depending on your region Do not expose the device to heavy smoke or fumes. Do not expose the device to high external pressure, ... -
Page 14: Functions Of Keys
2.1 Functions of Keys Power key Power key is located on the right edge of the phone. While using the phone, you can press -14-... - Page 15 this key to lock screen; if you press and hold this key, an option interface would pop out. Here, you can select to restart, take screenshots or power off. Volume Key Volume keys are on the right side of the phone. You can press them to adjust ringer, earpiece or media volume.
-
Page 16: Status Bar
the central screen. Back Key Press this icon to return to the previous screen; 2.2 Status bar Icon Description Mute is enabled. Vibration is enabled. New voice message has been received. Battery is full Battery is low Battery charging is in progress -16-... - Page 17 No SIM Card Your phone is connected to a 2G network. Your phone is connected to a 3G network. Your phone is connected to a 4G network. An LTE data connection is open. An EDGE data connection is open. An HSDPA/HSUPA data connection is open. Airplane mode is switched on.
- Page 18 GPS is in use Call is in progress Call is on hold SIM card is full Keyboard is in use Signal strength Battery is charging New text message New email Alarm Event notification Missed call -18-...
-
Page 19: Getting Started
3 Getting started 3.1 Installing the Micro SIM Cards, SD card and the Battery Insert the SIM card(s) provided by the GSM mobile phone service provider and use Micro-SIM card or/and Nano-SIM card work with the device. Note: After powering off your mobile phone, wait for a few seconds before removing or inserting a SIM card. - Page 20 corner of the card is positioned correctly. If the SIM card is not inserted correctly, the device will not detect it. Do not remove a card while the device is transferring or accessing information, as this could result in loss of data and/or damage to the card ...
- Page 21 -21-...
-
Page 22: Charging The Battery
3.2 Charging the Battery Your mobile phone can monitor and display the battery charge status. When connecting a cable to your device, make sure that the cable is connected to the proper side. The remaining energy of the battery is indicated by the battery level icon at the upper right corner of the display screen. - Page 23 The battery icon does no longer flicker when the charging process ends. Note: Ensure that the plug of the charger, the plug of the earphone, and the plug of the USB cable are inserted in the right direction. Inserting them in a wrong direction may cause charging failure or other damages.
-
Page 24: Linking To The Networks And Devices
screen timeout. If you don’t need them, turn off automatic syncing for Gmail , Calendar, Contacts, and other applications. Note: On the Home screen, tap Settings > Battery. The Battery Use screen lists the applications that have been using the battery, from greatest to least battery use. - Page 25 Setting up cellular data 1. Press the power key located on the right side of the phone. 2. Swipe up to unlock your phone. 3. Go to the main menu, and look for Settings 4. Tap on 'Mobile network' 5.Tap on the name of the mobile phone carrier and then tap the empty check box to the right of "Mobile data".
- Page 26 When the cellular data is enabled, but the “LTE” “H” or “E” is not displayed on the top of the screen or you sign up with a Mobile Virtual Network Operator (MVNO), like Tracfone and Straight Talk which network operates on big carriers, you might need to configure your phone’s APN settings.
- Page 27 Multiple SIMs & mobile network settings If your phone has more than one SIM: 1. Open your phone's Settings app. 2. Tab on Network&internet. 3. Tap SIM cards. 4. Under "Preferred SIM for," assign an activity to a SIM card: ...
- Page 28 depend on the Wi-Fi router and your surroundings. Go to the main menu, and look for Settings, tap “Wi-Fi”, then tap the empty check box to the right of "On”. The phone will scan for available Wi-Fi networks and displays the names it finds. Secured networks are indicated with a Lock icon.
- Page 29 hands-free kits for cars, and other portable devices, including laptops and cell phones. Go to the main menu, and look for Settings, tap “Bluetooth”, then tap the empty check box to the right of "On”. You must pair your phone with a device before you can connect to it.
-
Page 30: Using The Touch Screen
3.4 Using the touch screen Touch-screen tips Tap To active items on the screen, such as application and settings icons, to type text and symbols using the onscreen keyboard, you may simply tap them with your finger. Touch & hold Touch &... -
Page 31: Using The On Screen Keypad
example, you slide the screen up or down to scroll a list. Lock screen When the Screen lock is enabled in Security setting, press Power key located on the top of the right edge of the phone. When Sleep is enabled in Display Settings, the screen will be locked automatically to save power. -
Page 32: Make A Call
Use the Delete icon to erase characters. Touch Back icon to close the keyboard. Select your default keyboard or input method From a Home screen, tap Settings> System> Language and input > Keyboard &input >Select a keyboard. Note: Additional keyboards can be downloaded from the Google Play Store. - Page 33 top, type the contact you wish to call, then tap the phone number that appears to call the contact. Dial a Recent Number All incoming, outgoing, and missed calls are recorded in the Call log. If the number or caller is listed in your contacts list, the associated name is also displayed.
-
Page 34: Personal Data
Protect your personal data and prevent disclosure or misuse of sensitive information. While using your device, be sure to back up important data. RCA is not responsible for the loss of any data. When disposing of your device, back up all data and then reset your device to prevent misuse of your personal information. -
Page 35: Using The Menus
Avoid using applications from unknown sources and lock your device with a pattern, password, or PIN. 4 Using the Menus 4.1 Browser You can use Browser to view web pages and search for information on the web. To go to a webpage or search the web Touch the URL box at the top of the Browser screen. - Page 36 To find text on a webpage Touch Menu icon and tap “Find on page”. Enter the text you’re looking for. As you type, the first word with matching characters is highlighted on the screen, and subsequent matches are boxed. Touch the up or down arrow to scroll to and highlight the previous or next matching word.
-
Page 37: Calculator
and tap an entry. History To view a list of recently visited web pages: ► Tap Bookmarks > HISTORY. Open and close a tab Open a new tab: ► Tap Tabs >and then tap + to add a new tab. Close a tab: ►... -
Page 38: Calendar
4.3 Calendar Creating an event Tap CALENDAR from a Home screen> touch Menu Key > enter details for the event > tap Done to save. Delete an Event When the CALENDAR is opened, tap DELETE icon at upper right corner. -
Page 39: Camera And Video
4.4 Camera and video Touch the Camera icon from a home screen, compose the shot by aiming the camera at the subject. If desired, before taking the photo, you can touch onscreen icons to access various camera options and settings. You can also touch the screen to move the focus field to the area you touch. -
Page 40: Contacts
4.6 Contacts Open Contacts app At the bottom right, tap To pick the account where you want to save the contact: To add a photo: At the top, tap Add contact photo Enter the contact’s name and an email or phone number. ... -
Page 41: Downloads
to save it as a draft and go back, tap Back . When you’re done, tap Send 4.8 Downloads Tap DOWNLOADS icon, you can view a list of files and applications which you downloaded from the webpage. 4.9 Email You can use the Email application to read and send email. Touch email icon to access it. - Page 42 Set Automatically download attachments when connected to Wi-Fi. Compose and sending Email To compose and send an Email: 1. Touch the create icon to compose a new Email. 2. Enter Email address(es) for intended recipient(s). 3. Touch Menu → Attach file to attach a file. 4.
-
Page 43: File Manager
general settings for all accounts. 2. Enter Settings interface and touch the account to view the account settings. Delete an Email account 1. Enter Settings interface. 2. Touch the account to delete. 3. In account settings interface, touch Remove account to delete this account. -
Page 44: Gallery
4.12 Gallery Both pictures and videos taken by camera or stored in SD card can be viewed through this function. 4.13 Maps Google Maps may require to turn on the Location Services for full functionality. From a Home screen, tap Apps > Settings > Privacy and safety > Location. -
Page 45: Tethering And Portable Hotspot
location data from devices where you have enabled Location History, including when you aren’t using a specific Google product. You may view, manage or delete the history. From a Home screen, tap Apps > Settings > Location>Google Location History> Tap DELETE LOCATION HISTORY to delete your location history, Tap More to View/Manage the location history. -
Page 46: Display
4.15 Display Display Brightness Adjust brightness of screen. Wallpaper Choose wallpaper from Gallery, Live Wallpapers or Wallpapers. Auto-rotate screen Enable your screen to shift from portrait to landscape or vice verse when you physically turn your phone. ... -
Page 47: Security
You can view your battery status, battery level and battery use in this interface. Apps You can use the Applications settings to view details about the applications installed on your phone, to manage their data and force them to stop, to view and control currently running services, and to view the storage used by applications, etc. - Page 48 Encrypt phone Require the user to input a numeric PIN or password to decrypt the handset device upon powering on. Set up SIM card lock Lock SIM card and change PIN for SIM card. Make passwords visible Show password as you type.
- Page 49 language for the text on your phone and for configuring the input method. Backup & reset You can backup your data and reset your phone in this interface. 【SYSTEM】 Date & time You can use Date & Time settings to set your preferences for how dates are displayed.
- Page 50 4.17 SIM Toolkit The specific items depend on your SIM card and network. Service menu will be auto added to the phone menu when supported by network and SIM card. 4.18 Videos You can play videos made by the camera or stored in compatible SD card (if inserted) in this application.
- Page 51 The metal face of the SIM card is polluted. Clean the SIM card with a clean cloth Signals are obstructed. For instance, radio Move to a place where signals can be waves cannot be effectively transmitted nearby effectively transmitted Poor received a high building or in a basement.
- Page 52 Contact your network operator and obtain the APN settings is not updated newest APN values Turn on the data connection in the Setting Cellular data is not switched on menu (Refer 3.3 “Linking to the Networks and devices” ) The charging voltage does not match the Ensure the charging voltage matches the voltage range indicated on the charger voltage range indicated on the charger...
- Page 53 authority to operate the equipment. NOTE: This equipment has been tested and found to comply with the limits for a Class B digital device, pursuant to Part 15 of the FCC Rules. These limits are designed to provide reasonable protection against harmful interference in a residential installation.
- Page 54 substantial safety margin designed to assure the safety of all persons, regardless of age and health. The exposure standard for wireless mobile phones employs a unit of measurement known as the Specific Absorption Rate, or SAR. The SAR limit set by the FCC is 1.6 W/kg. * Tests for SAR are conducted with the phone transmitting at its highest certified power level in all tested frequency bands.
- Page 55 of tissue. The standard incorporates a sub-stantial margin of safety to give additional protection for the public and to account for any variations in measurements. Body-worn Operation This device was tested for typical body-worn operations. To comply with RF exposure requirements, a minimum separation distance of 10mm must be maintained between the user’s body and the handset, including the antenna.
Need help?
Do you have a question about the G2 and is the answer not in the manual?
Questions and answers