Advertisement
Quick Links
Advertisement

Related Manuals for Mobishear MSCMCH10.8-5

Summary of Contents for Mobishear MSCMCH10.8-5
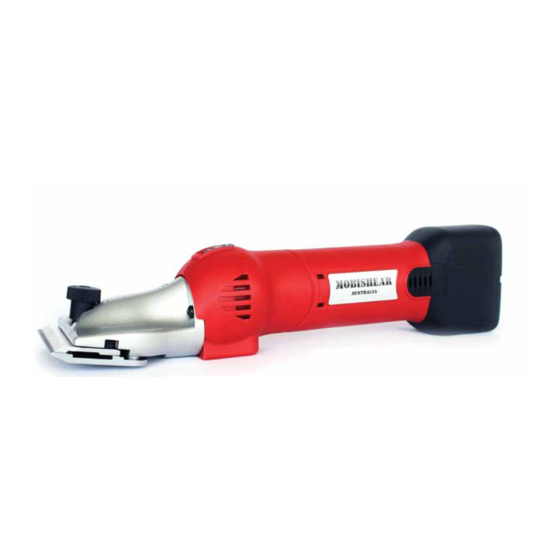
- Page 1 100% CORDLESS 100% CORDLESS MULTICLIP INSTRUCTION MANUAL mobishear.com.au MOBIS- HEAR AuStRAlIA...
- Page 2 Heavy Duty Cordless Clipper Introduction Contents in the box Safety guidelines Intended use Using the clippers Operating notes Tensioning Lubrication Charging the battery Changing the battery Changing the blades Looking after your clippers Cleaning Blade sharpening Storing the clippers Maintenance of the rechargeable batteries The charging unit Repairs Technical information...
- Page 3 Introduction Contents in the box 1 x Masterclip HD Roamer clipper 1 x pair of high grade A2 clipping blades 2 x rechargeable batteries 1 x charging unit 1 x bottle of clipper oil 1 x cleaning brush 1 x screwdriver 1 x storage case 1 x set of operating instructions Safety Guidelines...
- Page 4 Using The Clippers Operating Notes It is essential that these clippers are operated properly and that the user is experienced in handling the animal being clipped. Anyone using these clipper must have read the instruction manual or been advised by an expert on how to use a heavy duty horse clipper and understand the potential dangers.
-
Page 5: Important Note
Tensioning Your clippers have been factory set so you can start clipping immediately. When you need to re-tension your clippers, screw the tension nut down tight and then give it approximately 2 turns back, anticlockwise. Care should be taken to ensure that the blade tension is not set too high. Test the clippers to see how they are working and if they are not cutting correctly, you may need to slightly adjust the tension. - Page 6 Lubrication Before and During Clipping It is very important to keep your clippers well lubricated at all times. Before you start to clip, run some oil along the front and sides of the clipper blades and a few drops in the oiling holes on the head of the clipper. Whilst clipping, it is recommended that you lubricate every 5-10 minutes.
- Page 7 Charging the battery Plug the battery charger into the correct AC voltage source. • The charging light will then go green. • Insert the battery pack so that the plus and minus terminals on the battery • cartridge are on the same sides as their respective markings on the charger. Insert the battery pack into the charging unit.
- Page 8 Changing the battery Removing the battery Always make sure that the clipper is switched off before removing the battery. Press the clips in either side of the battery pack and pull away from the clipper to release the battery. Inserting the battery To insert the battery, align the tongue on the battery pack with the grooves in the clipper housing and slide into the clipper until it clicks into place.
- Page 9 Changing the Blades Make sure that the power switch is turned off and the battery pack is removed from • the clipper before changing the blade. Turn the tension nut anticlockwise to remove the nut and spring, then slide out the •...
- Page 10 Looking After Your Clippers Always ensure that the battery pack is removed when working on the clipper or blades. Cleaning When you have finished clipping, carefully clean the clipper head and blades with a dry brush, then oil the parts to prevent rusting. Remove any excess oil from the clipper and blades with a dry cloth.
- Page 11 Maintenance of the rechargeable batteries Only ever use genuine Masterclip batteries with this clipper. • The battery must be placed in a well ventilated area during charging. • Do not charge the battery inside a box or container of any kind. •...
- Page 12 Technical information Technical Data HD Roamer horse clipper Size: 80 mm × 80 mm × 315 mm Voltage: 10.8V Weight (including battery): 1.15Kg Decibel rating: 80dB Battery 6 x 3.6V Li-ion batteries Voltage: 10.8V Capacity: 3000mAh Weight: 360g Charging Unit AC Input: 100-240V 50/60Hz DC output: 13.7V 2A Weight: 320g...
- Page 13 Parts of the clipper head Tension nut Tension spring Clipper head Cam collar Gear O ring Blade guide Screw Rubber stop Front blade (cutter) Back blade (comb) Tension bolt Blade rest Drive wheel...
- Page 14 Parts of the clipper body Small gear Motor Right body Body screws Adhesive sticker (right side) Wires to docking plates Battery pack Switch Docking plates Left body Adhesive sticker (left side) EVA padding Sliding switch Switch driver Switch wires...
-
Page 15: Troubleshooting
Trouble Shooting Problem Possible cause Rectification Front blade is not moving Faulty cogwheel Replace cogwheel Thread may have got Clean and oil thread crossed or rusted Tension nut is not turning Tension spring jammed Have spring replaced Clipper blades are blunt Have both clipper blades Clipper blades have not sharpened... - Page 16 Switch off clipper, Battery pack is overloaded clean, oil and re-tension Battery charge is low Recharge the battery Switch may be broken Replace switch Power cuts out Motor may be broken Have motor replaced Switch may be broken Replace switch Environmental Protection and Disposal When the clipper and blades have come to the end of its service life, the owner of this clipper has a duty to dispose of the clipper and blades according to the relevant...
- Page 17 100% CORDLESS Arnd Enneking Heidi Enneking M: 0421 062 697 E: arnd@mobishear.com.au M: 0409 289 532 E: heidi@mobishear.com.au Box 89, Mount Barker SA 5251 www.mobishear.com.au...
Need help?
Do you have a question about the MSCMCH10.8-5 and is the answer not in the manual?
Questions and answers