
Related Manuals for Coaster 800436


Summary of Contents for Coaster 800436
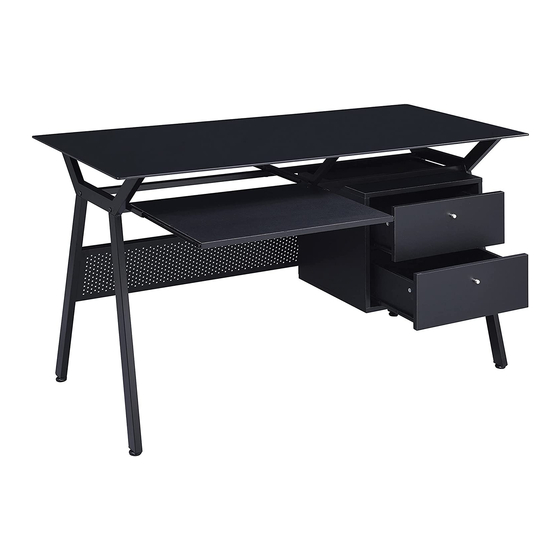
- Page 1 800436 COMPUTER DESK ASSEMBLY INSTRUCTION COASTER FINE FURNITURE www.coastercompany.com 2011/9/20 page 1 of 9...
- Page 2 ASSEMBLY INSTRUCION ITEM: 800436 ASSEMBLY INSTRUCTION ASSEMBLY TIPS: 1. Remove hardware from box and sort by size. 2. Please check to see that all hardware and parts are present prior to start of assembly. 3. Please follow attaced instructions in the same sequence as numbered to assure fast & easy assembly.
-
Page 3: Hardware Package
ITEM: 800436 ASSEMBLY INSTRUCTION ASSEMBLY INSTRUCTION ASSEMBLY TIPS: 1. Remove hardware from box and sort by size. 2. Please check to see that all hardware and parts are present prior to start of assembly. 3. Please follow attached instructions in the same sequence as numbered to assure fast & easy assembly. - Page 4 ITEM: 800436 ASSEMBLY INSTRUCTION STEP 1. STEP 2. www.coastercompany.com page 4 of 9...
- Page 5 ITEM: 800436 ASSEMBLY INSTRUCTION STEP 3. STEP 4. www.coastercompany.com page 5 of 9...
- Page 6 ITEM: 800436 ASSEMBLY INSTRUCTION STEP 5. STEP 6. www.coastercompany.com page 6 of 9...
- Page 7 ITEM: 800436 ASSEMBLY INSTRUCTION STEP 7. STEP 8. www.coastercompany.com page 7 of 9...
- Page 8 ITEM: 800436 ASSEMBLY INSTRUCTION STEP 9. STEP 10. STEP 11. www.coastercompany.com page 8 of 9...
- Page 9 ASSEMBLY INSTRUCTION STEP 1 : Attach FOOT PADS (14) onto FRAME (A) & (B) by screwing into the legs. Assemble IRON TUBES (D) between FRAMES (A) & (B) using BOLTS ( C ). STEP 2: Assemble BACK PANEL (C ) between FRAMES (A) &(B) and using BOLTS (3). STEP 3: Screw SIDE GLIDE RAILS ( T) on CABINET SIDE PANEL (H) using SCREWS (12).
Need help?
Do you have a question about the 800436 and is the answer not in the manual?
Questions and answers