
Related Manuals for YELLOWRIVER YR-380BSW

Summary of Contents for YELLOWRIVER YR-380BSW
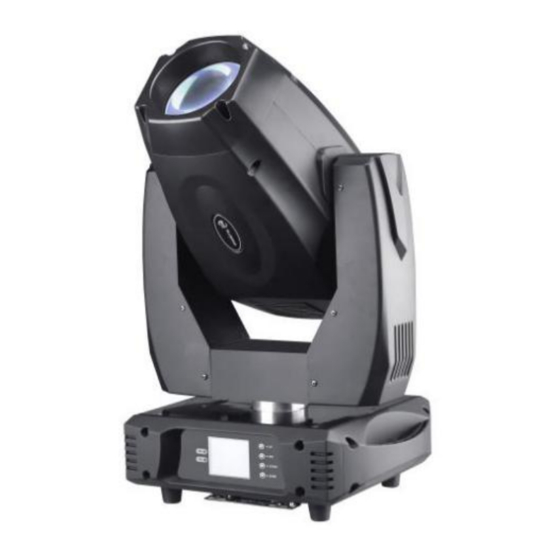
- Page 1 GUANGDONG YA GE LAI LIGHTING & AUDIO LIMITED 380W Beam+Wash+Spot Moving Head YR-380BSW (Model: ) Please read this manual carefully before you use this machine...
-
Page 2: Table Of Contents
Contents Section 1. Getting Started Unpacking Safety Instruction Instructions and remarks Section 2. Set Up Installation installation requirements: Controlling Board Machine Connection Master Slave Mode Introductions Section 3. Troubleshooting Troubleshooting Section 4. Reference ... -
Page 3: Section 1. Getting Started
2pc Fast-lock Omega Clamp (1/4 turn) Thanks for using our YR-380BSW moving beam. Carefully unpack the box and check the contents to ensure that all parts are present and in good conditions. If anything damaged during transit, notify the shipper immediately and keep the packing material for inspection. -
Page 4: Safety Instruction
manufacturer, it is important that the fixture be returned in the original manufacturer box and packing. Safety Instruction For your safe,please read this user manual carefully before turn on the fixture. This machine should be operated by qualified engineer! Please conserve this manual as operation guidance. -
Page 5: Instructions And Remarks
malfunction. Please contact the nearest authorized technical assistance center. Buy the same spare parts/components from manufacturer directly. Make sure the power cord is never crimped or damaged. Avoid direct eye exposure to the light source while it is on. ... -
Page 6: Section 2. Set Up
6. When using this product, the same signal lines within 20 meters maximum control 20 sets of the same products, beyond this range should be an additional signal amplification devices amplify the signal to use 7. Light source in use, must be controlled within the indicated the use time of light source, out of timer, please change the lamp;... -
Page 7: Installation Requirements
Installation requirement 1. The product shall be free from corrosive vapors and gases in the operating environment and shall not contain inflammable and explosive articles. 2. Keep the distance between the light outlet direction and the subject at least more than 3 meters. -
Page 8: Machine Connection
Machine Connection Cables must have a male XLR connector on one end and a female XLR connector on the other end. A word on termination: DMX is a resilient communication protocol, however errors still occasionally occur. Termination reduces signal errors, and therefore best practices include use of a terminator in all circumstances. -
Page 9: Master Slave Mode Introductions
Master Slave Mode Introductions Set one of the machines as the host, select self-running, set the other machines as the slave, and the slave machines as the DMX address code 001 state, connect the signal line. At this time, the slave machines accept the host control, and the functions are synchronized with the current functions of the host. - Page 10 blown Controller not Connect controller connected Incorrect Check address setting on fixture addressing of and controller the fixtures Inspect cables and correct poor Fixture Bad data link connections and/or broken resets but connection cables. does not respond Conflict between Eliminate scene cross-fade on correctly to tracking and controller...
-
Page 11: Section 4. Reference Menu
Section 4. Reference Menu 2.1 Address setting Introductions: Select "last one" or "next one", the lamp will automatically calculate the address code of the next one or the last one according to the current address code and channel data, which can be quickly set... - Page 12 Click the address code number to enter the number editing window, where you can set any valid address code. The lamp will automatically get the current channel number of the lamp and automatically filter the unavailable address code(512-Current channel number) Support RDM protocol , the fixture address code can remotely be set by RDM .
- Page 13 and the fixture will automatically detect the state of DMX and automatically switch the output to prevent data conflict Master The fixture runs by built-in program. If DMX has no unit signal, will output data (synchronization); otherwise, it will not output data ...
- Page 14 Keep the final action page,screen on Model 1 Screen off Model 2 Screen black , The address code of light is displayed in the lower left corner Model 3 Display trademark information, address code, and run mode Screen Set the display direction of the screen rotation No display rotation Display rotation...
- Page 15 correction correction page to correct the screen 2.4 Scene Mode: Under this page, the light will not receive DMX console data, and the edited data will be immediately reflected on the light. The content of the page depends on the currently selected channel, and the displayed channel content and sequence are consistent with the channel table of light.
- Page 16 2.5 Advanced Setup: Set Pan direction of rotation Reverse Do not reverse Reverse Tilt Set Tilt direction of rotation Reverse Do not reverse Reverse Optocoupl Set whether the fixture detects Pan/Tilt out-of-step er Revise and corrects Do not correct position after out of step Automatically correct position after out of step and record out of step fault.
- Page 17 Light up Reset the machine after 3s’ power on ,then after light up. reset Manual When complete reset,light up by menu or light up manual console Factory The confirmation box pops up, and after selecting Settings "SURE", the lamp parameters return to the factory Settings Select light up after power on,after power on,wait for 30s to let the bulb fully initiate,start reset after bulb’s internal voltage is stable enough,if voltage is...
- Page 18 Optocouple Display the status of the two signals of the pan and tilt optocouplers, binary Fault/ state us Display the last 8 fault records of the lamp reset and record operation. The fault record is not saved after power off。 Fault data Total number of faults detected after power-on...
-
Page 19: Dmx Protocol
source light source, "---" means no detection temperatur Display Display the temperature of the current panel display panel ambient temperatur temperature in the vicinity Sensor Displays current motherboard temperatur temperature or the ambient temperature of the motherboard installation location Version Display the information and version of the current information luminaire, an important reference for after-sales... - Page 20 Function Number Description 0-255 0-540 degrees 0-255 0-2 degrees fine-tuning Tilt 0-255 0-270 degrees Tilt 0-255 0-1 degrees fine-tuning Pan and tilt 0-255 From fast to slow speed 0-127 Frost 128-255 Enter the frost Dimmer 0-255 0-100% dimmer Lights close 4-103 From slow to fast Pulse strobo 104-107...
- Page 21 25-29 Color 2+Color 3 30-34 Color 3 35-39 Color 3+Color 4 40-44 Color 4 45-49 Color 4+Color 5 50-54 Color 5 Color 5+Color 6 60-64 Color 6 65-69 Color 6+Color 7 70-74 Color 7 75-79 Color 7+Color 8 80-84 Color 8 85-89 Color 8+Color 9 90-94...
- Page 22 140-144 Color 14 145-149 Color 14+White 150-199 From fast to slow Forward flows 200-202 Stop From slow to fast Reverse 203-255 flows white 10-14 Pattern 1 15-19 Pattern 2 20-24 Pattern 3 CH10 Gobo 25-29 Pattern 4 30-34 Pattern 5 35-39 Pattern 6 40-44...
- Page 23 From slow to fast Shake 90-94 pattern 3 From slow to fast Shake 95-99 pattern 4 From slow to fast Shake 100-104 pattern 5 From slow to fast Shake 105-109 pattern 6 From slow to fast Shake 110-114 pattern 7 From slow to fast Shake 115-119 pattern 8...
- Page 24 31-40 Pattern 3 41-50 Pattern 4 51-60 Pattern 5 61-70 Pattern 6 71-80 Pattern 7 81-90 Pattern 8 91-100 Pattern 9 From slow to fast Shake 101-110 pattern 1 From slow to fast Shake 111-120 pattern 2 From slow to fast Shake 121-130 pattern 3 From slow to fast Shake...
- Page 25 gobo 11-20 Pattern 1 21-30 Pattern 2 31-40 Pattern 3 41-50 Pattern 4 51-60 Pattern 5 61-70 Pattern 6 71-80 Pattern 7 From slow to fast Shake 81-90 pattern 1 From slow to fast Shake 91-100 pattern 2 From slow to fast Shake 101-110 pattern 3 From slow to fast Shake...
- Page 26 From slow to fast Reverse 193-255 flows 0-127 CH14 Prism 1 128-255 Enter prism 1 0-127 0-400 degrees 128-187 From fast to slow Forward flows Prism 1 self CH15 188-195 Stop -rotate From slow to fast Reverse 196-255 flows 0-127 CH16 Prism2 128-255...
-
Page 27: Specification
Specification Source parameters : Lamp Source: 380W 18R Lifespan:1500H CCT: 8000K controls parameter: Strobe: 1-20Hz, support mechanical strobe and adjustable speed strobe Control: DMX512、RDM Channel: 20CH Control Mode: DMX512, master-slave,auto Touch screen Display: LCD color screen, can set the channel mode, horizontal vertical inversion, back screen, signal hint, switch in both Chinese and English, automatic screen off/lasting bright screen, display channel number,record light source time, boot time and fault inspection, scene... - Page 28 Color Wheel: 13 color+ White open + semi-color effect; Fixed Gobo Wheel 1: 9 gobos+ white open + Shake + bi-direction flow effect; Fixed Gobo Wheel 2: 10 gobos+ 4 different size beam holes + Shake + bi-direction flow effect; Rotation Gobo Wheel: 6 gobos + water wave glass endless rotation+ white open + bi-direction flow effect.
- Page 29 Net weight: 23.45KG Size:409.9*323.9*670.5mm...
Need help?
Do you have a question about the YR-380BSW and is the answer not in the manual?
Questions and answers