Table of Contents
Advertisement
Advertisement
Table of Contents

Subscribe to Our Youtube Channel
Related Manuals for thomann Sirus MP2


Summary of Contents for thomann Sirus MP2
- Page 1 media player user manual...
- Page 2 Musikhaus Thomann Thomann GmbH Hans-Thomann-Straße 1 96138 Burgebrach Germany Telephone: +49 (0) 9546 9223-0 E-mail: info@thomann.de Internet: www.thomann.de 29.10.2020, ID: 498872...
-
Page 3: Table Of Contents
Table of contents Table of contents General information......................4 1.1 Further information......................4 1.2 Notational conventions....................4 1.3 Symbols and signal words................... 5 Safety instructions......................... 6 Features............................9 Installation..........................10 Connections and operating elements................ 11 5.1 Display types........................14 Setup............................16 6.1 Setup wizard........................ -
Page 4: General Information
1.1 Further information On our website (www.thomann.de) you will find lots of further information and details on the following points: Download This manual is also available as PDF file for you to download. -
Page 5: Symbols And Signal Words
General information Instructions The individual steps of an instruction are numbered consecutively. The result of a step is indented and highlighted by an arrow. Example: Switch on the device. Press [Auto]. ð Automatic operation is started. Switch off the device. 1.3 Symbols and signal words In this section you will find an overview of the meaning of symbols and signal words that are used in this manual. -
Page 6: Safety Instructions
Safety instructions Safety instructions Intended use This device is intended to playback audio files. Use the device only as described in this user manual. Any other use or use under other operating conditions is consid‐ ered to be improper and may result in personal injury or property damage. No lia‐ bility will be assumed for damages resulting from improper use. - Page 7 Safety instructions NOTICE! Risk of fire Do not cover the device nor any ventilation slots. Do not place the device near any direct heat source. Keep the device away from naked flames. NOTICE! Operating conditions This device has been designed for indoor use only. To prevent damage, never expose the device to any liquid or moisture.
- Page 8 Safety instructions NOTICE! Possible staining The plasticiser contained in the rubber feet of this product may possibly react with the coating of your parquet, linoleum, laminate or PVC floor and after some time cause permanent dark stains. In case of doubt, do not put the rubber feet directly on the floor, but use felt-pad floor protectors or a carpet.
-
Page 9: Features
Features Features This media player is suitable for use in clubs, bars, night clubs and on stages. Special features of the device: Internet radio with access to over 20,000 stations, radio programmes and pod‐ casts Digital radio (DAB / DAB +) with a large number of channels and digital sound quality FM with RDS (Radio Data System) Media player for easy navigation and playback of music files from USB medium... -
Page 10: Installation
Installation Installation Unpack and carefully check that there is no transportation damage before using the unit. Keep the equipment packaging. To fully protect the device against vibration, dust and moisture during transportation or storage use the original packaging or your own packaging material suitable for transport or storage, respectively. Establish all connections as long as the unit is switched off. -
Page 11: Connections And Operating Elements
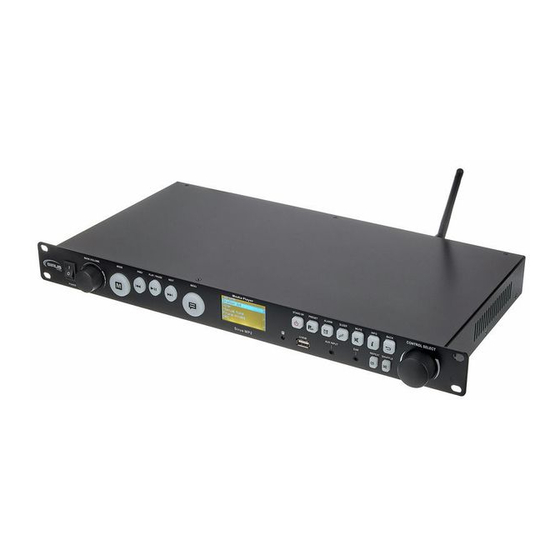
Connections and operating elements Connections and operating elements Front panel 1 [POWER] Main switch to turn the device on and off 2 [MAIN VOLUME] Rotary control for adjusting the volume 3 [MODE] Button for mode selection Skip back to the previous track / page Start or resume playback / pause Skip to the next track. - Page 12 Connections and operating elements [MUTE] Mutes or unmutes [INFO] Displays additional information about the radio station or the track being played. Press repeat‐ edly [INFO] to see more information on the display. Automatically switches back to the ‘Now Playing’ display. [BACK] Back to the previous page 8 [CONTROL SELECT]...
- Page 13 Connections and operating elements 20 [BALANCED OUTPUT] Balanced XLR output. Here you can connect e.g. the line input of a mixer, amplifier or similar device using XLR cables. 21 IEC chassis plug for the power supply. Connect the device to a grounded power outlet using the supplied power cord. 22 Sliding switch to toggle the supply voltage 23 [13.2V] Screw terminal block for the alternative power supply with 13.2 DC.
-
Page 14: Display Types
Connections and operating elements Back to the previous page [ENTER] Confirms the selection Confirms the selection [REPEAT] Repeats tracks Down in menu or list [SHUFFLE] Plays the tracks in random order 28 Calling up or saving presets Location 1 or 6 Location 2 or 7 Location 3 or 8 Location 4 or 9... - Page 15 Connections and operating elements Start screen In each mode, a start screen is displayed after it is called up. The last radio station or track selected in the respective mode is then played. If this is not possible, the device tries to establish a connection to the last radio station or network selected or prompts you to enter corresponding input.
-
Page 16: Setup
Setup Setup 6.1 Setup wizard When the device is switched on for the first time, a setup wizard is started to set the date and time as well as the network connection. The device is then ready for use. In the ( ‘System settings’ ) you can change these settings at any time and also restart the setup wizard. - Page 17 Setup If there is a daylight saving time change in your country, the time updated via the network may differ by one hour. To correct this, enable the ‘Daylight savings’ option during winter time. When updating via DAB or FM, the ‘Daylight savings’ option has no effect. The time of the device is updated using the set source as soon as a time signal is received.
- Page 18 Setup WPS encrypted network When networks are WPS-encrypted, the network name begins with WPS. The con‐ nection can be made in three different ways: If you choose the ‘Push Button’ option, you will be prompted to press the con‐ nect button on your router. ð...
-
Page 19: General Settings
Setup Setup is complete and the setup wizard exits. If the network connection is interrupted, the device tries to reconnect automatically. 6.2 General Settings Equalizer Select ‘System settings > Equaliser’ to adjust the EQ. Choose one of the preset modes or create your own profile with custom bass, treble and loudness on / off. -
Page 20: Setting Up A Music Server
Setup In Internet radio mode, select ‘Station list > Help’ in the menu. ð The ‘Access code’ , which is only valid for 10 minutes, is displayed. Register your device on the portal website http://nuvola.link/sr. ð You can use the portal's offers immediately after completing your registra‐ tion. -
Page 21: Operating
Operating Operating 7.1 Internet radio mode The device can play thousands of radio stations and podcasts broadcast worldwide via a broadband internet connection. If you call up the Internet radio mode with [MODE] or via the ‘Internet radio’ menu, the device connects to the “Frontier Silicon Internet” radio portal and calls up the sta‐ tion list. - Page 22 Operating Searching You can also search for internet broadcasts for stations or podcasts using keywords in the title. Select ‘Station list’ and then ‘Stations’ or ‘Podcasts’ . To enter the keyword, select the appropriate characters and confirm with ‘OK’ . ð...
-
Page 23: Music Player Mode
Operating Adding stations You can also listen to radio stations that are not listed on the “Frontier Silicon Internet” radio portal. You can add your own stations in the portal. Select ‘Station list > My added stations > [Station]’ to select the added stations with the device. Information about the current During playback, the name and description are shown on the display. - Page 24 Operating 7.2.1 Shared media data (from the UPnP media server) Select the menu item ‘Shared media’ . If you have set up the sharing of media data, you will now see an entry con‐ sisting of ‘<Computer name>: <Share name>’ . If you have set up shares on sev‐ eral computers, the alternatives are listed here.
-
Page 25: Dab Radio Mode
Operating Press and hold [CONTROL SELECT] to delete a track from the playlist and press ‘YES’ to confirm. If you play a track outside of the playlist, the playlist remains saved. The playlist remains also saved in standby. 7.2.4 Repeat / Shuffle play To repeat a track and play tracks in random order, select ‘Repeat play’... - Page 26 Operating 7.3.1 Station scan If the station list in DAB radio mode is empty, the device will automatically search for available radio stations. You can also start the station scan manually: Select ‘Scan’ to start the station scan manually. ð The existing stations are updated or reloaded. After the station scan, the available radio stations are displayed.
-
Page 27: Fm Radio Mode
Operating Select ‘DRC’ and then ‘DRC high’ , ‘DRC low’ or ‘DRC off’ to change the DRC of the device. The DRC can only be set if DRC data is transmitted from the radio station. Station order The station list can be sorted in different ways, alphanumerically, by ensemble or by validity. -
Page 28: Aux-In Mode
Operating 7.4.3 Settings Search settings By default, the FM search stops at every available station. In this way, stations with weak signals can also be selected. Select ‘Scan setting > Strong stations only? > Yes ’ if you want the scan to stop for stations with good signal strength only. -
Page 29: Operating Via App
You can also operate the device using the "UNDOK" app for mobile devices with Android or iOS. The app is available in the Apple® AppStore and in the Google® Play Store. The app instructions are available for download on the product page of our home‐ page www.thomann.de. -
Page 30: Reset To Factory Defaults
Operating 7.8 Reset to factory defaults When performing a factory reset, all user-related settings are reset to the default values. The settings for time / date, the network configuration and all default settings are deleted. The current software version of the device and the registration at the "Frontier Silicon Internet"... -
Page 31: Menu Overview
Operating Function Code Function Code ENTER / TUNER 0c1C 0x3C SCAN MODE 0x1D 0x3D MENU UP / 0x1E 0x3E TUNING UP MENU DOWN / 0x1F INTERNET RADIO 0x3F TUNING DOWN Mode AUTO SCAN UP 0x20 MUSIC PLAYER 0x40 Mode AUTO SCAN 0x21 DAB Mode 0x41... -
Page 32: Technical Specifications
Technical specifications Technical specifications Input connections Voltage supply IEC chassis plug C14 Screw terminal block 13.2 V (alternative) Audio signal 1 × USB connections (max. 64 GB) 1 × RJ-45 1 × RS232, 9-pin Aux In 1 × 3.5 mm mini jack socket Output connections Line 2 ×... -
Page 33: Plug And Connection Assignment
Plug and connection assignment Plug and connection assignment Introduction This chapter will help you select the right cables and plugs to connect your valuable equipment in such a way that a perfect sound experience is ensured. Please note these advices, because especially in ‘Sound & Light’ caution is indicated: Even if a plug fits into the socket, an incorrect connection may result in a destroyed power amp, a short circuit or ‘just’... -
Page 34: Protecting The Environment
Protecting the environment Protecting the environment Disposal of the packaging material For the transport and protective packaging, environmentally friendly materials have been chosen that can be supplied to normal recycling. Ensure that plastic bags, packaging, etc. are properly disposed of. Do not just dispose these materials with your normal household waste, but make sure that they are fed to a recovery. - Page 36 Musikhaus Thomann · Hans-Thomann-Straße 1 · 96138 Burgebrach · Germany · www.thomann.de...
Need help?
Do you have a question about the Sirus MP2 and is the answer not in the manual?
Questions and answers