Table of Contents
Advertisement
Quick Links
Advertisement
Table of Contents

Subscribe to Our Youtube Channel
Related Manuals for Dragon Touch Vision 4 Lite


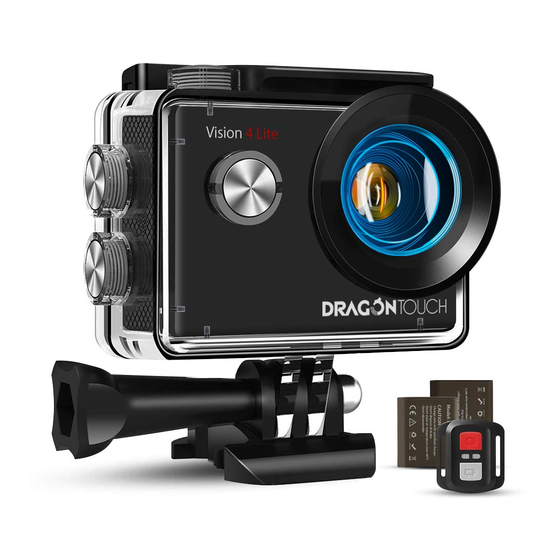
Summary of Contents for Dragon Touch Vision 4 Lite
- Page 1 USER MANUAL Dragon Touch Vision 4 Lite Action Camera v3.0...
-
Page 2: Table Of Contents
CONTENTS What's in the Box Your Vision 4 Lite Getting Started Overview of Modes Customizing Your Vision 4 Lite Connecting to the App Playing Back Your Content Deleting Your Content Offloading Your Content Adjusting the Zoom Level Maintaining Your Camera... -
Page 3: What's In The Box
Mount 4 Mount 5 Mount 6 Mount 7 Mount 8 Mount 9 Protective Helmet Mounts Battery USB Cable Backdoor Wrist Strap Bandages Tethers Lens Cloth for Remote Quick Start Guide Dragon Touch Vision 4 Lite Action Camera Remote Quick Start Guide... -
Page 4: Your Vision 4 Lite
YOUR VISION 4 LITE... - Page 5 Shutter/Select Button Screen Power/Mode/Exit Button Charging Indicator microSD Card Slot Working Indicator USB Port/External Mic Jack Up/Zoom Out/Wifi Button Micro HDMI Port Down/Zoom in Button Lens Battery Door Note: The camera does not record sound when it is in the waterproof case.
-
Page 6: Getting Started
GETTING STARTED Welcome to your Dragon Touch Vision 4 Lite. To capture videos and photos, you need a microSD card (sold separately) to start recording. microSD Cards Please use brand name memory cards that meet these requirements: • microSD, microSDHC or microSDXC •... -
Page 7: Overview Of Modes
OVERVIEW OF MODES There are 8 different modes: Video, Slow Motion, Loop Recording, Time Lapse Video, Photo, Auto Photo, Burst Photo, Self-Timer. Video Mode Your device is on the video mode - which is the default mode - when you turn on the camera. -
Page 8: Customizing Your Vision 4 Lite
Self-Timer Mode gives a delay between pressing the shutter release and the shutter's firing. CUSTOMIZING YOUR VISION 4 LITE Press and hold the OK button, choose the Setting icon to enter Setting Menu. Press the Mode button to choose video setting, photo setting or system setting. - Page 9 White Balance: Auto/Sunny/Cloudy/Incandescent/Fluorescence Default setting is Auto. White Balance lets you adjust the color temperature of videos and photos to optimize for cool or warm lighting conditions. Exposure Setting: -3/-2/-1/0/1/2/3 Default setting is 0. Exposure lets you select an area that you want the camera to prioritize when determining exposure.
- Page 10 FOV: Wide/Middle/Narrow Default setting is Wide. The FOV refers to how much of the scene (measured in degrees) can be captured through the camera lens. Wide FOV captures the largest amount of the scene, while Narrow FOV captures the least. Diving Mode: On/Off...
- Page 11 ISO: Auto/100/200/400/800/1600/3200/6400 Default setting is Auto. ISO determines the camera's sensitivity to light and creates a trade-off between brightness and resulting image noise. Image noise refers to the degree of graininess in the image. In low light, higher ISO values result in brighter images, but with greater image noise.
- Page 12 Wifi Information: You can check the Wifi name and password of the camera. Reset Wifi: You can reset the Wifi of the camera. Light Source Frequency: Auto/50Hz/60Hz Default setting is Auto. LED Indicator: On/Off Default setting is On. Turn on this setting and the LED indicator will show different working status. Auto Screen Saver: Turn Off/1 Minute/3 Minutes/5 Minutes Default setting is 1 Minute.
- Page 13 Date Set: You can set the date of the camera. Format: You can check the usage of the SD card and format the SD card. To keep your microSD card in good condition, reformat it on a regular basis. Reformatting erases all of your content, so make sure offload your photos and videos first.
-
Page 14: Connecting To The App
1. Turn on the camera, press and hold the Up button to turn on Wifi. The Wifi name and password are shown on the camera screen. 2. Connect the Wifi "Vision 4 Lite" and enter the password on your smartphone WLAN setting. -
Page 15: Playing Back Your Content
files to a computer. Transferring also frees up space on your microSD card for new content. Viewing Files on Your Vision 4 Lite Turn on the camera, press and hold the OK button, choose the Playback icon to enter Album. Press the Up or Down button to scroll through the files. Press the OK button to play or stop video. -
Page 16: Offloading Your Content
OFFLOADING YOUR CONTENT Offloading Your Content to A Computer To offload files to a computer, you need a card reader (sold separately). Connect it to the computer via a USB port and insert the microSD card. You can then transfer files to your computer or delete selected files by using file explorer. -
Page 17: Maximizing Battery Life
5. Keep the camera away from high temperature and strong sunshine to avoid being damaged. 6. Do NOT use the camera when charging. Turn off the camera before charging. MAXIMIZING BATTERY LIFE If the battery reaches 0% while recording, the camera will save the file before powering off. -
Page 18: Remote
REMOTE Photo Button Video Button Splashproof only, not waterproof To pair the remote control with the camera, press any button on the remote control. Video To record a video, verify the camera is in Video mode. To start recording: Press the gray Video Button. The camera will emit one beep, and the camera light will flash while recording. - Page 19 CR2032 BATTERY REPLACEMENT FOR REMOTE 1. Use a 1.8mm Phillips tip screwdriver to remove the 4 screws on the back cover of the remote, allowing you to open it. 2. Remove another 4 screws on the PCB board. 3. Lift the PCB board and slide out the battery, as shown in the picture. Note: Do NOT rotate the PCB board to avoid reversing the camera and video button functions.
-
Page 20: Mounting Your Camera
5. Install all 4 screws back onto the PCB board. 6. Install all 4 screws back into the cover. MOUNTING YOUR CAMERA Attach your camera to helmets, gear and equipment. -
Page 22: Contact Us
CONTACT US For any inquiries with Dragon Touch products, please feel free to contact us, we will respond within 24 hours. Email: cs@dragontouch.com Tel: 888-811-1140 (US) Mon-Fri (except holiday) 9am-5pm (EST) Official website: www.dragontouch.com The microSD, microSDHC, microSDXC and SD marks and logos are trademarks of...
Need help?
Do you have a question about the Vision 4 Lite and is the answer not in the manual?
Questions and answers