Table of Contents
Advertisement
Quick Links
Advertisement
Table of Contents

Related Manuals for Blunik Trip II PLUS

Summary of Contents for Blunik Trip II PLUS
- Page 1 www.blunik.com...
- Page 2 BLUNIK TRIP = BLUNIK II PLUS — SPEED TABLE | v.01 |...
-
Page 4: Table Of Contents
1. INTRODUCTION…………………………………………………………………….…………07 1.1 What is a regularity rally?……………………………..…………………....…..07 1.2 How to participate in a regularity rally…………………………….......09 2. WHAT DOES THE BLUNIK II PLUS CONTRIBUTE TO REGULARITY?.…..…10 3. OPERATION OF THE BLUNIK II PLUS……………………………………..……12 3.1 Key functions……………………………………………………………......…..13 3.2 BLUNIK II PLUS parameters…………………………………………..…..….….15 3.3 Stage programming……………………………………..…..…......19... - Page 5 5.5.5 Light brightness…………………………………………………..……..……27 5.5.6 How to finish a stage – deactivate a stage…………...….….....27 5.6 Summary of key actions with BLUNIK Active…………………….….……...…..28 6. MORE INFORMATION…………………………………………………………..……29 6.1 Rally language……………………………………………………..…........29 6.2 Importance of distance measurements………………………………...…...29 6.3 How to synchronise the clock……………………………………………..…..…31 6.4 Memories……………………………………………………..………..……………..……31 6.5 Data validation……………………………………..………..……………..…..…32...
- Page 6 6.29 “Partial copy” mode………………………………………………………………..….…50 6.30 SCREEN II Driver’s screen…………………………………………………... … ..…..51 6.31 B-Sport Drive…………………………………………………………..……………..…….52 6.32 B-Sport Calculator…………………………………………………..……………..……53 6.33 B-Acustic Drive…………………………………………………………..……………...……54 6.34 B-Super-Acustic Drive……………………………………………………..…………... … 55 6.35 B-Pad……………………………………………………………………………….....…...…56 6.36 B-Data-Fast…………………………………………………………………..…..…...…56 6.37 B-Remote……………………………………………………………………..……...……...…57 6.38 B-Pedal……………………………………………………………………..…..……...…58 · 5 · BLUNIK II PLUS INSTRUCTIONS...
- Page 7 · 6·...
-
Page 8: Introduction
The organiser of a regularity rally gives us a route to follow (Road book) and some specifications about speeds, times and distances with which we have to comply (regulation). · 7 · BLUNIK II PLUS INSTRUCTIONS... - Page 9 There are many ways of giving us these specifications. We can be set points that we have to pass irrespective of the time. We can be given specific times for passing certain points. We can also be given the average speed that we have to meet for a set distance.
-
Page 10: How To Participate In A Regularity Rally
(in metres) and take our stage times in tenths of a second. Some of the participants in these precision rallies achieve spectacularly tight results. With your Blunik II Plus, you can also manage this. In a badly measured rally it is almost impossible to achieve good results. It all becomes a matter of luck. -
Page 11: What Does The Blunik Ii Plus Contribute To Regularity
2. WHAT DOES THE BLUNIK II PLUS CONTRIBUTE TO REGULARITY? BLUNIK II PLUS uses the accumulated experience of many pilots and co- pilots from all types of regularity rallies. It brings together all the necessary functions for precision regularity in a single device. - Page 12 The BLUNIK II keypad has only 12 keys. These keys are real “clicking” keys so as to avoid entry errors. EL BLUNIK II PLUS is designed so that you can access the majority of its functions with the minimum presses of the keys.
-
Page 13: Operation Of The Blunik Ii Plus
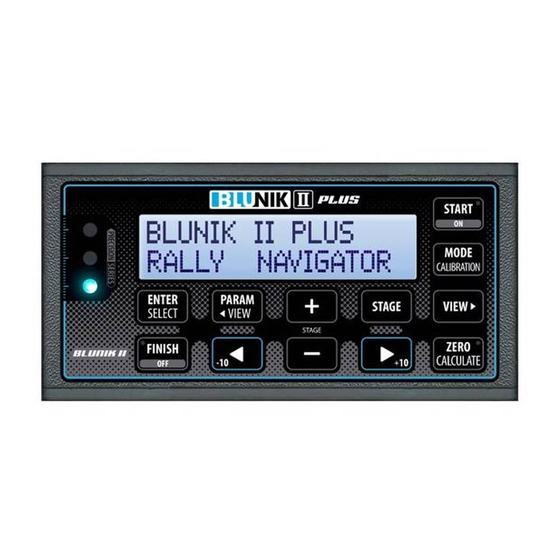
BLUNIK II SCREEN-DISPLAY The BLUNIK II screen has 2 lines of 16 characters. At any given point of the rally only the necessary information is displayed on the screen. Too much information is bad information. BLUNIK II POWER SOURCE The BLUNIK II is powered by the automobile battery. It has an internal battery so that the BLUNIK can be turned on outside the vehicle to program it or set the time. -
Page 14: Key Functions
BLUNIK well. We can trust our BLUNIK device. It is very reliable and is designed so that we don’t go wrong for silly mistakes like forgetting to press ENTER. - Page 15 +info: HOW TO CALIBRATE — page:037 BUTTON Sets the Partial distance counter to zero. It also serves to run the different calculations that the BLUNIK II performs. +info: CALCULATIONS PERFORMED BY THE ZERO/CALCULATE BUTTON — page:044 · 14·...
-
Page 16: Blunik Ii Plus Parameters
The parameters are usually programmed or reviewed before starting each rally. Sometimes during a rally it may be necessary to adjust a value. The BLUNIK shows us the most appropriate parameters for each circumstance. We push the to access the parameter programming. - Page 17 +info: PRECISION ADJUSTMENTS — page:041 +info: DISTANCE CORRECTIONS — page:043 ADJUSTMENTS This screen only appears in BLUNIK Active. It is for the provisional calibration and offsetting of the time. Calib Adj: This is for a temporary adjustment of the calibration: •...
- Page 18 0.5 second delay (program -0.5 sec). Note: The values we enter into this screen are only valid while the BLUNIK remains Active. ILLUMINATION Screen where we can adjust the brightness of the lights and the screens for Night time.
- Page 19 +info: B-SPORT CALCULATOR — pág:053 ACOUSTIC DRIVE Acoustic drive. If it is installed. +info: B-ACUSTIC DRIVE — pág:054 In BLUNIK Active we have access to the following screens DAY/NIGHT Allows the selection of the brightness. SENSOR VERIFICATION CALIBRATION SENSOR SELECTOR CLOCK ADJUST...
-
Page 20: Stage Programming
FORMAT 3.3. STAGE PROGRAMMING Only with the BLUNIK Inactive can we change the stage selected with: The selected stage is the one we are going to program by pushing Access to the programming of the selected stage is made pressing... -
Page 21: Installation And Connection
4. INSTALLATION AND CONNECTION 4.1. CONNECTION Blunik II requires connection to the car battery and to the wheel sensors. This installation should be done just once at a mechanical workshop that has experience in this kind of assembly. The information that the mechanic requires id on the website. -
Page 22: How To Use Blunik Ii Plus
We turn the BLUNIK II on by pressing VERSION This screen appears for a few seconds on turning the BLUNIK on. It tells us the version. Then the BLUNIK Inactive screen appears: BLUNIK INACTIVE 5.1. SUMMARY OF BUTTON ACTIONS WITH BLUNIK INACTIVE... -
Page 23: Calibration
5.3. START PROTOCOL – ACTIVATE A STAGE +info: START MODES — page:039 +info: START BUTTON ACTIONS — page:040 Always from the BLUNIK Inactive screen BLUNIK INACTIVE By pressing we can see the scheduled start time of the Selected Stage. By pressing we can change the Selected Stage. - Page 24 Summary of the SCHEDULED START: Press The Selected Stage becomes the Pre-activated stage. The BLUNIK starts to control the start time of the sector. Press (when the vehicle is at the 0 distance point). The BLUNIK puts Zero for the TOTAL distance.
-
Page 25: Screens With Blunik Active
The TOTAL and PARTIAL measures will remain in the screen for 5 seconds so you can take a note. A Z is displayed on the screen. At the same time the distance of the next Partial is set to Zero. Internal the BLUNIK always keeps counting. -
Page 26: Actions With Blunik Active - Against The Clock Section
5.5. ACTIONS WITH BLUNIK ACTIVE – TIMED SECTION 5.5.1. Distance corrections While we are with BLUNIK Active, normally the first kilometres are the Timed sector. From the end of the Timed sector we find ourselves in a link. During the whole sector, but mainly in the Timed sector we must verify that our Actual total distance is correct. -
Page 27: Verifications
We can also verify the averages and distances programmed. Any value that we vary will be taken into account by BLUNIK and recalculated from the beginning of the stage. We exit by pressing The start time registered in the BLUNIK is what determines the calculation of the theoretical distance. By pressing we can verify or reprogram our Parameters. -
Page 28: Light Brightness
At the end of the stage, press return BLUNIK Inactive. Pressing cancels ACOUSTIC. To reactivate ACOUSTIC press Pressing also serves to turn BLUNIK off (press and hold). +info: FINISH BUTTON ACTIONS — page:043 · 27 · BLUNIK II PLUS INSTRUCTIONS... -
Page 29: Summary Of Key Actions With Blunik Active
Press to change the illumination. Press once to freeze the Info screen. Press to finish the stage and go to BLUNIK Inactive. Press to directly modify the real total distance. Press to modify the real total distance. Press to put a distance in the real total distance. -
Page 30: More Information
This is why the organiser establishes a calibration section, where a reference distance is established for the whole rally. · 29 · BLUNIK II PLUS INSTRUCTIONS... - Page 31 How to adapt to the measurements of the organiser. The BLUNIK II allows us: To calibrate with great precision. To recalibrate (if required) with BLUNIK Active. To choose with which sensor we measure (Right, left or both) • To take the average of the measurements when we measure with both.
-
Page 32: How To Synchronise The Clock
We exit this screen by pressing or with 6.4. MEMORIES So that the BLUNIK II can be used with different sets of tyres or different vehicles, it has 4 memories: A B C D. CALIBRATION Only from the Calibration screen can the selected memory be chosen. -
Page 33: Data Validation
The parameters of the SENSOR CONNECTION screen. 6.5. DATA VALIDATION We do not normally need to validate the data that we input into the BLUNIK. It is recorded exactly as entered. If we have not varied anything, nothing changes. If we change data, it stays changed. -
Page 34: Stage Related Concepts
6.7. STAGE RELATED CONCEPTS BLUNIK Inactive. When we are not running a stage. When we turn the BLUNIK on, or when we finish a stage with and before starting the next stage. BLUNIK Active. When we are running a stage. (Timed SECTION or link). -
Page 35: Programming A Different Stage
When we are in stage programming, we are normally programming the Selected or Active Stage. If we want to program another stage, we can do it without modifying anything in the Selected or Active Stage in the BLUNIK at that time. INITIAL SECTOR SCREEN To do this we press... - Page 36 One wheel can lock on braking or stop touching the ground and stay stopped (this often happens with front-wheel drive cars) and can thus falsify the distance measured. The BLUNIK II has the FAST WHEEL function to compensate for these undesirable effects. · 35 ·...
- Page 37 From the information supplied by the 2 sensors the BLUNIK II can measure the distances with great precision. The BLUNIK II is not limited to making the measurement with the 2 sensors, apart from this it detects when one wheel is stopped due to not touching the ground or locking during braking and compensates for the error produced (Fast Wheel).
-
Page 38: Sensor Verification
If the sensor failure message appears on the screen, the mechanical problem with the sensors must be fixed immediately. 6.13. MANUAL CALIBRATION The distance measurement of the BLUNIK is made using sensors mounted on the wheels. Thus the calibration is based on the diameter of the wheel. · 37 ·... -
Page 39: Automatic Calibration
Diameter x 8 Diameter x 12 Diameter x 10 6.14.AUTOMATIC CALIBRATION The BLUNIK II from the measurement of a Partial distance. Each time that we press we set the Partial distance to zero and store the previous partial. By pressing we also start the Partial. -
Page 40: Start Modes
We press to validate or to abandon the operation. CALIBRATION CONFIRMATION Calibration while running a sector (BLUNIK Active). Pressing ini- tially works as a first if the calibration coincides with the start of the stage. Let’s suppose that we want to calibrate a partial of 5400 according to the Roadbook. -
Page 41: Start Button Actions
In the event that we have programmed START with Syncro the start time that BLUNIK uses will synchronise to 0 or 30 seconds, from second 45 to 15 it adjusts to second 0, from second 15 to 45 it adjusts to second 30. -
Page 42: Accuracy Adjustments
+info: LEARN/COPY MODE — page:049 Note: The START in STAGE function is always deactivated on turning the BLUNIK II on so as to avoid possible errors in subsequent rallies. The function of activating External Reference measure changes is always activated. -
Page 43: Changing The Average On An External Reference
We program the measures normally. Putting 000k000 at the unknown distances. During the Timed section (BLUNIK Active) When the next measurement change is unknown, the BLUNIK II tells us by displaying START! in the part of the screen corresponding to the imposed measure. -
Page 44: Distance Corrections
Inactive. Pressing cancels ACOUSTIC. To reactivate, press Pressing and holding serves to turn off the BLUNIK (press and hold). 6.22. OFFSET USE Offset Function. This is used, unlike Zero, when a stage does not start at 0 distance. · 43 ·... -
Page 45: Calculations Made By The Zero/Calculate Button
We have to put the stage start distance in the offset of the initial stages screen. The BLUNIK II will tell us the Total distance in concordance with the Road book but apply the measures with respect to the Zero of the stage. - Page 46 20h40 of stage 11 so as to calculate 21h02 as the start time for stage 12. In other words BLUNIK II can help us to add the minutes of the route card correctly. On the partial stage programming screens.
-
Page 47: Imposed Average" Mode
6.24. “IMPOSED MEASURE” MODE To program a section to imposed measure we have to program the averages or speeds and the change points of the average on the Partial screens. For example, in BLUNIK format: PARTIAL SCREEN at 50km/h till km 5. -
Page 48: Road Book" Mode
For example, in another format it is translated to BLUNIK format: at 50km/h for 5 km = till km 5. at 40km/h for 2 km = till km 7. at 20km/h for 3 km = till km 10. +info: DATA VALIDATION —... -
Page 49: Long Sections" Mode
In rallies like the Monte-Carlo Rally, the stage starts are free but there is a set time to complete each section. BLUNIK II can be programmed so that section ST00 is the control of a complete stage. It is as if we have two BLUNIK. -
Page 50: Imposed Tables" (Jp) Mode
If we have B-DATA-FAST we can modify distance N continuously as we see fit. If the BLUNIK shows us a lap time later than that indicated by the table, we have to accelerate. If the BLUNIK shows us a lap time earlier than that indicated by the table, we have to slow down. -
Page 51: Partial Copy" Mode
STAGE on the START KEY screen. We will program the sector in learn. On starting the reference lap we press On finishing the reference lap and starting the first lap we push again and the BLUNIK will go from lean to copy. On each lap we press again. +info: START BUTTON ACTIONS —... -
Page 52: Screen Ii Driver's Screen
INNOVATIONS Access to the new “Timing screen”. Two Screen II can be connected at a time to the same Blunik II so you can always see the “Timing screen” (The Multi-cable accessory is required). If we have BLUNIK II PLUS, it will indicate on the screen the imposed measure specifying whether this is going to go up or down. -
Page 53: B-Sport Drive
In regularity sport rallies or regularity rallies on closed roads corners are cut, thus using the Blunik route compensator is the best you can do to square the distances and stick to the regularity. In rallies on open roads, it seems simpler to follow the same route as the... -
Page 54: B-Sport Calculator
Sport Calculator is the perfect complement for Blunik II to lead the regularity rallies where a few decimals can put you on, or take you from, the podium. Sport Calculator is a Blunik accessory that applies your “cut” to square the distance with the road book. -
Page 55: B-Acustic Drive
Incredible but true. Only when you use it will you believe what it does. Accessory for BLUNIK II version 4.03 and above. Connect and go. With connection cable included. If you have other accessories connected, you will need a Multi-Cable Accessory. -
Page 56: B-Super-Acustic Drive
It is not tiresome or annoying since it stops insisting when it sees you cannot reach the average. It is not programmed. It does not calculate. The options related with Acoustic Drive are configured with the Blunik when the device is connected. (Plug and Play style). 6.34. B-SUPER-ACUSTIC DRIVE Acoustic warning for regularity and changes of average. -
Page 57: B-Pad
Blunik is greatly improved by the B-DATA FAST. New accessory for the Blunik II Plus so as to enter data quickly and efficiently even when the car is racing and moving a lot. -
Page 58: B-Remote
Only works with BLUNIK II PLUS. 6.37. B-REMOTE Remote keypad for Blunik II. If you want to have the Blunik keys close to your road book and fully to hand, B-Remote is ideal. B-Remote is a remote Blunik II keypad. It has the most useful functions used during the regularity stages. -
Page 59: B-Pedal
6.38. B-PEDAL Pedal to link to your Blunik so as to be able to mark partial distances with your foot. Providing maximum precision. Useful for navigators in bucket seats and harnesses. Allows the navigator to do the “ZERO” function with a foot. - Page 60 · 59 · BLUNIK II PLUS INSTRUCTIONS...
- Page 61 Blunik Chrono System, S.L Girona, Catalunya, Spain Tel. +34 617 088 336 info@blunik.com www.blunik.com @blunik @blunik...
Need help?
Do you have a question about the Trip II PLUS and is the answer not in the manual?
Questions and answers
Blunik II Plus new installation in another car. You delivered the cable and the sensors ( probe ) We installed the calibration. Problem: "probe fail" appears periodly on the screen. ( approx. all 20 sec.for 2 sec. ) The measuring of the kilometers stops, but after 2 sec. the accumulated kilometers are correct. ( counted in the background ? ) What could be the reason ?? Thanks for your help
The "PROBE FAIL" message on the Blunik Trip II PLUS could appear periodically after installation in another car due to serious sensor anomalies. Possible causes include:
1. Mechanical issues with the wheel sensors – The sensors may not be properly mounted, aligned, or secured.
2. Connection problems – Loose or faulty wiring may cause intermittent disconnections.
3. Incompatibility with the new vehicle – The sensor setup may not match the car’s wheel configuration.
4. Calibration errors – Incorrect calibration settings could lead to inconsistent sensor readings.
The issue should be resolved by checking and fixing any mechanical problems with the sensors immediately.
This answer is automatically generated