Advertisement
Item #1003 943 420
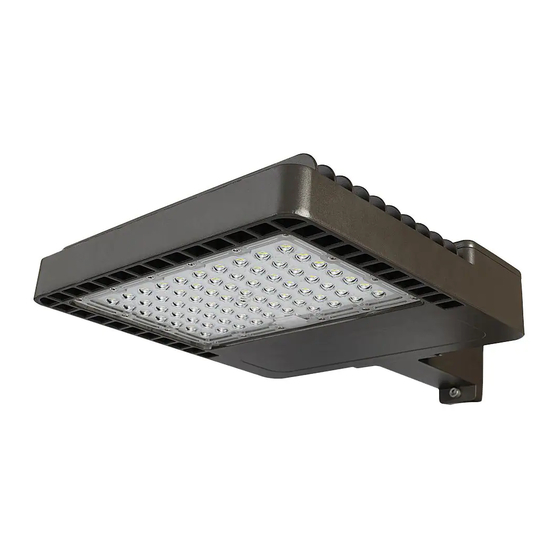
Model #NOVA150-PC-4K-BZ
USE AND CARE GUIDE
NOVA COMMERCIAL LED AREA LIGHT
Questions, problems, missing parts? Before returning to the store,
call Commercial Electric Customer Service
9 a.m. - 5 p.m., EST, Monday - Friday
1-844-548-3776
HOMEDEPOT.COM
THANK YOU
We appreciate the trust and confidence you have placed in Commercial Electric through the purchase of this LED area light. We strive to
continually create quality products designed to enhance your home. Visit us online to see our full line of products available for your home
improvement needs. Thank you for choosing Commercial Electric!
Advertisement

Related Manuals for Commercial Electric NOVA150-PC-4K-BZ


Summary of Contents for Commercial Electric NOVA150-PC-4K-BZ
- Page 1 THANK YOU We appreciate the trust and confidence you have placed in Commercial Electric through the purchase of this LED area light. We strive to continually create quality products designed to enhance your home. Visit us online to see our full line of products available for your home...
-
Page 2: Table Of Contents
Table of Contents Safety Information ........2 Installation . -
Page 3: Warranty
Warranty (continued) LIMITATION OF LIABILITY In no event shall the manufacturer be liable for indirect, consequential, incidental or special damages, or lost profits. The manufacturer is not liable for any claims or damage arising out of or connected with the manufacture, sale, delivery, use, maintenance and repair or modification of the manufacturer products, or supply of any replacement parts that exceed the purchase price of the manufacturer products giving rise to a claim. - Page 4 Pre-Installation (continued) HARDWARE INCLUDED NOTE: Hardware not shown to actual size. Part Description Quantity Extension arm Wire nut Flat washers Adapter plate (for round pole) Photocell black cover label Allen key Hex head lag bolts Bolster plate PACKAGE CONTENTS Part Description Quantity Light fixture...
-
Page 5: Preparing For Installation
Preparing for Installation IMPORTANT: Use two people for installation of this fixture. □ The fixture can be mounted in the following ways: □ Swivel Slipfitter Knuckle Arm Mount: Use the default swivel slipfitter knuckle on a 2-3/8 in. to 2-1/2 in. (O.D) round pipe, or fit to standard tenon arms for ground, pole, or wall mounting (tenon arms sold separately). - Page 6 Installation (continued) Placing the photocell on the fixture NOTE: The fixture comes with the twist-lock photocell (E) provided separately in the box. □ The photocell (E) MUST be inserted into the receptacle (B) for fixture to turn ON. □ OPTIONAL: To deactivate the automatic dusk-to-dawn functionality, place the included photocell cover sticker (EE) on the photocell window.
- Page 7 Installation (continued) Slipfitter knuckle arm mounting (APPLICABLE FOR ROUND PIPE / TENON MOUNTING ONLY) IMPORTANT: For extension arm mounting, go to step 5. NOTE: The fixture comes with the 2-3/8 in. swivel slipfitter arm (C) already attached to the fixture (A). □...
- Page 8 Installation (continued) Making electrical connections 3/8 in. (APPLICABLE FOR ROUND PIPE / TENON MOUNTING ONLY) □ If necessary, strip 3/8 in. of insulation from the junction box or fixture (A) wires. Non-Dimming Wiring Diagram ON/OFF Wiring (Non Dimming) Method: □ Connect the fixture black wire to the supply black wire ((+) Black (+) Line line), and fixture white wire to the supply white wire ((-)
- Page 9 Installation (continued) Adjusting the fixture head orientation □ Remove the plug from the side of the knuckle arm (C). (Fig. 1) □ Use the allen key (FF) to loosen the screw and adjust the angle to desired orientation for the fixture. (Fig.
- Page 10 Installation (continued) Replacing the slipfitter kunckle with extension arm mount □ Remove the plug from the slipfitter knuckle mounting arm (C) of the fixture and loosen the screw to remove the bottom handle. (Fig. 1 & 2) □ Remove the four screws from the slipfitter upper handle Fig.
- Page 11 Installation (continued) Drilling mounting holes on the surface 2.25" 0.391" APPLICABLE FOR WALL, SQUARE, AND 1.75" 0.875" ROUND POLE 3.50" (wire hole). □ Remove the pole’s top cover, if applicable. □ Drill mounting holes into the pole or surface as this figure shows.
- Page 12 Installation (continued) Mounting the extension arm IMPORTANT: Pay attention to threading the wire through the center hole in the bolster plate (HH), the pole, the round pole adapter plate (DD), and the extension arm (AA). For Square Pole Only: □ Align the extension arm (AA) holes with the holes drilled on the pole.
- Page 13 Installation (continued) Making electrical connections 3/8 in. (APPLICABLE FOR ROUND PIPE / TENON MOUNTING ONLY) □ If necessary, strip 3/8 in. of insulation from the junction box or fixture (A) wires. (Fig. 1) Non-Dimming Wiring Diagram ON/OFF Wiring (Non Dimming) Method: □...
-
Page 14: Operation
Operation SELECTING DUSK-TO-DAWN OR SWITCH-ACTIVATED CONTROL NOTE: The photocell (E) must be installed on the fixture AUTOMATIC for both dusk-to-dawn and switch controlled operation. The NIGHTTIME ON fixture will not work if the photocell is not installed. Option 1: Dusk-to-Dawn Dusk-to-dawn operation enables the light fixture to automatically DAYTIME OFF turn ON when dark outside and turn OFF when the sun rises, thus... -
Page 15: Care And Cleaning
Care and Cleaning □ Shut off the main power supply before cleaning the product. To prolong the original appearance, clean the light fixture with clear water and a soft, damp cloth only. □ Do not use abrasive cleaners or cleaners that contain alcohol. Do not apply paints, solvents, or any other chemicals on this light fixture. They could cause a premature deterioration of the finish and may void the warranty. - Page 16 Questions, problems, missing parts? Before returning to the store, call Commercial Electric Customer Service 9 a.m. - 5 p.m., EST, Monday-Friday 1-844-548-3776 HOMEDEPOT.COM Retain this manual for future use.
Need help?
Do you have a question about the NOVA150-PC-4K-BZ and is the answer not in the manual?
Questions and answers