Advertisement
Quick Links
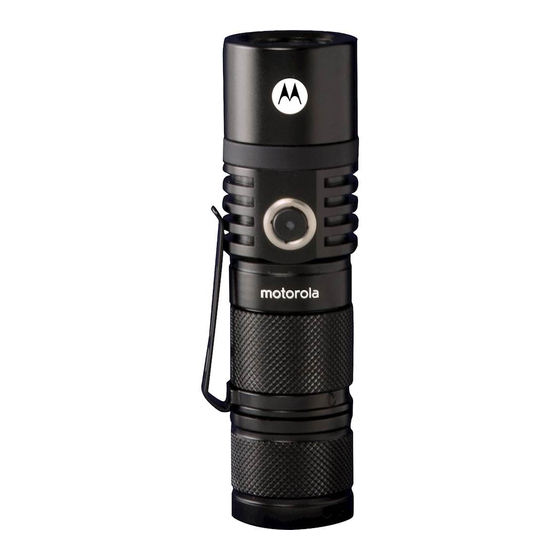
Motorola MR535
LED Flashlight User Guide
Congratulations on your purchase of the Motorola MR535 high- performance, high durability
flashlight. The Motorola MR535 utilizes CREE XP-G2 LED technology that is geared for
optimum effectiveness and high efficiency. Its ability to endure rugged use is enabled by the
aircraft grade aluminum with premium Type II anodized anti-abrasive finish. It is lightweight
and compact in design making it a great option for portability. Use it in any situation such as
hunting, hiking, camping, caving, general household, recreational activities, rugged sports,
industrial work or emergency situations. Please take a few moments to read this user guide to
ensure that you get the best performance and years of trouble free service.
Package includes
· 1 Motorola MR535 LED Flashlight
· 1 16340 Rechargeable Li-ion Battery, 550mAh
· 1 Belt Clip
· 1 micro-USB Cable
· 1 User Guide
Product Description
Battery Installation
1. Unscrew the tail switch cap and insert 1x16340
rechargeable (Li-Ion) battery (included).The (+)
terminal on the battery should face toward the
flashlight's head.
2. Replace the tail switch cap and turn on the
flashlight as indicated in any of the options
listed below.
16340
With the light on, the charge indicator light (located on the side switch) will flash once
per second when the battery charge has reached 30% of full charge. When the battery
charge has reached 10%, the charge indicator light will flash to indicate low battery
capacity.
Charging the MR535
The Motorola MR535 charge indicator light will blink during the ON modes to indicate the
battery is depleted and needs to be charged.
1. With the light in the OFF mode, open the rubber plug on the micro-USB
charging port to reveal the micro-USB charging connector.
2. Connect the MR535 to a power outlet using the included cable.
3. The charge indicator light will turn red to indicate the battery is charging.
4. Once the battery is fully charged, the charge indicator light will turn blue.
5. Remove the micro-USB cable and re-seat the rubber plug on the micro-USB charging port
to maintain waterproof integrity
NOTE: The flashlight will not illuminate while charging..
Head
micro-USB
Port
Switch
Tall Cap
Flashlight Operation
Your Motorola MR535 flashlight has a side switch for on/off operation and is equipped with 4
illumination light modes to suit your varied needs.
Turn ON
Press and hold the side switch for 1 to 3 seconds and release to turn the light on.
Turn OFF
Press and hold the side switch for 1 to 3 seconds. The light will turn off. Release the side switch.
Lockout Mode
Your Motorola MR535 is equipped with a lockout mode to minimize or prevent unintended
operation
Enter Lockout Mode.
With the light off, press and hold the side switch for 3 to 4 seconds. The MR535 will flash 2 times
to indicate the light is in lockout mode.
Exit Lockout Mode.
With the light off and in lockout mode, press and hold the side switch until the light turns on. The
MR535 will exit lockout mode and return to the brightness setting selected when placed into
lockout mode.
Changing the Brightness Setting
Your Motorola MR535 has 3 different preset brightness levels as follows:
high → medium → low
With the light on, single press and release the side switch to cycle through the different
brightness levels.
Memory Function
Your Motorola MR535 flashlight has a memory function. The light will memorize the selected
brightness setting when turning the light off. The next time the light is turned on, it automatically
resumes to the previously selected brightness level.
Note that the memory function does NOT include the strobe mode. If the light is turned off while
in strobe mode, the light will come back on in the last brightness setting (high, medium, low)
that was active prior to strobe mode.
Strobe Mode
Your Motorola MR535 flashlight is equipped with a strobe mode that can be accessed from any
light setting including the OFF position, except when the light is in lockout mode. When strobe
mode is entered, the light will automatically switch to the high brightness setting.
To enter strobe, quickly double click the side switch to activate the strobe mode.
To exit strobe mode, quickly double click again. The flashlight will exit from strobe mode and
return to the last light setting, including OFF.
Battery Charge Indicator Light
Note: When the charge indicator light is blinking, it means to indicate
the battery is nearly depleted and needs to be charged.
Maintenance and Precautions
· Do not disassemble the sealed head. Doing so can cause damage to the
flashlight and will void the warranty.
· Use a high-quality battery to mitigate the risk of the flashlight being damaged by
electrolyte leakage or battery breakage.
· If the flashlight will not be used for a long time, remove the battery to avoid damage
caused from battery leakage.
· Lubricate the O-rings regularly using a Q-Tip®. Apply a small dab of silicone grease or
petroleum jelly to the contacts to prevent corrosion. Doing so will keep the flashlight
properly sealed against water. If the O-rings are damaged after prolonged use, replace
them.
Advertisement

Related Manuals for Motorola MR535


Summary of Contents for Motorola MR535
- Page 1 With the light off, press and hold the side switch for 3 to 4 seconds. The MR535 will flash 2 times to indicate the light is in lockout mode.
- Page 2 This device complies with Part 15 of the FCC Rules. Operations is subject to the following two conditions: (1) this divice may not cause harmful interference, and other acts which are not the fault of MOTOROLA or ZENUS, are excluded from coverage. (2) this device must accept any interference received, including interference Use of Non-Motorola branded Products and Accessories.
Need help?
Do you have a question about the MR535 and is the answer not in the manual?
Questions and answers