
Related Manuals for Draminski DOD2

Summary of Contents for Draminski DOD2
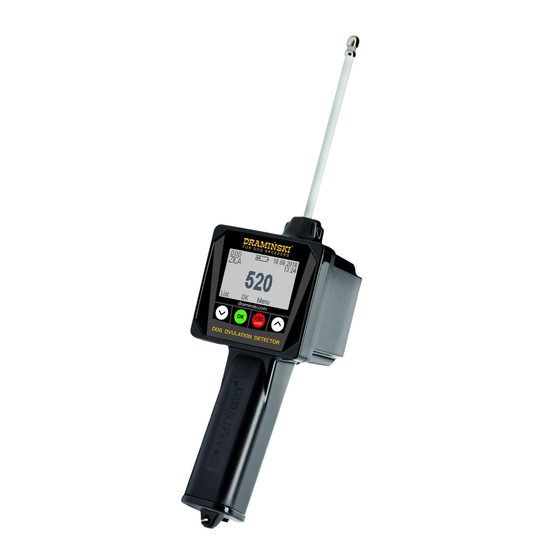
- Page 1 Dramiński DOD2 Dramiński DOD2 Dog Ovulation Detector Dog Ovulation Detector www.draminski.com MANUAL ISO 9001...
- Page 2 TABLE OF CONTENTS INTRODUCTION ..........3 SECTION 1 | EQUIPMENT .
- Page 4 INTRODUCTION...
- Page 5 It is the us- of DRAMIŃSKI DOD2 (Dog Ovulation Detector). er’s responsibility to dispose of this type of waste to appropriate disposal companies in accordance The manufacturer –...
- Page 6 EQUIPMENT SECTION...
- Page 7 EQUIPMENT: 1. Transport case with foam insert. 2. Dramiński DOD2 electronic ovulation term detector in bitches. 3. 1.5 V AA LR6 type batteries. 4. USB cable - mini USB for communication with a computer. 5. Lanyard with metal snap hook.
- Page 8 DESIGN OF THE DEVICE SECTION...
- Page 9 EXTERNAL DESIGN 1. Probe ended with 2 measuring electrodes. 2. Graphic LCD display with LED backlighting. 3. Membrane keyboard. 4. Housing made of high-quality ABS. 5. Mini USB socket with rubber cover. 6. Compartment for four 1.5 V AA LR6 type batteries. 7.
- Page 10 APPROXIMATE DIMENSIONS 33,0 cm 12,5 cm 7,5 cm 8,0 cm SECTION 2 | DESIGN OF THE DEVICE...
- Page 11 SECTION 2 | DESIGN OF THE DEVICE...
- Page 12 KEYBOARD FUNCTIONS SECTION...
- Page 13 – Turning on the device. – Turning off the device by holding down the key for 5 seconds (NOTE! The dog ovulation detector can also be turned off via the menu by using the “Turn off!” option, and if not in use, it will automatically turn off to save batteries).
- Page 14 STARTING THE DEVICE SECTION...
- Page 15 Dramiński DOD2 will be ready for use if the batteries are correctly inserted in the battery compartment (pay atten- 1 2 3 tion to the correct polarity). Turn on the device with the key. List Start Menu a) A welcome message will appear on the display speci- fying the name of the device, software version and se- rial number.
- Page 16 Persons using the advanced mode can download from our website www.draminski.com (or www.dog.dramin- c) In order to save the power source when the keys are not in use, after some time the device will go into a stand- ski.com) special software for communication with the...
- Page 17 SECTION 4 | STARTING THE DEVICE...
- Page 18 NOTES TO THE MEASUREMENTS SECTION...
- Page 19 1 measurement to make the examination last shorter. Therefore, the number – Before using Dramiński DOD2 for the first time, the user of measurements in the measurement cycle can be should: changed from the menu according to the user’s needs a) take several measurements on a certain number of fe- (see section: MAIN MENU).
- Page 20 Observing the differences in readings between stages 1 c) adding another pinch of salt will further reduce the and 2 will help the beginner to become familiar with the reading (during measurements, the probe should be in functioning of the device and understand the differences a similar position inside the vessel).
- Page 21 SECTION 5 | NOTES TO THE MEASUREMENTS...
- Page 22 ANIMAL EXAMINATION SECTION...
- Page 23 Follow the steps below prior to the examination: a) turn the device on and check the display to see if the battery charge level is sufficient, b) prepare a disinfectant to sterilize the probe (see sec- tion: DISINFECTION), c) if the vulva area is dirty, wash and wipe it, d) in order to use the possibility of saving the results to the memory, activate the advanced operating mode in the menu of the device, make sure that the date and time...
- Page 24 so when the probe is correctly positioned in the vagina 01.01.2019 LASSIE 11:50 of the bitch, click the key to take the measurement (during this time the display shows the “Wait!” message) List Menu Save 01.01.2019 LASSIE 11:50 h) after completion of the examination, the probe must be removed from the animal’s vagina, Wait! i) turn off the device,...
- Page 25 SECTION 6 | ANIMAL EXAMINATION...
- Page 26 PROBE INSERTION METHOD SECTION...
- Page 27 Gently stretch the vulva open to make it easier to insert Inserting the probe at the right angle will significantly fa- the probe and slide it into the vagina to the depth of cilitate the measurements, make them safe and accurate about 8 centimetres (3 inches), considering the breed and and will not cause any discomfort to the examined bitch.
- Page 28 Note! Once adopted, the method should be consistently applied to all measurements, i.e. the probe should be placed at the same depth and the measurements should be taken in the same part of the vagina. Failure to do so may lead to conflicting, accidental results. Some bitches may have different results for morning and evening tests.
- Page 29 SECTION 7 | PROBE INSERTION METHOD...
- Page 30 DISINFECTION SECTION...
- Page 31 DRAMIŃSKI S.A. would like to emphasize the impor- The detector must be disinfected before and after each tance of keeping the detector clean. Carelessness in test. Careful, thorough cleaning and disinfection of the this respect may lead to infection of the reproduc- device is one of the most important conditions for proper tive tract.
- Page 32 RESULT INTERPRETATION SECTION...
- Page 33 The presented figure shows a typical graph showing vag- – When readings begin to rise, it is recommended that you inal mucus resistance fluctuations and the optimal mo- perform the tests more frequently (2, 3 or even 4 times ment for mating. a day) to determine the exact moment of ovulation.
- Page 34 Optimal moment for mating Units False peak Days SECTION 9 | RESULT INTERPRETATION...
- Page 35 1000 SECTION 9 | RESULT INTERPRETATION...
- Page 36 SECTION 9 | RESULT INTERPRETATION...
- Page 37 SECTION 9 | RESULT INTERPRETATION...
- Page 38 MAIN MENU SECTION...
- Page 39 2. Animals Thanks to the functions contained in the main menu of the device, the user can quickly turn off the device, adjust 01.01.2019 01.01.2019 Main menu Animals operational settings to their needs, manage memory and Turn o ! Change animal much more.
- Page 40 d) Sort animals – to sort previously saved animals, go name is entered, press the key and when the “Save the name?” message appears, confirm with the to Main menu / Animals / Sort animals and confirm or cancel with the key, e.g.
- Page 41 01.01.2019 01.01.2019 01.01.2019 01.01.2019 Main menu LASSIE Main menu Operating mode 11.50 Turn o ! Turn o ! Basic 01.01.19 11:50:15 Animals Animals Advanced 31.12.18 Results Results 30.12.18 29.12.18 Operating mode Operating mode 4. Operating mode 5. Settings a) Basic – in order to facilitate the operation of the device 01.01.2019 Main menu and use only the basic menu functions, go to the Main...
- Page 42 5.2 Display device goes into the idle state waiting for the key- board to be used again (the time is counted from 01.01.2019 Settings the last click/use of the key on the keyboard of the Language device). To change the backlight off time, go to the Display Number of measureme Main menu / Settings / Display / Backlight off...
- Page 43 5.3 Number of measurements 5.4 a) Available memory – to check the current amount of free space in the device’s memory, go to the Main We recommend that the measurement cycle consists of menu / Settings / Memory, use the 3 readings, while in the case of very restless bitches that to select the Available memory option and confirm are difficult to hold during the test, it is possible to set 1...
- Page 44 5.6 Date & time erased from the device, so if it is relevant, remem- DOD2 has a real time clock so that the measurement re- ber to first transfer it to your computer using spe- sults are stored in the memory together with the actual cial software.
- Page 45 5.6 c) Date notation – to change the format of date dis- 01.01.2019 01.01.2019 Date & time Set date play, go to the Main menu / Settings / Date & time Set date Year Set time / Date notation, then use the key to Date notation 2017...
- Page 46 Main menu www.draminski.com Results Operating mode Dog Ovulation Detector Settings Firmware rew: 1.59 About SN: DOD070001 DM DRAMIŃSKI S.A. ul. Owocowa 17 10-860 Olsztyn, Poland e-mail: dm@draminski.com tel: +48 89 527 11 30 Made in Poland SECTION 10 | MAIN MENU...
- Page 47 SECTION 10 | MAIN MENU...
- Page 48 BATTERY REPLACEMENT SECTION...
- Page 49 The device features an automatic indication that the bat- – Check whether the cover has latched tery is discharged. In this case, the “Change batteries” properly into the container to make message in the form of a graphic symbol will be displayed sure that it does not slip out.
- Page 50 FINAL REMARKS SECTION...
- Page 51 – We advise you not to lend the device to other breed- – In case of problems with the device or difficulties in in- ers in order to reduce the risk of transmission of infec- terpreting the results, we recommend (before sending tious diseases.
- Page 52 TECHNICAL DATA SECTION...
- Page 53 Approximate unit weight 380 g Approximate dimensions 33.0 x 8.0 x 7.5 cm Probe length 12.5 cm Power supply four 1.5 V AA type batteries (LR6) Battery status indication graphic Battery low indication automatic Power consumption from 11 mA to 54 mA (depending on the set backlight intensity) Measurement control single chip microcomputer 209 hours when backlight is set to 0%...
- Page 54 DRAMIŃSKI S.A. Owocowa 17, 10-860 Olsztyn, Poland tel. +48 89 527 11 30 e-mail: dm@draminski.com Instr.DOD21119EN1.3...
Need help?
Do you have a question about the DOD2 and is the answer not in the manual?
Questions and answers