FIMI X8 MINI User Manual
Hide thumbs
Also See for X8 MINI:
- Quick start manual (25 pages) ,
- Operation instructions manual (16 pages)

Related Manuals for FIMI X8 MINI


Summary of Contents for FIMI X8 MINI
- Page 1 FIMI X8 MINI User Manual Please read the user manual carefully before using and keep the manual for future reference...
- Page 2 Users are advised to watch tutorial videos before using the product and read FIMI X8 Mini Disclaimer and Safety Operation Instructions carefully and get to know the process of using by going through FIMI X8 Mini Quick Start Manual. For more detailed product information, please refer to FIMI X8 Mini User Manual.
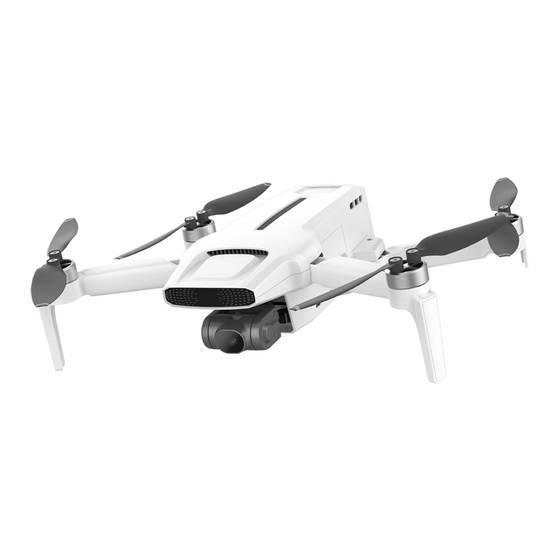
- Page 3 Product Introduction The FIMI X8 SE Mini is a high integrated and foldable drone equipped with long flight time, strong wind resistance, 250g-class ultra-light design and other advanced technologies which achieve functions like long-distance remote control, intelligent flight, precise landing, etc. The built-in 3-axis gimbal stabilizes the camera which is able to shoot 4K video at 30 fps and performs real-time image transmission.
- Page 4 Product Overview 1 Drone Clockwise propeller Counterclockwise propeller Landing gear Integrated gimbal camera Motor...
- Page 5 Power button Battery level light Optical flow camera TOF sensor Charging port Flight status light Wi-Fi/RC switch...
- Page 6 2 Remote controller Battery level lights Power button Mobile holder Right Stick Left Stick Stick storage slot Charging port Auto return...
- Page 7 Antenna Record button Shoot button Dial...
- Page 8 Controller Functions Buttons Function description Push stick forward to ascend Pull stick backward to descend Left stick Move stick left & right to Yaw CCW Move sick right to Yaw CW Push stick forward to Pitch (fly) drone forward Pull stick backwards to Pitch (fly) drone backwards Right stick Move stick left to Roll (fly) drone left Move stick right to Roll (fly) drone right...
- Page 9 Backward Right Forward Left Drone heading Down Forward Counter Clockwise Left Right clockwise Down Backward Left stick Right stick Note: The stick mode can be set in FIMI Navi Mini app. (The default is Mode 2)
- Page 10 Drone Flight Mode: GPS Mode To achieve precise hovering, the drone is equipped with a GPS module. The intelligent flight function works in GPS mode. Users can enable Sport Mode or Beginner Mode in the flight settings. When the Beginner Mode is on, the flight speed, flight distance, flight altitude and RTH altitude will be limited.
- Page 11 Drone Lights Drone heading Drone status lights Drone status Light status Drone lights Initial check failed Self-checking failed Compass error Take-off forbidden Red lights are on IMU error Flying error Cannot take off IMU is warmed up Self-checking Yellow lights fade in and out...
- Page 12 Horizontal green light is on Compass calibration Compass calibrating and vertical red light is on Compass needs to be Compass needs to be The red and yellow light is calibrated flashing at regular intervals calibrated The drone disconnects Signal is lost Yellow lights fade in and out with the RC Low battery warning...
- Page 13 Safety Protection Failsafe Return Failsafe return is only supported in GPS mode. When the drone and remote controller signal is interrupted for more than 2 seconds, the flight control system built into the drone will take over the control of your drone, plan the return path according to the original flight path, then the drone will fly back and land at the home point.
- Page 14 Hovering on the Edge of No-fly-zone The drone will automatically hover in the restricted flight area designated by the state, such as the edge of airports, and the App will appear corresponding hints. The user can use sticks to fly the drone from the edge of the no-fly-zone, but the drone will not enter the no-fly-zone.
- Page 15 Auto Return When the drone is in flight, the user can long press the auto return button to return the drone. When the return distance is less than 10 meters and flight altitude is less than 3 meters, the drone will ascend to 3 meters first and return to the home point; if the flight altitude is greater than or equal to 3 meters, the drone will directly return to the home point.
- Page 16 Smart Track Smart Track is supported only in GPS mode. The user can choose Trace, Profile, or Lock in the App menu. The drone will trace the subject chosen at the App interface at a distance. In Trace mode, the heading will always lock at the target and trace it from the back at a distance.
- Page 17 In Lock mode, the drone will hover at a place if flight speed is 0, following the target 360°. The user can also adjust flight speed, and the drone will fly around the target at a certain distance. flight speed =0m/s flight speed = 0m/s camera tracking 360°...
- Page 18 Center point If sticks are moved in flight, the flight altitude or radius will be changed. Taking Mode 2 as example: Narrow radius Counter Clockwise Direction& Direction& clockwise Speed Speed Down Expand radius Left stick Right stick...
- Page 19 Tap-fly The user can select Tap-fly in the App. Tap map to choose a destination and set flight speed, the drone will fly over there at a default speed in a straight line. If a point of interest is set, the camera will be locked at the POI Tap the map to choose a destination Switch to image interface to drag a rectangle around the POI Set flight altitude and speed...
- Page 20 Course Lock The user can select Course Lock mode in the App. The drone saves current fly direction as heading. The user can control sticks to adjust direction of head and gimbal, but the forward direction remains unchanged. Tripod Mode The max speed of the drone is 1m/s, and the max rotation speed is 60°/s.
- Page 21 Spiral Mode The user can select Spiral Mode in the App. Set the central point and radius, the drone will spirally fly upward and shoot a video simultaneously, showing a sense of space. Fly to a point to set as the central point. Fly away the central point to set radius.
- Page 22 One-click Video Soaring flight: Select a target and the drone will rise quickly according to the set altitude, and shoot a video. Dronie flight: Select a shooting target, the aircraft will automatically rise and fly far away according to the set distance and current gimbal angle, and shoot a video. Orbit flight: Select the target, the aircraft will keep the current altitude, take the horizontal distance from the target as the radius, circle the target, and shoot a video.
- Page 23 3. When all waypoints ready, please set waypoints routes attribute, including flight speed, heading direction, action at the destination. 4. POI is enabled when executing waypoints. Choosing points on the map 1. Tap map to add waypoint. 2. Set waypoint attribute, including flight altitude and action at the destination. 3.
- Page 24 SAR Mode The user can select SAR Mode in the APP. With real-time GPS coordinates, the drone could help user to search and rescue. Image interface: show real-time coordinate and time of the drone, support digital zoom, screen shots to share it online Map interface: show real-time coordinate and time of the drone in ordinary map and satellite map, screen shots to share it online Precise Landing...
- Page 25 Propellers Please install and remove propellers as the picture shown. Attach the gray marked propellers to the motor mounting base with gray marks on the arms. Distinguish clockwise propellers and counterclockwise propellers before installation. Need to use a screwdriver for installation and make sure screws are locked well.
- Page 26 Battery Hardly push the battery, after the battery installed in place, there will be a "click" sound. To remove the battery, you need to press the bottom buckle to pull out the battery. Battery buckle Safety tips: Please place the battery separately if don’t use it for a long time.
- Page 27 Charging Use the USB cable to charge the battery as shown below. The battery status light flashed when charging. The battery level light off when charging finished. It takes 2.5h to fully charge the battery via 5V/2A, 1.5h via 9V/2A and 1h via 9V/3A. Note: 1.
- Page 28 Turning on and off Short press+long press power button 2 seconds to power on/off . Short press the power button to check battery level. Please check Wi-Fi/RC toggle before turning on the drone. It is supposed to restart the drone if switch the Wi-Fi/RC status. Power button...
- Page 29 Insert Micro SD card When installing Micro SD card, please pull out the battery. Insert the SD card into the SD card slot. When removing SD card, press the SD card to pop out.
- Page 30 Equip and remove the gimbal protector Equip and remove the gimbal protector as shown Equip the gimbal protector as Remove the gimbal protector as the arrow leading the arrow leading...
- Page 31 Gimbal FIMI X8 MINI combines a light weight 3-axis mechanical gimbal with the latest professional control algorithms and ±0.005° control accuracy, which provides a stable shooting platform for camera. The pitch axis, default to tilt from 10°to -90°, can be adjusted by left dial of remote controller or App.The camera is equipped with 1/2.6 inches...
- Page 32 Remote controller 1 Turning on and off Short press+long press power button 2 seconds to power on/off. Short press to check battery level. Power button...
- Page 33 2 Charging Connect the remote controller to a power adapter as shown below. When the RC is in charge, the battery level lights are flashing. When the RC is fully charged, the battery level lights go out. It takes about 2.5 hours to fully charge the RC in the powered off condition.
- Page 34 3 Connect the remote controller Use USB cable to connect the device as shown. Unfold the RC to place the device.
- Page 35 4 Taking Videos & Photos Press the shoot button to take a photo. A photo is taken when you hear 2 short sounds. Press the record button to record video. Recording starts when you hear 2 short sounds. Press again to stop recording with 4 short sounds. The pitch angle of the gimbal can be controlled by toggling the left dial up and down.
- Page 36 5 Sticks Control (Mode 1) Forward Counterclockwise Clockwise Left Right Backward Down Left sticker Right sticker (Mode 2) Forward Counterclockwise Clockwise Left Right Backward Down Left sticker Right sticker (Mode 3) Forward Counterclockwise Clockwise Left Right Backward Down Left sticker Right sticker...
- Page 37 Remote Controller Pairing When a new remote controller or drone is replaced, please pair the remote controller and the drone again as shown below: Turn on the drone and remote controller. Turn on the RC, long press the power button 15 seconds until hearing constant beep sound,and the power button red light flashes.
- Page 38 Light status of remote controller Remote lights Remote status Short press the power button Check battery level Fade in and out Not connected to the drone Flash in turn Pairing or updating the firmware Light keeps on Connection normal LED1 LED2 LED3 LED4...
- Page 39 Download and install Fimi Navi Mini app, register a FIMI user account or enter the app directly. Note:You are supposed to register and log in for enjoying more special flight modes. Image Interface 1. .Return to login interface :Tap to return to the home screen.
- Page 40 :Height from the home point. :Distance from the home point. :Vertical speed of aircraft. :Horizontal speed of aircraft. :Battery level is only enough for landing. 3.Signal status, battery status and default settings :Display the current GPS signals. 0-6 means low signal and displays in red colour, 7-12 medium signal and in yellow colour, more than 13 great signal and in white colour.
- Page 41 5.Smart flight :Switch various switch modes from waypoint mode, spiral mode, route mode, tripod mode and so on. :Flight planning mode includes setting POI, flight route and historical route. :Smart tracking includes trace tracking, profile tracking and lock tracking. :Spiral flight. :Waypoint flight.
- Page 42 :Display the current pitch angle of the gimbal,Long press the gimbal for more -57.3 than 2 seconds to vertically downward, double-click the gimbal to return to center 7. Light metering and locked exposure Tap any position on the app to meter the light or lock the exposure value. 8.
- Page 43 :Tap to center the drone. :Display the location of the drone. :Display the location of the Home. :Display the location of the phone. :Tap to correct the direction. :Switch the map. :Home point. :Tap to switch to guided map. :Represent the direction of the phone. :The position of drone to the phone.
- Page 44 Wi-Fi mode connection: 1. Move the Wi-Fi/RC button to the right when the aircraft is off as shown in the figure. Note: After switching the Wi-Fi mode, the remote control and the aircraft cannot be connected; if you need to use the remote control again to control, turn off the aircraft and move the Wi-Fi/RC button to the left...
- Page 45 Open the APP, click "connect" in Wi-Fi mode Follow the steps in the APP to display the interface after successful connection :Virtual key switch :Click the gimbal angle, the adjustment bar will pop up on the right,Long press -57.3 the gimbal for more than 2 seconds to vertically downward, double-click the gimbal to return to center...
- Page 46 Flight Distinguish the direction of the drone The side of gimbal camera is head of drone. Distinguish the direction of drone through status light. Drone heading Safety tips:User should face to the tail of drone when operating it, in case of accident caused by wrong direction.
- Page 47 Prepare to Fly Make sure that the battery of the aircraft and remote controller is sufficient. Make sure that the propeller is properly installed and free from damage and aging. Make sure that the camera lens is clean. Make sure that the SD card is inserted. Manual take off/land Keep both sticks to the bottom inner still over 3 seconds, the propellers start spinning.
- Page 48 Stop propellers in an emergency When motors can't properly turn off, please toggle the left stick to the bottom inner in maximum range, and press Auto return-to-home button for 5 seconds simultaneously, the motors will stop. Safety tips: Do not do the operation above during normal flight to avoid motors being stopped in the air.
- Page 49 Flying Condition Requirement 1. The drone is suitable for people above 16 years who have full civil capacity. 2. Make sure to keep some distance from people, animals, trees, vehicles and buildings while using the drone. Please be careful when someone approaches. 3.
- Page 50 Maintenance and Calibration Remote Controller Calibration Please try to calibrate the remote controller when you detect inconsistencies between stick control and drone flying. Select "RC Calibration" in the remote controller menu Tap" Start" to calibrate the center, do not move sticks Skip to sticks calibration once the center calibration succeed Skip to dial calibration once the sticks calibration succeed Note: Please turn off the power of the drone before calibrating the remote controller.
- Page 51 0 degrees. Do not place the battery under the burning sun. Gimbal Maintenance The gimbal of X8 MINI, integrated with the drone, does not need to disassemble. Please be careful not to scratch the camera when store the drone. Please keep the camera clean for better image quality.
- Page 52 Drone Specifications Drone Remote controller Product model:FMWRJ04A7 Net weight:About 260g Max ascending speed:5m/s Dimensions: 165x89x47mm Max descending speed:3.5m/s Operating frequency:5.725-5.825GHz Max flight speed:16m/s Type:Rechargeable lithium battery Operating temperature:0~40℃ Battery voltage: 3500mAh Suitable altitude:≤4000m Nominal voltage: 3.7V Operating frequency:5.725-5.825GHz Input: 5V Max transmission distance: About 8000m Dimensions:145×85×56mm (folded) 200×145×56mm (unfolded)
- Page 53 6m/s (no wind or breeze environment) after being fully charged *Remote control distance reaches to 8km (FCC) in open area and no interference. All testing and data above come from FIMI laboratory. Errors may occur in actual use because of operating and environmental changes.
Need help?
Do you have a question about the X8 MINI and is the answer not in the manual?
Questions and answers
Hello I need to get another cord that connects my drones controller to my Samsung phone. I lost it over time. Does your website sell that by chance or how to I aquire on or what is it called
The cord is called the FIMI Original USB Cable 3.
This answer is automatically generated