
Related Manuals for ElectrIQ Iq-wifiplugmeter


Summary of Contents for ElectrIQ Iq-wifiplugmeter
- Page 1 SMART WIFI PLUG WITH POWER METER SETUP AND USER MANUAL Iq-wifiplugmeter Thank you for choosing electriQ. Please read this user manual before using this item and keep it safe for future reference.
-
Page 2: Important Safety Instructions
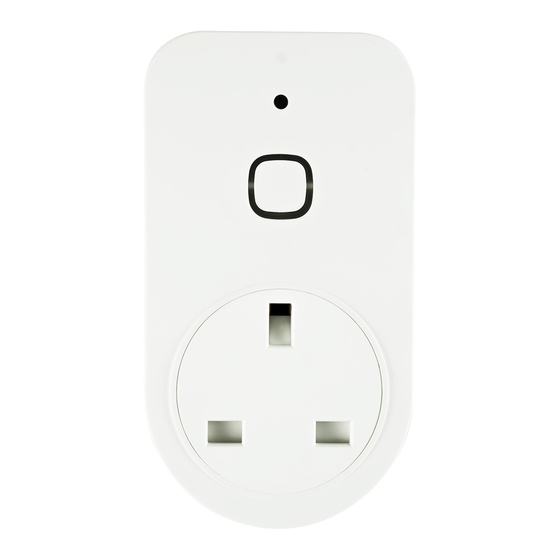
IMPORTANT SAFETY INSTRUCTIONS • Read all instructions. All user guidelines must be read before the device is used. • Retain the instructions for further use. • For indoor use only. Do not position the unit where it would be subjected to extreme moisture, temperature, or dust. - Page 3 INTRODUCTION Thank you for purchasing an electrIQ Wifi controlled device. Power Button Power Light WIFI Indicator light...
-
Page 4: Installing The App
INSTALLING THE APP The app can be downloaded to your phone either by using the QR codes below, or by searching for “Tuya Smart App” in your chosen app store Android Once installed the app needs to be registered, following the next steps:... - Page 5 1. Click on the register 2. Enter either your button at the bottom mobile phone of the screen number or email address and press next 3. For phone registration: you will receive a verification code by sms, enter it in the top box, and create a password in the lower box before pressing confirm.
- Page 6 ADDING A DEVICE TO THE APP The wifi plug has two different setup modes, Quick Connection and AP (Access Point). The quick connection is a quick and simple way to set the unit up. The AP connection uses a direct local wifi connection between your phone and the device to upload the network details.
- Page 7 CONNECTING USING QUICK CONNECTION Before initiating the connection, make sure that your phone is connected to the wifi network and that the unit is in standby mode, with the light flashing once per second. If not follow the guide in the factory reset section. 1.
- Page 8 4. Enter your wifi password and press confirm. This will then transfer the settings to the smart device. If this fails, please retry, failing that review troubleshooting for further help.
- Page 9 CONNECTING USING AP MODE (ALTERNATIVE METHOD) Before initiating the connection, make sure your phone is connected to the wifi network and that the wifi indicator light is flashing once every 2 seconds. If not follow the guide in the factory reset section to change the connection mode, then follow steps 1 and 2 in the quick connection guide before following the steps below.
- Page 10 3. Enter your wifi 4. Go to network password and press settings in your phone confirm and connect to the “SmartLife xxx” connection. There is no password to enter. 5. Your phone will then upload the network settings to the device, which can take up to 60 seconds.
- Page 11 CONTROLLING YOUR DEVICE THROUGH THE APP Now that your device is linked up to your network, you can now control it from your phone. From the main control screen you can turn your device on and off by pressing on the power icon to the right hand side of the device.
-
Page 12: Energy Usage
ENERGY USAGE Within the Statistics screen, the app will provide information about the current energy usage through the socket, as well as allowing viewing energy usage history. TIMER Within the timer, you are able to set a countdown timer for the socket to turn on or off. - Page 13 CHANGING THE NAME OF YOUR DEVICE When in any of the three device screens further settings for the device can be accessed, by pressing on the three dots in the top right hand corner. The top option within this allows you to change the name of the device something...
-
Page 14: Troubleshooing
TROUBLESHOOING 1. Check whether the device is powered on and is in the correct standby mode, if not please refer to the factory reset section 2. Ensure the wifi password has been entered into the app correctly ( Case sensitive) 3. -
Page 15: Specification
240V 50/60Hz -40 ℃ to 85 ℃ Operating Temperature Network Type Supported 2.4 Ghz ELECTRIQ UK SUPPORT www.electriQ.co.uk/support Service Line: 0330 390 3061 Office hours: 9AM - 5PM Monday to Friday www.electriQ.co.uk Unit J6, Lowfields Business Park Lowfields Way, Elland... - Page 16 Disposal: Do not dispose this product unsorted municipal waste. Collection of such waste must be handled separately special treatment is necessary. Recycling facilities are now available for all customers at which you can deposit your old electrical products. Customers will be able to take any old electrical equipment to participating civic amenity sites run by their local councils.
Need help?
Do you have a question about the Iq-wifiplugmeter and is the answer not in the manual?
Questions and answers