Advertisement
Quick Links
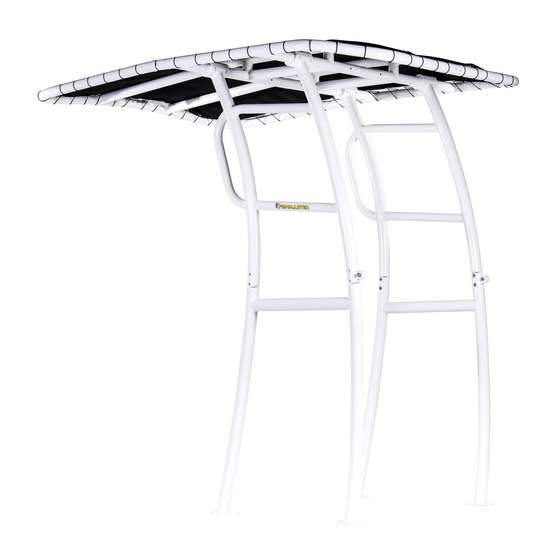
Fishmaster Pro Series Folding T-Top
Installation Instructions
And Owners Manual
Fishmaster, Inc.
Phone: 877-777-8693 or 678-679-1462
www.Fishmaster.com
Support@Fishmaster.com
Reference 20FEB18
THANK YOU FOR YOUR BUSINESS. IF YOU ARE NOT COMPLETELY SATISFIED
IN ANY WAY WITH YOUR NEW FISHMASTER T-TOP, PLEASE CONTACT US
IMMEDIATELY. Our entire purpose as a company is to create great products at
affordable prices that fishermen love.
IMPORTANT
Please take a few minutes to read the entire installation instructions and become
familiar with the Fishmaster parts and installation before beginning to ensure a
high quality, trouble free installation. We put a lot of effort into our manuals and
are continually improving them so your feedback and suggestions are sincerely
appreciated. If you have any questions during your installation give us a call at
877-777-8693 or e-mail Support@Fishmaster.com
Be sure and watch the Pro Series T-Top Installation
video at www.Fishmaster.com
1 of 16
Pg
Reference 20FEB2018
Copyright 2018 Fishmaster
Advertisement

Related Manuals for Fishmaster Pro Series


Summary of Contents for Fishmaster Pro Series
- Page 1 Please take a few minutes to read the entire installation instructions and become familiar with the Fishmaster parts and installation before beginning to ensure a high quality, trouble free installation. We put a lot of effort into our manuals and are continually improving them so your feedback and suggestions are sincerely appreciated.
- Page 2 Re-torque all hardware after each of the first few uses and then check regularly. The Fishmaster T-Top is silent by design, if you hear any rattling or noise at all, then check all hardware for tightness. Begin by ensuring you have a protected surface to assemble the parts of the T-Top so they will not be damaged.
-
Page 3: Other Items Included
(not shown) Cover Lacing Rope (not shown) The Fishmaster Pro Series T-Top is an innovative design in the T-Top market that uses common parts and design elements that make it affordable, functional and easy to install. The two main components of the design as shown above are the side legs and the upper frame. -
Page 4: Hardware List
Used between the foot plate and the deck of the boat and in holes for deck screws. ITEM #15 –CANVAS COVER / ROPE - QTY 1 Laces onto the top section frame to provide shade. 4 of 16 Reference 20FEB2018 Copyright 2018 Fishmaster... - Page 5 The above hardware is included with your Fishmaster Pro Series T-Top and are referenced to in the installation of the tower by their item number. The following are items the customer supplies to complete the installation. Items and tools needed for Installation The following items will be needed for the installation of the T-Top and are not supplied.
- Page 6 The installation video at www.Fishmaster.com shows how to assemble the t-top in the boat. During the assembly and installation, you should protect the parts from scratches by doing the assembly on a tarp, blanket, grass, carpet or the packaging bubble wrap and cardboard.
- Page 7 . NOTE: There is a port and starboard (Left & Right) side upright. The Fishmaster Logo will always be to the outside. The hinge is on the front of each side upright. The hinge will always be on the front which allows the t-top to fold forward.
- Page 8 Top in the vertical position to two people in the boat. With only two people one can lift the canopy frame and the second can lift at the base of the legs to transfer to the boat in the horizontal position with one leg on the side of the boat. 8 of 16 Reference 20FEB2018 Copyright 2018 Fishmaster...
- Page 9 REVERSE with lite pressure!!!! Optionally, you can use a small piece of sand paper to radius the edge of the chamfer also to remove the slight edge. Removing this edge will prevent stress cracking around the holes. 9 of 16 Reference 20FEB2018 Copyright 2018 Fishmaster...
- Page 10 After the standoffs are complete be sure to finish tightening the base screws to the deck. Do not over tighten. After stand offs are complete and tight go back and tighten the base screws to the deck. 10 of 16 Reference 20FEB2018 Copyright 2018 Fishmaster...
- Page 11 It is acceptable to have the standoff come off the cross bar, front leg or rear leg. Try and get the standoff as high as possible. 11 of 16 Reference 20FEB2018 Copyright 2018 Fishmaster...
- Page 12 Follow the same directions to complete the standoff installation on the other side of the console ensuring the leg is vertical. Tighten all Base Screws: Tighten all sixteen (16) base screws. Do not over tighten and if you hear noise stop. 12 of 16 Reference 20FEB2018 Copyright 2018 Fishmaster...
- Page 13 There should be approximately ½ inch space between canvas and rail once complete. Remove the zip ties once cover is completely laced onto the frame and tightened. 13 of 16 Reference 20FEB2018 Copyright 2018 Fishmaster...
- Page 14 After the first few uses the fabric will need to be retightened by this method. Remember to send us a few pictures of your boat with the Fishmaster T-Top installed AND YOUR T-SHIRT SIZE and MAILING ADDRESS for a free Team Fishmaster T- Shirt.
- Page 15 - Always understand and follow the warnings on the T-Top warning label Fishmaster T-Top, Inc. - 5 Year Warranty - Fishmaster T-Top warrants that for a period of 5 years from the date the T-Top is sold at retail, that Fishmaster T-Top will repair directly, or supply parts for the repair of any material cracks, fractures or structural failures that are a result of a manufacturing defect.
- Page 16 Wiring Instructions for your Fishmaster T-Top If you add speakers, lights, antenna or other items to your Fishmaster T-Top, you can hide the wires inside of the tubing of the T-Top. When wiring and you get to the hinge’s drill a hole 1 inch above the weld on the top section and drill a hole 1”...
Need help?
Do you have a question about the Pro Series and is the answer not in the manual?
Questions and answers