
Related Manuals for Sponsler SP714-S2i

Summary of Contents for Sponsler SP714-S2i
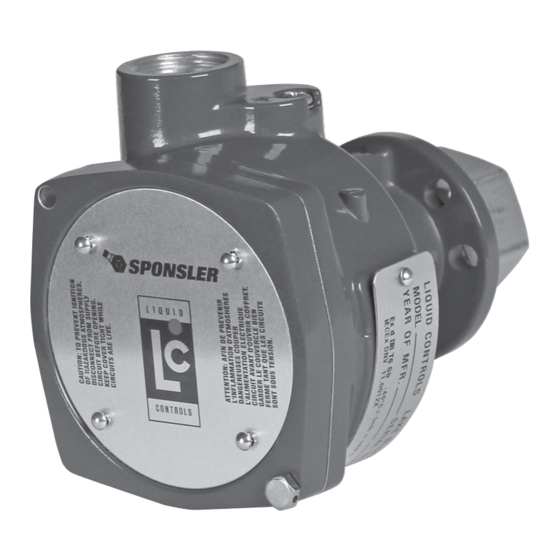
- Page 1 Sponsler SP714-S2i Installation & Parts Pulse Amplifier Liquid ControLs Group An IDEX Fluid & Metering Business Operation: EM700-10...
-
Page 2: Table Of Contents
table of contents IntroductIon InstallatIon Safety Procedures ............ 3 Installation Overview ..........7 General Information ..........3 Wiring ............... 7 Dimensions .............. 4 Settings ..............11 Specifications ............4 Diagnostics .............. 11 Regulatory Compliance Tag Markings ...... 6 Maintenance ............11 notIce This manual provides warnings and procedures that are intended to inform the owner and/or operator of the hazards present when using the Liquid Controls Meter on LP-... -
Page 3: Safety Procedures
This, in conjunction with being directly mounted onto the turbine flow meter, allows the SP714-S2i to operate effectively in noisy environments. -
Page 4: Dimensions
Specifications Weight Input Voltage • 1.2 lbs (0.54 kg) • 6-28 VDC; 83 mA maximum @ 24 VDC • Protected against polarity reversal Materials of Construction Signal Input Housing • Aluminum Alloy ADC12 Frequency •... - Page 5 sPecIfIcatIons Output Signal Characteristics Standard Configuration (2-wire Current Mode)* MiniMuM MaxiMuM units Logic HIGH Output Voltage Logic LOW DC power supply voltage: 12 V Total System Resistance: 130 Ω ± 25 Ω Logic HIGH mA DC Output Current Logic LOW mA DC Logic HIGH Output Voltage...
-
Page 6: Regulatory Compliance Tag Markings
reGulatory comPlIance taG Explosive Atmospheres symbol Iecex dnv 11.0012x This equipment has been found to comply with the Certification Scheme for Explosive Atmospheres of INTERNATIONAL ELECTROTECHNICAL COMMISSION (IECEx). Evaluation was made in 2013 by Det Norske Veritas (DNV) to IECEx scheme with a certificate number IECEx DNV 11.0012X, where X represents the following Special Conditions for Safe Use: 1) Only Ex d certified cable glands are to be used;... -
Page 7: Installation Overview
Install Sponsler turbine flowmeter (with SP714-S2i) into system piping. Sponsler Turbine Flowmeter Installation Manual Wire the SP714-S2i to a pulse acquisition device and set the S1 switches to the preferred output signal characteristics. Page 7 Perform field test and adjust the input signal sensitivity (if necessary). Page 11... - Page 8 Remove the SP714-S2i housing cover. Pull the SP714-S2i board from the housing for access to the TB1 terminal block and the S1 switches. Attach proper cable glands and/or conduit connectors to the SP714-S2i, the pulse acquisition device, and DC power supply.
- Page 9 “TTL” is misleading because the output switches from 0V to +Vs, not 0V to +5V as the TTL standard indicates. In the SP714-S2i, “TTL” indicates that the output is driven in both the positive and zero volt cases. A pull- up or pull-down resistor is optional in the 3-wire TTL Sourcing configuration;...
- Page 10 Remove the SP714-S2i housing cover. Pull the SP714-S2i board from the housing for access to the TB1 terminal block and the S1 switches. Attach proper cable glands and/or conduit connectors to the SP714-S2i, the pulse acquisition device, and DC power supply.
-
Page 11: Settings
The red LED (D2) indicates the status of the signal traveling through the preamplifier. The red LED flashes at the same rate as the frequency as the signal passing through the SP714-S2i. If the LED is not flashing, no signal is passing through the amplifier. - Page 12 Dist. Vadodara 391 770 4702 North Sam Houston Parkway West, Suite 100 Gujarat, India Houston, TX 77086 +91 2667 662001 (713) 623-0808 Liquid conTroLS SponSLer 105 Albrecht Drive Lake Bluff, IL 60044 (847) 295-1050 105 Albrecht Drive Lake Bluff, IL 60044-2242 1.800.458.5262 •...
Need help?
Do you have a question about the SP714-S2i and is the answer not in the manual?
Questions and answers