
Subscribe to Our Youtube Channel
Related Manuals for Monster ARYOND A32 V1.1


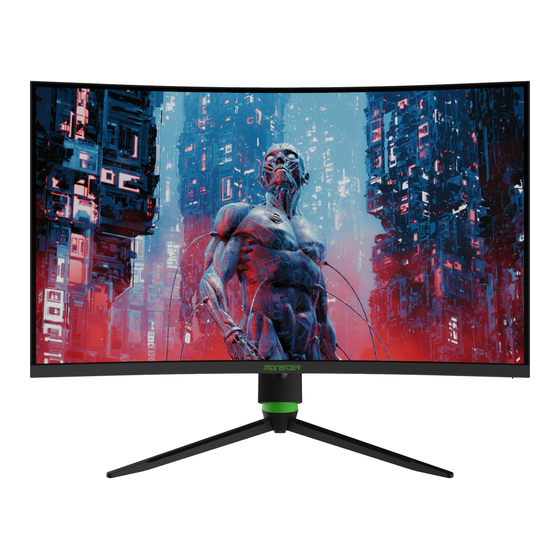
Summary of Contents for Monster ARYOND A32 V1.1
- Page 1 U S E R M A N U A L B E N U T Z E R H A N D B U C H K U L L A N I M K I L A V U Z U...
-
Page 3: Table Of Contents
TABLE OF CONTENT Important Safety Precautions ..........02 Product Description ..............03 Packing list .................03 Installation and Connection ...........03 Display installation ..............03 Signal line connection .............05 Audio output................05 USB Upgrade ................05 Operation of Display ..............06 Power indicator light ..............06 Introduction to rocker functions ...........07 Safety protection ..............07 Basic Troubleshooting .............08 Technical Specifications of Product........08... -
Page 4: Important Safety Precautions
Important Safety Precautions Please read all the instructions carefully before using this product. BE SURE TO unplug the power cord when cleaning LCD. Never clean it with liquid detergent or spraying detergent, but wipe it with wet soft cloth. If it is still not clean, please use special detergent for LCD. -
Page 5: Product Description
Product Description General As a high-performance smart multi-frequency scanning display,it adopts active-matrix TFT-LED backlight liquid screen and is controlled with MCU digital technology. With compact and thin appearance and build-in power supply, it is suitable for narrow work space. Packing list Please check the following items in the packing case before installation: One LCD display (including the base) •... - Page 6 DO NOT place this machine in places with mechanical vibration. • DO NOT place this machine in places where insects are accessible. • DO NOT install this machine directly opposite to air-conditioner, otherwise its • inner panel may bedewed and cause failure. DO NOT place this machine in places with strong electromagnetic field, •...
-
Page 7: Signal Line Connection
Signal line connection Connect the signal line to output interfaces signal of DP/HDMI signals of PC, and then connect the other end of the signal line to the corresponding signal input port of the display. Audio output This machine supports earphone and external speaker audio output. USB Upgrade The USB port is used only for USB devices to update the monitor firmware. -
Page 8: Operation Of Display
Operation of Display Congratulations on becoming an user of this notebook, the finely designed notebook. You will have a delightful and professional experience in using this exquisite notebook. We are proud to tell users that this notebook is thoroughly tested and certified by our reputation for unsurpassed dependability and customer satisfaction. -
Page 9: Introduction To Rocker Functions
Introduction to rocker functions Initial state: Enter the function menu: Safety protection When the video signals of PC exceeds the frequency range of the display, the horizontal and field synchronizing signals will be shut down to protect the display. Then, you have to set the PC output frequency to an acceptable range so as to make the display work normally. -
Page 10: Basic Troubleshooting
Basic Troubleshooting Technical Specifications of Product... -
Page 11: Instruction Of Base Installation
Power supply management system Remarks: All technical specifications in this manual and external packages are subject to change without further notice. In case that there is subtle difference between this manual and practical operation, please follow practical operation. Instruction of Base Installation Push up the slider near the base VESA cover;... -
Page 12: Safety Protection
Safety protection Rotate: Adjust the monitor to max tilt angle; Slowly rotate the monitor clockwise by 90°,be careful with the panel; Then adjust the tilt angle as you need. Parameters: Note: Some of the contents in this manual may differ slightly from the final product, and the later shall be referred to. -
Page 13: Name And Content Of Toxic And Harmful Substance Or Element Contained In This Product
This table is prepared in accordance with SJ/T11364. *: The circuit board module includes PCB and constitutive electronic elements; The packing materials include packing case, EPS and so on; Other accessories include manual and so on; : Indicate that the content of toxic and harmful substance in all homogeneous materials of this part is below the limit stipulated in GB/T26572-2011. - Page 14 INHALTSVERZEICHNIS Wichtige Sicherheitsvorkehrungen ........13 Produktbeschreibung ..............14 Allgemeines ................14 Installation und Anschluss .............14 Bildschirm-Installation ............14 Anschluss der Signalleitung ...........16 Audio-Ausgang ................16 USB-Aktualisierung ..............16 Bedienung des Bildschirms ............17 Betriebsanzeige ................17 Einführung in die Kippschalter-Funktionen .......18 Sicherheitsschutz ..............18 Grundlegende Fehlerbehebung ..........19 Technische Daten des Produkts ..........19 Anleitung zur Sockelinstallation ...........20 Höhenverstellbarer Ständer ...........21 Name und Gehalt des in diesem Produkt enthaltenen...
-
Page 15: Wichtige Sicherheitsvorkehrungen
Wichtige Sicherheitsvorkehrungen Pl1. Bitte lesen Sie alle Hinweise sorgfältig durch, bevor Sie dieses Produkt verwenden. STELLEN SIE SICHER, dass beim Reinigen des LCD-Bildschirms das Netzkabel aus der Steckdose gezogen ist. Reinigen Sie ihn niemals mit Flüssigreiniger oder Sprühreiniger, sondern wischen Sie ihn mit einem feuchten, weichen Tuch ab. Sollte er immer noch nicht sauber sein, verwenden Sie bitte ein spezielles Reinigungsmittel für LCD-Bild schirme. -
Page 16: Produktbeschreibung
Produktbeschreibung Allgemeines Als hochleistungsfähiger intelligenter Multi-Frequenz-Scanning-Bildschirm verwendet er einen Aktiv- Matrix-TFT-Display mit LED-Hintergrundbeleuchtung und wird mit digitaler MCU-Technologie gesteuert. Mit seinem kompakten und dünnen Erscheinungsbild und dem eingebauten Netzteil eignet es sich besonders für enge Arbeitsbereiche. Lieferumfang Bitte überprüfen Sie vor der Installation die folgenden Positionen im Versandkarton: Ein LCD-Bildschirm (einschließlich des Sockels) •... - Page 17 Platzieren Sie dieses Gerät NICHT an Orten, an denen Insekten eindringen können. • Installieren Sie dieses Gerät NICHT direkt gegenüber Klimaanlagen, da sonst die • Innenverkleidung des Geräts verstopft werden und einen Ausfall verursachen kann. Platzieren Sie dieses Gerät NICHT an Orten mit starkem elektromagnetischen Feld, •...
-
Page 18: Anschluss Der Signalleitung
Anschluss der Signalleitung Verbinden Sie die Signalleitung mit dem Ausgangsschnittstellen-Signal der DP/ HDMI-Signale des PCs, und verbinden Sie dann das andere Ende der Signallei- tung mit dem entsprechenden Signaleingang des Bildschirms. Audio-Ausgang Dieses Gerät unterstützt die Audioausgabe über Kopfhörer und externe Lautsprecher. -
Page 19: Bedienung Des Bildschirms
Bedienung des Bildschirms Die OSD-Steuertasten sind in der Abbildung dargestellt. Modelle der gleichen Produktserie unterscheiden sich nur in der Tastenposition und im Bedienfeld- Muster, bitte orientieren Sie sich am Gebrauchsmodell. Betriebsanzeige Kippschalter Betriebsanzeige Wenn der Bildschirm normal funktioniert, leuchtet die Anzeigelampe blau; wenn er sich im Energiesparzustand befindet, blinkt die Anzeigelampe rot;... -
Page 20: Einführung In Die Kippschalter-Funktionen
Einführung in die Kippschalter-Funktionen Ausgangszustand: Kippschalter nach oben Signalquellen-Eingang Kippschalter nach unten Schnelltaste zur Lautstärkeanpassung Kippschalter nach links Spiel plus Schnelltaste Kippschalter nach rechts Voreingestellte Schnelltaste Kurz drücken, um das Menü zu starten/anzuzeigen, drücken und 3 Kippschalter drücken Sekunden lang gedrückt halten, um das Gerät auszuschalten Enter the function menu: Kippschalter nach oben Wert nach oben verschieben/einstellen... -
Page 21: Grundlegende Fehlerbehebung
Grundlegende Fehlerbehebung Technische Daten des Produkts 31.5” 2560x1440@165Hz 19V/3.42A 711X526X251 mm 796x533x173 mm 6.2kg 8.4kg... -
Page 22: Anleitung Zur Sockelinstallation
System zur Verwaltung der Stromversorgung Modus Stromverbrauch Normalbetrieb ≤65W Standby ≤0,5W Anmerkungen: Alle technischen Daten in dieser Anleitung und in den externen Verpackungen können ohne weitere Ankündigung geändert werden. Falls es einen feinen Unterschied zwischen dieser Anleitung und der praktischen Bedienung gibt, folgen Sie bitte der praktischen Bedienung. -
Page 23: Höhenverstellbarer Ständer
Höhenverstellbarer Ständer Rotieren: Den Monitor auf den maximalen Neigungswinkel einstellen; Drehen Sie den Monitor langsam um 90° im Uhrzeigersinn, gehen Sie vorsichtig mit dem Panel um; Then adjust the tilt angle as you need. Parameter: Neigen Schwenken Höhe Hinweis: Einige der Inhalte in dieser Anleitung können sich geringfügig vom Endprodukt unterscheiden, auf letzteres wird verwiesen. -
Page 24: Name Und Gehalt Des In Diesem Produkt Enthaltenen Giftigen Und Schädlichen Stoffes Oder Elements
Name der Giftige und schädliche Substanz oder Element Komponente Bildschirm Kunststoffgehäuse Leiterplatten-Modul* Netzkabel und Anschlussleitung Metallteile Verpackungsmaterialien* Lautsprecher (optional) Zubehör* Diese Tabelle wurde in Übereinstimmung mit SJ/T11364 erstellt. *: Das Leiterplatten-Modul enthält PCB (Polychlorierte Biphenyle) und konstitutive elektronische Elemente; Die Verpackungsmaterialien umfassen Verpackungskarton, Styropor und so weiter; Sonstiges Zubehör umfasst Anleitung und so weiter;... - Page 25 İÇİNDEKİLER Önemli Güvenlik Önlemleri ............24 Ürün Açıklaması ................25 Paket İçindekiler ................25 Kurulum ve Bağlantılar ............25 Ekran kurulumu .................25 Sinyal hattı bağlantısı ..............27 Ses çıkışı ..................27 USB Yükseltme ................27 Ekranın Çalıştırılması ...............28 Güç gösterge ışığı ..............28 Çalıştırma düğmesi fonksiyonları .........29 Güvenlik önlemleri ..............29 Temel Sorun Giderme...............30 Ürünün Teknik Özellikleri ............30 Taban Kurulumuyla İlgili Talimatlar ........31...
-
Page 26: Önemli Güvenlik Önlemleri
Önemli Güvenlik Önlemleri Bu ürünü kullanmadan önce lütfen bütün talimatları dikkatlice okuyun. LCD’yi temizlerken güç kablosunu prizden çıkardığınızdan EMİN OLUN. Sıvı veya sprey temizleyiciyle temizlemeyin, sadece ıslak bir yumuşak bezle silin. Bu şekilde hâlâ temizlenmediyse özel LCD temizleyicisi kullanın. İmalatçı tarafından yetkilendirilmemiş aksesuarlar KULLANMAYIN, aksi takdirde bu aksesuarlar tehlikeye neden olabilir. -
Page 27: Ürün Açıklaması
Ürün Açıklaması Genel Yüksek performanslı, akıllı ve çok frekanslı tarama özelliği olan bu ekranda etkin matris, TFT-LED arkadan aydınlatma ve sıvı ekran özellikleri mevcuttur ve MCU dijital teknoloji ile kontrol edilir. Kompakt ve ince görünümü ve yerleşik güç kaynağı ile dar çalışma alanlarına uygundur. Paket İçindekiler Lütfen kurulumdan önce paket içerisinde aşağıdaki ögelerin olup olmadığını... - Page 28 Bu cihazı mekanik titreme olan yerlere KOYMAYIN. • Bu cihazı böceklerin erişebileceği yerlere KOYMAYIN. • Bu cihazı doğrudan klimanın karşısına KOYMAYIN. Aksi takdirde iç panel • nemlenebilir ve cihaz arızalanabilir. Bu cihazı güçlü elektromanyetik alanın bulunduğu yerlere KOYMAYIN. Aksi • takdirde cihaz elektromanyetik dalgalardan etkilenebilir ve zarar görebilir.
-
Page 29: Sinyal Hattı Bağlantısı
Sinyal hattı bağlantısı Sinyal hattını bilgisayarın DP/HDMI sinyal çıkış arayüzlerine bağlayın ve sinyal hattının diğer ucunu ekranın ilgili sinyal giriş ucuna takın. Ses çıkışı Bu cihaz kulaklık ve harici hoparlör ses çıkışını destekler. USB Yükseltme USB bağlantı noktası, USB mobil cihazlarda monitörün ürün yazılımını yükseltmek için kullanılır. -
Page 30: Ekranın Çalıştırılması
Ekranın Çalıştırılması OSD kontrol düğmeleri resimde gösterildiği gibidir. Aynı ürün serisinin modellerinde sadece düğmenin yeri ve panel düzeni farklıdır. Lütfen elinizdeki modele göz atın. Güç gösterge ışığı Çalıştır Güç gösterge ışığı Ekran normal çalışırken mavi gösterge ışığı yanar. Ekran enerji tasarruf durumundayken gösterge ışığı... -
Page 31: Çalıştırma Düğmesi Fonksiyonları
Çalıştırma düğmesi fonksiyonları Başlangıç durumu: Sinyal kaynağı girişi Çalıştırma Düğmesi Yukarı Çalıştırma Düğmesi Aşağı Ses ayarlama kısayol tuşu Game Plus kısayol tuşu Çalıştırma Düğmesi Sola Sıfırlama kısayol tuşu Çalıştırma Düğmesi Sağa Başlat/ekran menüsü için kısa basılı tutun. Cihazı kapatmak için Çalıştırma Düğmesine Basılı... -
Page 32: Temel Sorun Giderme
Temel Sorun Giderme Olay Sorunun Çözümü 1. Işık söndü/güç gösterge Ekranın prize doğru şekilde takılı olduğundan emin olun ve ekranın ışığı söndü kapalı modda olup olmadığını kontrol edin. 2. Görüntü bulanık, fazla “Image Setting” (Görsel Ayarları) menüsüne girin ve “Auto Image Adjust” (Oto. Görsel Ayarlama) seçeneğini belirleyerek ekranın otomatik olarak ayarlanmasını... -
Page 33: Taban Kurulumuyla İlgili Talimatlar
Güç kaynağı yönetim sistemi Güç tüketimi Normal çalışma ≤ 65 W Bekleme ≤ 0,5 W Açıklamalar: Bu kılavuzda ve dış ambalajlarda belirtilen tüm teknik özellikler ön bilgilendirme yapılmaksızın değiştirilebilir. Bu kılavuzda belirtilenlerle ve uygu- lama esnasında karşılaşılanlar arasında küçük çaplı farklılıklar varsa uygulama sırasında karşılaşılan özelliklere göre hareket edin. -
Page 34: Yükseklik Ayarlı Stant
Yükseklik ayarlı stant Döndürme: Monitörü maksimum eğim açısına ayarlayın; Monitörü yavaşça saat yönünde 90° döndürün, döndürürken panele dikkat edin; Sonrasında eğim açısını istediğiniz şekilde ayarlayın. Parametreler: Eğim Döner Yükseklik Not: Bu kılavuzdaki bazı bilgilerle nihai ürün arasında küçük farklar olabilir. Bu durumda ürünün özellikleri dikkate alınır. -
Page 35: Bu Üründe Bulunan Zehirli Ve Zararlı Madde Veya Elementlerin Adı Ve Içeriği
Zehirli ve zararlı madde veya element Bileşenin adı Ekran Plastik gövde Devre kartı modülü* Güç kablosu ve bağlantı hattı Metal parçalar Ambalaj malzemeleri* Hoparlör (isteğe bağlı) Aksesuarlar* Bu tablo SJ/T11364 standardına uygun olarak hazırlanmıştır. *: Devre kartı modülünde PCB ve temel elektronik unsurlar bulunur. Ambalaj malzemeleri arasında ambalaj kutusu, EPS vb. - Page 36 TURKEY • UAE • CYPRUS • GERMANY...
Need help?
Do you have a question about the ARYOND A32 V1.1 and is the answer not in the manual?
Questions and answers