Advertisement
Quick Links
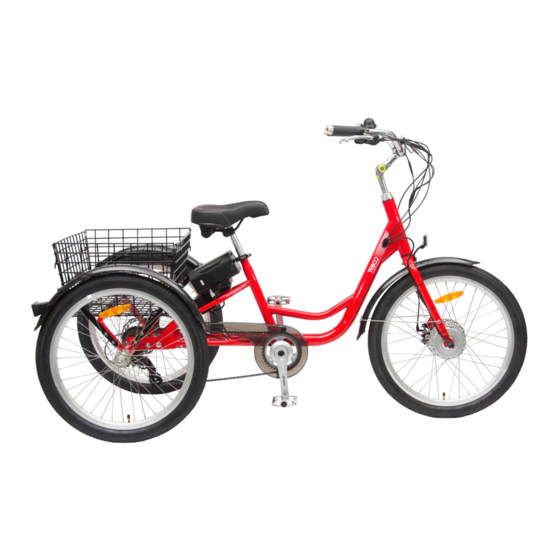
TEBCO Carrier Assembly Instructions
Whilst this is not the only way to assemble the Carrier Tricycle,
we find this method mitigates any problems during the assembly process.
We recommend assembly is carried out by a qualified bicycle mechanic.
Your Carrier Tricycle will have arrived in two boxes.
These contain the front and rear sections. Check you
have all the required parts from the photos above.
The front section should contain those items pictured
above.
First, place the motorised front wheel into the forks.
Ensure that the washer is placed on the outside of
the fork, and that the cable comes out the right side
of the wheel.
If you encounter any problems or have any questions
DO NOT HESITATE to call us on 1300 767 134.
The rear section will contain everything else.
Remove all the bubble wrap from your new tricycle.
Take special care to ensure the anti-rotational
washer is correctly seated in the cut-out in the forks.
This is critically important as the torsional force of the
motor is borne by the forks.
Advertisement

Related Manuals for Tebco Carrier 2019


Summary of Contents for Tebco Carrier 2019
- Page 1 TEBCO Carrier Assembly Instructions Whilst this is not the only way to assemble the Carrier Tricycle, we find this method mitigates any problems during the assembly process. We recommend assembly is carried out by a qualified bicycle mechanic. If you encounter any problems or have any questions DO NOT HESITATE to call us on 1300 767 134.
- Page 2 This shows the correct anti-rotational and washer Connect the motor plug to the motor cable present in arrangement. If you are unsure have a qualified the frame. Ensure that this plug is seated correctly bicycle technician look at your tricycle. Fork Failure and pushed all the way home.
- Page 3 some dry lubricant on these bolts before installation. bolts, ensuring that the square section fits into the hole correctly. As you can see, the head of the bolt faces inside at Install the handlebars with a 6mm Allen key. the rear of the tricycle, and outside toward the front. Remember before tightening to check that the rear section is at 90 degrees to the front section.
- Page 4 the way home. Now install the chain. Mount the chain guard. Mount the front mudguard holder to the front Add the long bolt at the top and tighten ensuring the mudguard. mudguard is straight in the forks. Install the two shorter 10mm hex head bolts into their Attach the front brake cable to the right brake lever locations on the forks and tighten.
- Page 5 Run the rear brake cable in its sheath and install to Install the gear cable and tighten. Remember to the left brake lever and tighten to the desired adjust the high and low maximum/minimum tightness. Take this opportunity to check alignment positions.
- Page 6 You can now install the battery, and take the bike out the frame. for a quick test ride to check all functionality. If you are unsure of anything – have a bicycle mechanic check your tricycle over or call us here at TEBCO!
Need help?
Do you have a question about the Carrier 2019 and is the answer not in the manual?
Questions and answers