Table of Contents
Advertisement
Quick Links
Advertisement
Table of Contents

Related Manuals for Dinel PCU–100

Summary of Contents for Dinel PCU–100
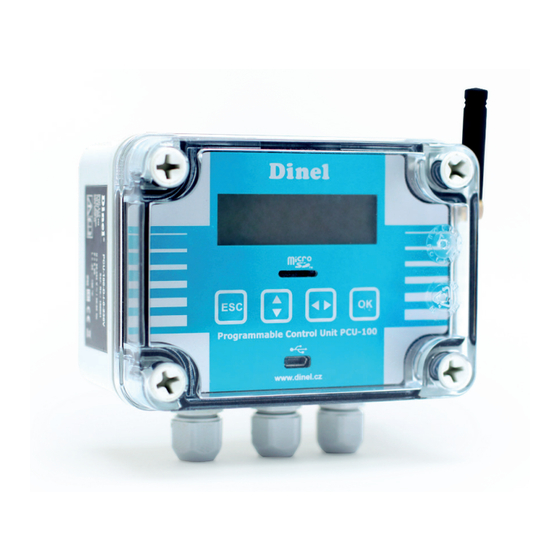
- Page 1 ANNEX TO THE USER MANUAL Programmable control unit PCU–100 with GSM module Firmware version 2.0.3. or higher Before the first use of the unit, read the instructions in this manual and keep it carefully. The manufacturer reserves the right to do alteration without prior notice.
-
Page 3: Table Of Contents
2.2. APN settings - user ......................6 2.3. APN settings - password ....................6 3 . How to insert a SIM card ......................7 4 . Connection system ......................... 9 5 . Limitations of the GSM module .................... 10 6 . Dinel.cloud web interface ..................... 10 6.1. Login procedure ......................10 6.2. Main screen ........................11 6.3. Change of language ...................... 11 ... -
Page 4: Basic Description Pcu-100 With Gsm Module
The extension module to the PCU-100 enables connection and sending of measured data to the server www.dinel.cloud, where this data is available from the Internet and where the data can be displayed in the form of graphs, tables and other graphic elements in the form of widgets (see chapter 6. Web interface dinel.cloud, page 10). -
Page 5: Sim Card
The SIM card for this module has been selected in the mini-SIM format for more convenient handling and longer connector life. FIG. 1: The correct type of SIM card - mini SIM After inserting the SIM card, it is necessary to set the access point name (APN). By default, the APN is set to "Internet", the user name and password are not used. This setting works in most countries. If your operator uses another APN to connect to the Internet for regular users, or you require a connection to private APNs, you must set this name and, if necessary, add a username and password. After connecting to the APN, the PCU-100 must have access to the www.dinel.cloud server. This is important if you use private APNs, where you may need to allow additional access. For successful communication between the PCU-100 and the dinel.cloud server, it is necessary to enable access for HTTPS (TCP / IP, port 443). © Dinel, s.r.o. PCU–100... -
Page 6: Apn Settings
2.3. APN settings - password Menu: APN PASSWD ( ID 091 ) • • Default value: - (not used) • [↔] - Move between characters, [↕] – Change the letter in the marked place CONFIGURATION APN PASSWD PCU–100 GSM © Dinel, s.r.o. -
Page 7: How To Insert A Sim Card
Electrical connection can only be made in a voltage-free state! The temperature of the internal components of the unit may under specific conditions exceed a temperature of 60 °C after a longer period of time in service. Take care when handling. © Dinel, s.r.o. PCU–100... - Page 8 3. The SIM card belongs to the slot on the top of the module. Open the slot by sliding the metal tab down. unlocking the SIM card slot 4. Insert the SIM card into the slot as shown in the pictures. Insert the SIM card into the slot from the back 5. Close the slot by sliding the metal tab up. after inserting the SIM card, pull up to lock the slot 6. Slide the front panel back into the connector. Screw on the polycarbonate cover with 4 screws using a torque wrench with a torque of 3 Nm. PCU–100 GSM © Dinel, s.r.o.
-
Page 9: Connection System
For more information on mechanical mounting, refer to the PCU-100 User's Guide. 4 . Connection system The following figure shows the communication diagram between the PCU-100 and the dinel.cloud server User UniScada Dinel software Programmable control unit Internet DinelCloud PCU-100 web interface 4 ... -
Page 10: Limitations Of The Gsm Module
Always check with your operator to see if they support 2G technology, and if not, choose another that provides 2G technology in your country. Many operators are likely to turn off 3G technology first. With such a procedure, the GSM module will continue to work without problems. 6 . Dinel.cloud web interface When purchasing the PCU-100 product with a GSM modem, you will receive a login name and password to the Cloud, which is used to view the measured data from the PCU-100. The portal is on the ThingsBoard platform and more detailed documentation can also be found at https:// thingsboard.io/docs/. -
Page 11: Main Screen
We will set the final form of your dashboard (ie types and number of displayed widgets) according to your requirements when ordering. You can change this setting at any time. The account has the option of editing the dashboard (see chapter 6.4. Editing the dashboard on page 13). FIG. 5: Introductory dashboard 6.3. Change of language After successful login, you can also change the language of the displayed texts for each user separately. 1. Click the 3 dots icon in the upper right corner next to your username. FIG. 6: Change of language © Dinel, s.r.o. PCU–100... - Page 12 2. Then select Profile.. FIG. 7 :Change of language 3. In the following menu, select the desired language (see figure) and save it with the Save button. FIG. 8: Change of language PCU–100 GSM © Dinel, s.r.o.
-
Page 13: Dashboard Editing
6.4. Dashboard editing 1. Log in to www.dinel.cloud with your account 2. In the left menu, select DASHBOARD GROUPS - ALL FIG. 9: Open the list of dashboards 3. Then select the dashboard you want to edit in the table and open it by clicking on the tile icon. Dashboards created when purchasing the GSM module are named PCU-100- <serial number> FIG. 10: Open dashboard editing © Dinel, s.r.o. PCU–100... - Page 14 5. Now, for each widget, a pencil icon appears in the upper right corner to allow it to be edited, as well as a cross icon to allow it to be deleted. FIG. 12: Open widget editing It is also possible to move individual widgets around the desktop differently and customize the dis- play. Moving is done by marking the mouse cursor of the widget and simultaneously pressing the left mouse button and dragging to the desired location. The ThingsBoard platform, on which dinel.cloud is built, offers a lot of options for editing the dis- played dashboard. This guide does not cover all editing options. Creating a new widget - a graph of the measured value as a function of time 6. Click on the + icon and then on the icon above it. A menu with a selection of widgets opens, in which you select Charts. FIG. 13: Add a widget PCU–100 GSM © Dinel, s.r.o.
- Page 15 FIG. 14: Add widget - select type 7. Then select the graph showing the measured value in the form of columns - Timeseries Bar and click on it. FIG. 15: New widget © Dinel, s.r.o. PCU–100...
- Page 16 8. In the next window, in the Data tab, click on the + ADD icon. FIG. 16a: Widget editing - adding new data And add the following line (Type: Entity, Parameters: PCU-100- <serial number>, Val value) and click on the ADD icon in the lower right corner. FIG. 16b: Widget editing - adding new data PCU–100 GSM © Dinel, s.r.o.
- Page 17 This newly created chart will appear in the dashboard below all existing widgets. Now we can resize it by dragging the lower right edge or move it arbitrarily on the surface. We can also edit this widget again by clicking on the pencil icon and possibly change the name or color in the Settings tab. FIG. 17: Widget editing - settings 9. After editing, save the changes by clicking on the check mark button in the lower right corner. FIG. 18: Edit widget - insert changes © Dinel, s.r.o. PCU–100...
-
Page 18: Add A New User
6.5. Add a new user Within your account, you can add any number of other users who will be able to access the portal and view the measured values f rom the PCU-100. These users can have the same permissions as your account, or they can only view data without the possibility of editing. 1. Log in to the portal www.dinel.cloud 2. In the menu on the left, select USER GROUPS and choose Customer Administrators for ac- counts that can make changes and Customer Users for accounts that are for viewing only FIG. 19: Opening the user list 3. To add a new user, click the + icon in the upper right corner. The user joins after filling in the table. FIG. 20: Adding a new user PCU–100 GSM © Dinel, s.r.o. - Page 19 4. Pay attention to the item Activation method, here you choose the method of account activation. Display activation link, the display will show the link that must be passed to the user, but we recommend choosing the direct method Send activation link, which will send a link to the e-mail of the new user, who will set his password when activating the account. FIG. 21: Setting up a new user 5. We can now edit user data, especially for those who have a view-only account. Above all, set the default dashboard, which will be displayed after logging in. This change is made again in the USER GROUPS menu, where we select Customer Users and then modify the relevant user by clicking on a row in the table and selecting the default dashboard. FIG. 22: Default user dashboard © Dinel, s.r.o. PCU–100...
-
Page 20: Add A New Device
6.6. Add a new device When purchasing a PCU-100 with a GSM module, your device will already have an automatically set up account in the dinel.cloud portal. To view your devices, follow these steps: 1. Log in to www.dinel.cloud with your account 2. In the left menu, select DEVICE GROUPS - ALL FIG. 23: Open device list 3. The list of your devices is in the following table. FIG. 24: Device list PCU–100 GSM © Dinel, s.r.o. -
Page 21: Sms Notification
The user defines the interval using 2 values ( minimum and maximum). As soon as the measured value is outside this interval, the first SMS with a notification will be sent. The SMS has the following form: PCU-100- <serial number>: ALARM ON, <time>, <measured value> Example: PCU-100-20001: ALARM ON, 2020-06-23T06:19:25, 3859 If the measured value remains in this interval. No further notifications are sent. As soon as the measured value changes to the defined interval, while in the previous measurement it was outside the interval, a second SMS with a notification will be sent. The SMS has the following form: PCU-100- <serial number>: ALARM OFF, <time>, <measured value> Example: PCU-100-20001: ALARM OFF, 2020-06-23T06:48:16, 3368 © Dinel, s.r.o. PCU–100... -
Page 22: Phone Number Settings For Sending Notifications
7.3. Alert setting (ALARM) - upper limit Menu: ALARM OVER ( ID 093 ) • • Default value: - (not used) • [↔] - Move between characters, [↕] – Change the number in the marked place ALARM OVER CONFIGURATION Enabling or disabling the upper limit is done in the same way as for the lower limit. PCU–100 GSM © Dinel, s.r.o. -
Page 23: Summary Of Conditions For Sending Sms
• If no maximum is specified for the alert, but the minimum is set, the interval is defined from minimum to + infinity. • If the minimum for the notification is not specified, but the maximum is set, the interval is defined from -infinity to the maximum. The SIM card must have the option for sending SMS activated. Please note that sending an SMS may be charged according to the set tariff and the contract with your operator. © Dinel, s.r.o. PCU–100... - Page 24 Dinel, s.r.o. U Tescomy 249 760 01 Zlín Czech Republic phone: +420 577 002 002 email: obchod@dinel.cz www.dinel.cz The current version of the manual can be found on www.dinel.cz Version: 07/2020...
Need help?
Do you have a question about the PCU–100 and is the answer not in the manual?
Questions and answers