Advertisement
Quick Links
Advertisement

Related Manuals for ARM Motorsports N63

Summary of Contents for ARM Motorsports N63
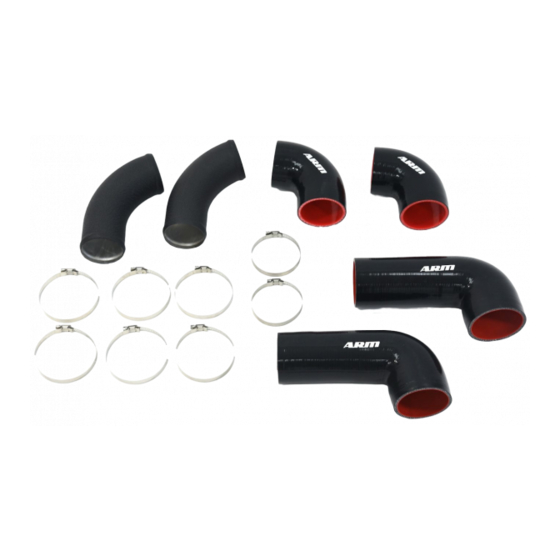
- Page 1 ARM N63/N63TU FRONT FACING UPGRADE INSTALLATION GUIDE Kit Contents ...
- Page 2 STEP 1: Begin by removing the middle soft liner covering torx and plastic pop rivets. STEP 2: R emove the plastic pop rivets and the torx screws holding the top of the front bumper to the rest of the body. The plastic covering over the hood latches gets moved out of the way for more clearance, you may want to remove more of the plastic pop rivets up the fender sides of the car to bend it out of the way further.
- Page 3 STEP 3: We then go on to removing the front grilles. The best way to remove these is to reach under the bumper from above where the BMW emblem is and maneuver left and right with a pick to press the tabs down. You will want to keep constant tension on the grill being pulled outwards (away from the engine) while you release the tabs so that they do not snap back into place as you move to other tabs.
- Page 4 STEP 4: Once you remove the grill, we need to remove inner air ducts. To keep things easy, we advise removing these by detaching the fins where they connect to the inner grill. Both sides are one piece and to remove them without snapping the tabs you will need to disassemble the front bumper.
- Page 5 STEP 5: W e then go on to remove the small and restrictive air duct, but first we need to remove the small cap that holds the air duct to the rest of some plastic liners. This is just held in by a little clip and a centering hole.
- Page 6 STEP 6: Next we move onto removing the actual air duct. For this, start by removing the hood latch (4x T-30 torx screws) to give yourself a little bit more room, you can also detach the hood latch wire so you can pull the whole piece out of the way.
- Page 7 STEP 7: Below the hood latch, there is 1 more T-30 torx screw that holds the air duct in place. Remove it and the air duct can be pulled out from inside the engine bay.
- Page 8 STEP 8: There are 3 main components of the Front Facing Upgrade; the short 90 degree hose, aluminum pipe, and long 90 degree hose. For installation the orientation will be as follows. ● For the long hose: we found it best to push this through the front grill area. Before adding the aluminum piece put a clamp over it so you don't forget.
- Page 9 STEP 10: Install the wire into the hood latch (if removed) and reinstall the hood latch unit. (4x T-30 screw @ 18ft lbs or 25nm) STEP 11: Then reinstall the plastic top liners removed earlier and install the plastic pop rivets and the torx screws that hold the bumper.
Need help?
Do you have a question about the N63 and is the answer not in the manual?
Questions and answers