
Related Manuals for Indiecam indieASSIST 435

Summary of Contents for Indiecam indieASSIST 435
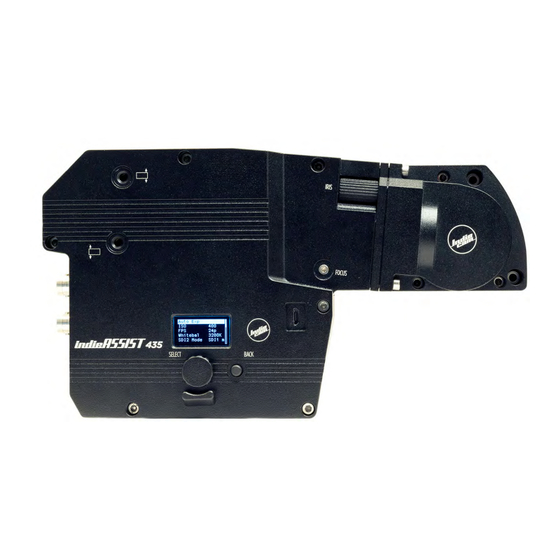
- Page 1 435 HD video assist for ARRIFLEX 435 User Manual FW 1.0.9 27.9.2020 INDIECAM GmbH Seidengasse 26/4-5 1070 Vienna – Austria www.indiecam.com...
-
Page 2: Table Of Contents
Power Out connector ................ 11 SDI 1 connector ..................11 SDI 2 connector ................... 11 Side ....................... 12 USB-Connector ................... 12 Setting up the indieASSIST 435 ............. 13 On/Off switch ................... 13 Status LED ....................14 Focus ......................14 Iris ........................14 Alignment of the image position ............ - Page 3 Removal original IVS-CCD from Viewfinder ......21 Removal original IVS-flange ............22 Re-Attach Viewfinder ..............22 Mounting the indieASSIST 435 ............23 Mount the indieASSIST 435 Flange ..........23 Mount the indieASSIST 435 L-Bracket ........23 Connecting the indieASSIST 435 ............ 24 CAM-Cable ................... 24 SDI-Cable(s) ..................
- Page 4 Save Settgs ..................38 Load Settgs ..................38 Read Settgs ..................39 Fact. Preset ..................39 Exposure Shutter-Compensation ..........39 Timecode Trigger ................40 Timecode Footage Counter (SDI) ..........40 CCU Connection ................. 41 Info ........................ 41 indieASSIST 435 user manual...
-
Page 5: Important Safety Instructions
Operate the unit only in the advised temperature range from 0° to +40° Celsius / 32°-104° Fahrenheit Before using the indieASSIST 435 be sure to read and understand all relevant instructions. If there are any questions please contact Indiecam for technical support at office@indiecam.com. -
Page 6: Legal Disclaimer
Legal Disclaimer Be aware that the indieASSIST 435 is a system of assistance. indieASSIST 435 records the image of the ground glass. Indiecam is not responsible for any errors on film stock like wrong colours, focus, focal depth, ground glass settings etc. -
Page 7: Introduction
Introduction indieASSIST 435 is an HD video assist for ARRIFLEX 435 35mm film cameras. It provides exceptional image quality for all crew on set, allowing to judge images far better than before. The high-resolution Full-HD images show true colours and have sharp, high contrast. -
Page 8: Technical Data
435 can be remote- controlled with indieREMOTE through the CTRL-port. Original ARRI RCU/CCU units can be used for controlling the ARRIFLEX 435 by connecting them directly to the indieASSIST 435 and enabling their use in the menu (menu setting is obligatory!). Technical Data General §... -
Page 9: Video Output
However, these cameras can be retrofitted with the FEM-1 or FEM cover and then they are compatible with the indieASSIST 435. To sum up, indieASSIST 435 is compatible with the majority of ARRIFLEX 435 cameras, except when cameras §... -
Page 10: Connectors
Connectors indieASSIST 435 has 6 connectors at the rear side and one on the right side. Back indieASSIST 435 connectors on back-side indieASSIST 435 user manual... -
Page 11: 435 Connector
CCU connector Enables CCU operation of the ARRIFLEX 435 camera through the indieASSIST 435 with a special included cable (LEMO 7pin to Fischer). For remote operation an additional long cable can be ordered. When using a RCU/CCU with the indieASSIST 435, menu item “CCU CON”... -
Page 12: Side
Side USB-Connector indieASSIST 435 has 1 x USB-Connector on the right side. The USB-Connector is a type USB2.0 Micro-B socket. It can be used to update the firmware of indieASSIST 435 indieASSIST 435 user manual... -
Page 13: Setting Up The Indieassist 435
Setting up the indieASSIST 435 indieAssist 435 can be used in 3perf or 4perf setup. You can read how to do the conversion on page 25 of this manual. On/Off switch The indieASSIST 435 can be switched on and off independently from the film camera, as long as the film camera is powered on. -
Page 14: Status Led
§ Red blinking: firmware update running or error Focus The focus of the indieASSIST 435 can be manually adjusted by turning the focus screw located on the right-hand side using a hex-screwdriver (tip size 2mm). Caution: Do not use excessive force! -
Page 15: Alignment Of The Image Position
Be sure to re-install them after you have finished adjustments. Caution: Do not use excessive force when turning the adjustment screws! X-Axis The adjustment-screw “X-axis” located on the top side of the indieASSIST 435 moves the video image on the monitor horizontally. indieASSIST 435 user manual... -
Page 16: Y-Axis
Adjustment-screw “left-swing” located on the right-hand side of the indieASSIST 435 shifts the left side of the image up and down and rotates the image around a point, which is located in... -
Page 17: Lock Image Position
With the locking-screw on the top back side image alignment can be locked. Do not use excessive force as it might damage the internals of your indieASSIST 435. Do not try to adjust the image position while the lock screw is tightened! -
Page 18: Installation
Do not do this on set! Caution: Do not touch any glass surfaces during installation! The indieASSIST 435 is powered directly from the ARRIFLEX 435 camera CCU socket with the “CAM” cable that is included. indieASSIST 435... -
Page 19: Preparation Before Mounting
§ hex-screwdriver tip size 2,5mm § hex-screwdriver tip size 1,5mm § slot-screw driver tip-size 0,3x2,5mm max Removal carrying handle First, remove the carrying handle from the ARRIFLEX 435 camera by loosening both mounting screws (hex 3mm). indieASSIST 435 user manual... -
Page 20: Removal Side-Cover And Rs Double-Socket
(hex 2,5mm) and pull the entire unit carefully out. Removal Viewfinder Remove the viewfinder system by loosening the three fastening screws on top. Caution: Support the viewfinder top when it is released! The viewfinder top will fall forward otherwise. indieASSIST 435 user manual... -
Page 21: Removal Original Ivs
IVS in between, using the 3mm hex screw. Removal original IVS-CCD from Viewfinder Now the original IVS video optics have to be removed from the viewfinder system in the VFtop. Loosen the three fastening indieASSIST 435 user manual... -
Page 22: Removal Original Ivs-Flange
Then remove the original flange from the videoport on the 435 VFtop by releasing the 4 slotted fastening screws indicated in the picture above. Re-Attach Viewfinder Place the 435 viewfinder top back on the camera body and tighten the three mounting screws on top. indieASSIST 435 user manual... -
Page 23: Mounting The Indieassist 435
(tip-size 0,3x2,5mm max) with the original screws. indieASSIST 435 adapter flange Mount the indieASSIST 435 onto the adapter flange with the three provided captive screws. Two screws reside in the indieASSIST 435, one resides in the flange itself and is tightened from the back. -
Page 24: Connecting The Indieassist 435
L-Bracket mounted to back of indieASSIST 435 in 4perf configuration with step-ring When in 3perf mode without step-ring, use the back mounting sockets for the L-bracket. When in 4perf mode with step-ring installed (picture above), use the front mounting sockets for the L-bracket. -
Page 25: Ccu-Cable
CCU-Cable When operating the ARRIFLEX 435 camera with an RCU/CCU unit and the indieASSIST 435 in place you need to use the dedicated “CCU” cable which is included. The original CCU socket is in use by the indieASSIST 435 and RCU/CCU operation has to go through the indieASSIST 435. -
Page 26: Disassembly
Carefully remove all four screws A on the front of the chassis (Section 1) of the indieASSIST 435. Make sure not to scratch or damage any surfaces while you loosen screws A. -
Page 27: Assembly With 4Perf Step-Ring
435 in 3perf configuration, operator side Once all 4 screws A are removed, separate the back of the chassis (Section 2) from the front of the chassis (Section 1). Caution: Fitting of the parts can be very tight. Try to apply force carefully and in such a way, that you are not separating the parts over a large distance. -
Page 28: Mount Step-Ring On Section 2 (Back)
Carefully tighten screws B (hex 2,5mm). Make sure you insert them straight and not angled into the threads of the step ring. § Make sure there are no gaps between the step ring and Sections 1 left. Finally, adjust framing and focus accordingly. indieASSIST 435 user manual... - Page 29 435 in 4perf configuration indieASSIST 435 in 4perf configuration, assistant side indieASSIST 435 user manual...
-
Page 30: Re-Assembly Without 4Perf Step-Ring For 3Perf
435 in 4perf configuration, assistant side - detail Re-Assembly without 4perf Step-Ring for 3perf To remove the step-ring and to bring the indieASSIST 435 back to 3perf configuration, carefully perform the steps above in reverse. indieASSIST 435 user manual... -
Page 31: Menu Navigation
In the home-menu you can select the following settings: § Auto Exposure § § § White balance § SDI2 Mode § § Image Flip § § Saturation § Brightness § Contrast § Denoise § Detail § Framelines § Settings § Info indieASSIST 435 user manual... -
Page 32: Auto-Exposure
Select ISO with the SELECT knob and confirm by pressing the SELECT knob. You can choose from the following options: 1000 1250 1600 2000 2500 3200 4000 5000 6400 8000 10000 12800 Caution: Be aware that the ISO can only be changed when Auto-Exposure is disabled. indieASSIST 435 user manual... -
Page 33: Fps
You can choose from the following options: 23.98p 29.97p For flicker free operation, set the fps of the indieASSIST 435 to match the fps of the ARRIFLEX 435. Auto-FPS when you select „Auto“ in the FPS menu, the indieASSIST 435 will slave to the FPS setting of the ARRIFLEX 435. -
Page 34: Auto Wb
Select “off” or change the speed to “slow”, “medium” or “fast”, in order to enable it. SDI2 Mode The SDI-2 connector on the indieASSIST 435 can be assigned an individual LUT if desired. By selecting SDI-1 (mirror), SDI-2 output behaves as an entire duplicate of SDI-1 with all its settings. -
Page 35: Image Flip
Select Contrast with the SELECT knob and confirm by pressing the SELECT knob. The white mark on the horizontal bar is what you want to select. Contrast can be set in steps of 0.008 from 0.000 to 1.992. Default value is 1.000 indieASSIST 435 user manual... -
Page 36: Denoise
Framelines In the framelines menu you can set up the properties of two individual sets of framelines. You have the following options: § Frameline1 § Frameline2 § Vert Lines § Centre Mark § Colour indieASSIST 435 user manual... -
Page 37: Frameline 1/2
§ § § Left Adj. (adjust from 0 to 1920 pixel, 0=left) § Right Adj. (adjust from 0 to 1920 pixel, 0=left) Centre Mark The CentreMark can be disabled (Off) and enabled (On). indieASSIST 435 user manual... -
Page 38: Colour
Save Settgs If auto save is disabled and you want to save your settings click on “Save Settgs”. Load Settgs Loads the settings that were last saved with “Save Settgs” or “Autosave – ON”. indieASSIST 435 user manual... -
Page 39: Read Settgs
§ § 23.98p § 29.97p Exposure Shutter-Compensation In the settings menu you can activate „shutter compensation“ which compensates for a 1/2 stop of brightness loss in the indieASSIST 435 when the ARRIFLEX 435 starts to run. indieASSIST 435 user manual... -
Page 40: Timecode Trigger
Timecode Trigger In the settings menu you can activate „timecode trigger“. Now, SDI timecode from the indieASSIST 435 will only run when the ARRIFLEX 435 starts to run. This way, you can automatically start and stop the recording of a compatible recorder, which has the option of triggering recording by timecode. -
Page 41: Ccu Connection
Set the entry “CCU Con” to value “ON”. Also, make sure that the RCU / CCU is correctly connected with the special adapter cable to the CCU socket on the indieASSIST 435 (see page 11 and 25, Lemo 7pin).
Need help?
Do you have a question about the indieASSIST 435 and is the answer not in the manual?
Questions and answers
How do I get camera roll indicator on video feed